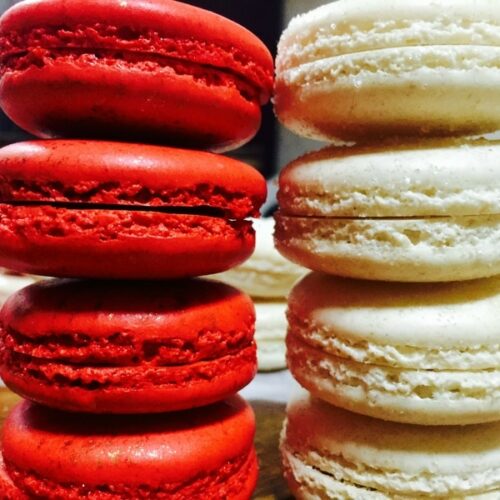
French Macarons-the best recipe
The perfect recipe for Italian meringue macarons with all the secrets and tips to succeed! Don't be afraid to make macarons anymore with this foolproof recipe to get a nice collar.
SERVING:40 Macarons
PRINT
PIN
SAVE
INGREDIENTS
For about 40 macarons
- 150 g (75 g+ 75 g ) egg whites aged for 2 to 3 days, room temperature
- 200 g granulated sugar
- 200 g almond flour if the almond flour is not fine enough and you need to blend and sift it with the powdered sugar, add 10 to 15% more of both the almond flour and the powdered sugar.
- 200 g powdered or confectioners sugar
- 50 ml water
- 20 g sugar to stabilize the egg whites before adding the syrup
- Water-soluble powdered or gel food coloring
Ganache for about 20 macarons
- 150 g white chocolate preferably in chips or pistoles
- 75 ml heavy cream
- 8 g honey
- 10 g unsalted butter
- Flavoring of your choice mine is also colored to match the flavor
PREPARATION
Prepare the tant pour tant:
- Use 210 g of almond flour and 210 g of powdered sugar. After grinding and sifting them, you should retain the total weight required for the recipe, that is, a tant pour tant (equal parts almond flour and powdered sugar) of 400 g.
- Pulse the almond flour with the powdered sugar in batches to avoid heating the mixture. Stop the food processor once or twice to stir. The mixture should not heat up. Then sift it into a bowl or onto a sheet of parchment paper, and weigh out the amount needed for the recipe.
Preparing the Macarons
- If your granulated sugar isn't very fine, sift it.
- Use aged egg whites (separated from the yolks) that have been stored in the refrigerator in an airtight container for 3 to 4 days. Take them out the night before, or at least 2 hours ahead of time, so they reach room temperature.
- Personally, I separate the egg whites just the day before and haven’t noticed any difference.
- For the syrup, pour 50 ml of water into a small saucepan, then add the 200 g of granulated sugar. Insert a thermometer into the pan to monitor the temperature.
- Place 75 g of egg whites in the bowl of a stand mixer fitted with a whisk attachment, or in a large mixing bowl if using a hand mixer. Keep the 20 g of granulated sugar close at hand.
- Heat the water and sugar mixture over low heat until it reaches 118°C to 119°C (244–246°F), then remove it from the heat.
- When the syrup reaches around 90°C (even though some chefs recommend starting at 114°C, it often hits 118°C before the egg whites are fully whipped), begin beating the 75 g of egg whites on low speed in the stand mixer bowl. Gradually increase the speed, and add the 20 g of granulated sugar in 2 or 3 additions as soon as the egg whites start to foam.
- When the syrup approaches 117°C, increase the mixer speed so the egg whites reach stiff peaks by the time the syrup hits 118°C.
- Reduce the mixer speed and slowly pour the syrup in a steady stream down the side of the bowl (avoiding the whisk), so it blends gradually into the meringue.
- Then increase the speed to maximum (speed 10 on a KitchenAid) and whisk until the meringue cools slightly, to about 40°C, just warmer than body temperature to the touch.
- The meringue should be smooth, glossy, and form soft peaks (known as the "bird’s beak"). If you're only using one color, add the powdered food coloring just before stopping the mixer so it incorporates evenly. Otherwise, add the coloring directly to the tant pour tant mixture.
- While preparing the meringue, mix the remaining 75 g of egg whites with the tant pour tant, as well as with the food coloring if you haven’t added it to the meringue.
- Mix well until you have a smooth batter. Slightly intensify the desired color, as it will fade during baking.
- Pour a little meringue into the almond mixture, then, using a spatula, gently fold it in using the "J fold" technique. This involves making a bottom-up motion, starting from the center and moving towards the edges, while scraping the sides of the bowl. Then, add the rest of the meringue and incorporate it the same way, turning the bowl.
- Macaronage by pressing the mixture against the sides of the bowl. The batter should form a ribbon when it falls from the spatula. It should not be too runny or too thick. The batter should flow smoothly in a stream, and when you make a line with the spatula in the bowl, it should smooth out and become smooth and shiny again.
- Note : If you’d like to do the macaronage using a stand mixer, start by beating the meringue until it forms stiff peaks (bird’s beak stage), and add the coloring at this point if using. Then incorporate the remaining 75 g of egg whites and mix just until combined.
- Next, switch the whisk attachment for the paddle (K) attachment, add the almond-sugar mixture (tant pour tant) all at once, and run the mixer in 30-second intervals, checking the texture in between.
- The batter should flow in a ribbon when lifted. It's best to stop just before the ideal consistency is reached and finish the macaronage by hand with a spatula to avoid overmixing and ending up with a runny batter.
- Pipe the batter into a piping bag fitted with a #8 round tip. Pipe small circles about 2 to 3 cm, depending on the size of macarons you want, onto a baking tray lined with parchment paper, a Silpat, or preferably, fiberglass baking sheet. fiberglass baking mats.
- Note: To make piping easier, you can draw small circles (3 cm or less) on a sheet of parchment paper to use as a template. Simply place this sheet under your baking liner while piping, then remove it before baking.
- Gently tap the baking sheet from underneath to smooth out the macarons and release any air bubbles.
- Let them dry ("crust") in a dry room, away from kitchen humidity, for 30 minutes to 1 hour. When you lightly touch the surface of a macaron with your finger, it should feel dry.
- Some people, like Mercotte, don’t let Italian meringue macarons rest before baking, but I prefer following the chef’s tips.
- Preheat the oven to 150°C (300°F) with convection (fan-assisted) heat, and bake for 12 to 14 minutes.
- Normally, after about 5 to 6 minutes, the feet (the characteristic frilly base) will appear. Around 7 minutes in, once the feet have formed, briefly open the oven to release steam, this helps prevent the macarons from cracking. Open for just a few seconds, then close again.
- If you notice the macarons browning too much, your oven may be too hot, lower the temperature to 140°C (285°F) or even less. Keep an eye on them and take notes for the next batches.
- Once out of the oven, remove the parchment paper or baking mat from the tray immediately. Let the macarons cool completely before removing them.
Ganache for about 20 macaroons
- Melt the chocolate slightly in a double boiler. In the meantime, bring the cream and honey to a boil. Once it starts to simmer, remove from the heat.
- Off the heat, incorporate the cream into the chocolate in three stages, mixing well to emulsify. Add the butter and your choice of flavoring.
- Blend with an immersion blender. Transfer to a piping bag and let it firm up before using. I recommend leaving it at room temperature for 2 to 3 hours.
Garnish macarons
- Assemble the matching shells two by two. Fill half of them with the ganache, then close with the second half of the shells.
- Place them on a tray and refrigerate for at least 6 hours before transferring to an airtight container. It is recommended to wait at least until the next day to enjoy them, as the macarons will be much softer and even better after 24 hours of resting.
- Store them in an airtight container in the refrigerator.
- I hope my explanations will be very helpful to you and that you will make beautiful macarons. I am available for any questions you may have.
- Happy baking!