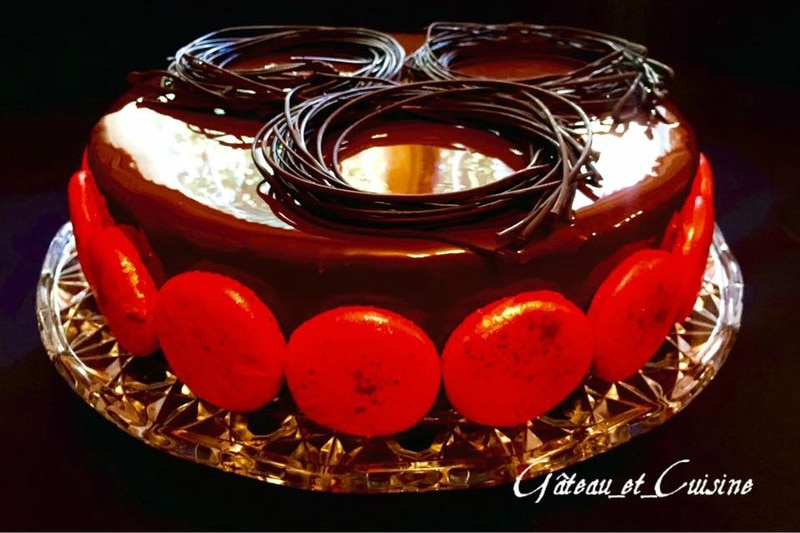
Here’s an original and elegant idea for a chocolate decoration: chocolate Easter nests made from chocolate spaghetti. They’re perfect for Easter treats, topped with mini eggs or chocolate bunnies, but also look stunning on cupcakes, chocolate moelleux, or any kind of cake. I personally used them to decorate a chocolate Royal cake, filling them with macarons.
The concept is simple: pipe thin lines of melted chocolate, like spaghetti, onto a very cold surface (a tray placed in the freezer beforehand works well). The cold sets the chocolate quickly while keeping it pliable. You can then wrap the chocolate strands around small rings to form nest shapes. Simply layer several strands to build up the structure.
Remember to freeze a baking tray several hours in advance. For better results, you can stack two trays to retain the cold longer, or, as I sometimes do, work directly inside a half-open freezer. If you have a marble slab, even better, it holds the cold beautifully, just like the pros do.
The amount of chocolate you’ll need depends on how many decorations you want to make.
I personally prefer to temper the chocolate, but it’s not absolutely necessary.
Since that first video tutorial on chocolate decoration, I’ve created several others focused on chocolate work. You can check out this dedicated article on tempering chocolate, where I explain how to achieve beautifully glossy chocolate using temperature curves. A step-by-step video is also included to guide you through the entire process.

You’ll also find another video where I explain how to temper chocolate using Mycryo, a much simpler and faster method. In the same video, I also show you how to create elegant chocolate rings and other decorative elements.
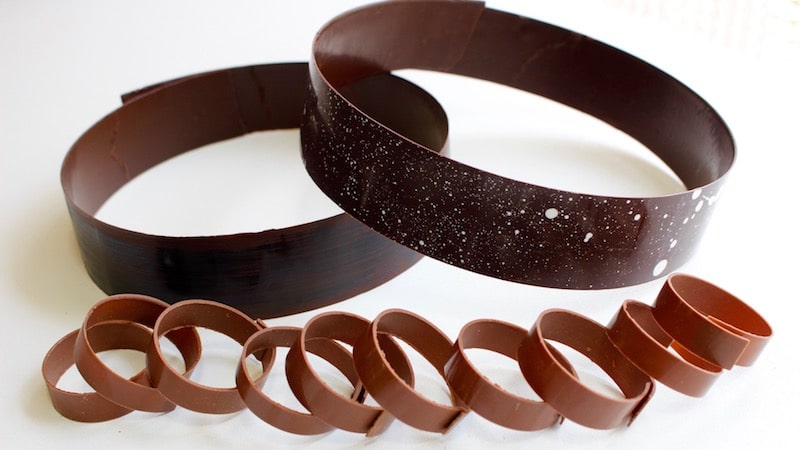
Table of Contents
Video Recipe
Ingredients:
- 250 g chocolate ( chocolate chips or cut into small pieces)
Preparation steps :
The day before, place a tray in the freezer so it’s very cold when you’re ready to use it.
Temper the chopped chocolate or chocolate chips using a double boiler or microwave.
Melt the chocolate until it reaches 50°C (122°F).
Remove from the heat and stir regularly until the temperature drops to 26–27°C (78–81°F).
Briefly return it to the heat to bring the temperature up to 31–32°C (88–90°F), the ideal working temperature.
Pour the tempered chocolate into a piping bag (or a freezer bag) and cut a small opening at the tip.
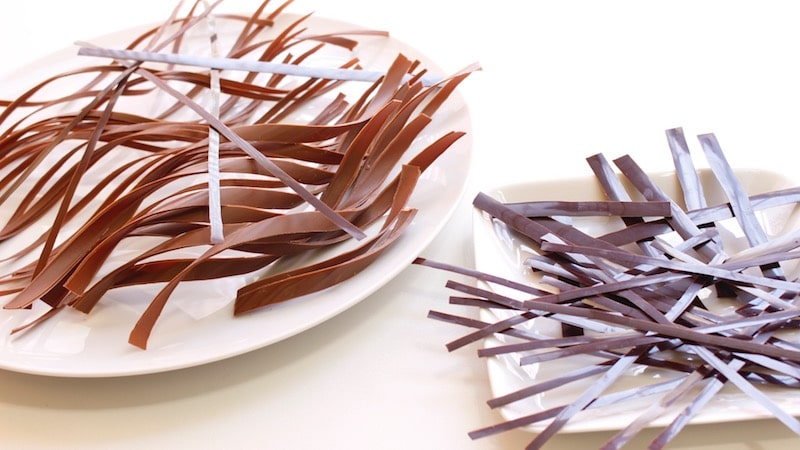
Quickly pipe chocolate spaghetti by moving back and forth across the cold tray.
Cut the ends to remove any thick or irregular parts.
Gather the chocolate spaghetti and wrap them around a stainless steel ring placed on a plate or platter.
Work quickly: hold the edges of the nest in place with a cup or heavy object until the chocolate completely crystallizes.
For a thicker nest, layer two or use a larger tray to create more spaghetti.
You can use these spaghetti to decorate the base of a dessert by wrapping them around it.

Chocolate Easter Nest Decoration
INGREDIENTS
- 250 g chocolate chocolate chips or cut into small pieces
PREPARATION
- The day before, place a tray in the freezer so it's very cold when you're ready to use it.
- Temper the chopped chocolate or chocolate chips using a double boiler or microwave.
- Melt the chocolate until it reaches 50°C (122°F).
- Remove from the heat and stir regularly until the temperature drops to 26-27°C (78-81°F).
- Briefly return it to the heat to bring the temperature up to 31-32°C (88-90°F), the ideal working temperature.
- Pour the tempered chocolate into a piping bag (or a freezer bag) and cut a small opening at the tip.
- Quickly pipe chocolate spaghetti by moving back and forth across the cold tray.
- Cut the ends to remove any thick or irregular parts.
- Gather the chocolate spaghetti and wrap them around a stainless steel ring placed on a plate or platter.
- Work quickly: hold the edges of the nest in place with a cup or heavy object until the chocolate completely crystallizes.
- For a thicker nest, layer two or use a larger tray to create more spaghetti.
- You can use these spaghetti to decorate the base of a dessert by wrapping them around it.
Thank you for your visit and your comments!