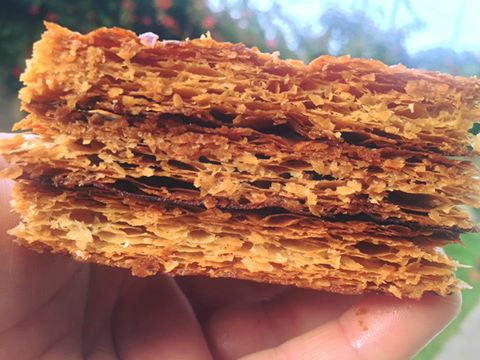
The classic puff pastry (6 single turns/folds) is a staple of French pastry, essential for both sweet and savory recipes. It allows for the creation of delicious pastries such as Napoleon, galette des rois, or apple turnovers, as well as savory recipes like appetizer puffs, quiches, or savory tarts.
Many think that preparing homemade puff pastry is complicated and time-consuming, but in reality, with a little practice, it’s very easy. It’s much better than store-bought, with an authentic taste and incomparable texture.
Even though laminating butter is ideal for achieving perfect layers, it is absolutely possible to make puff pastry with flawless layering using simple supermarket butter with 82% fat content. It should not be confused with leavened puff pastry (PLF), which contains baker’s yeast and is used to make viennoiseries like croissants, pain au chocolat, or raisin Danish.
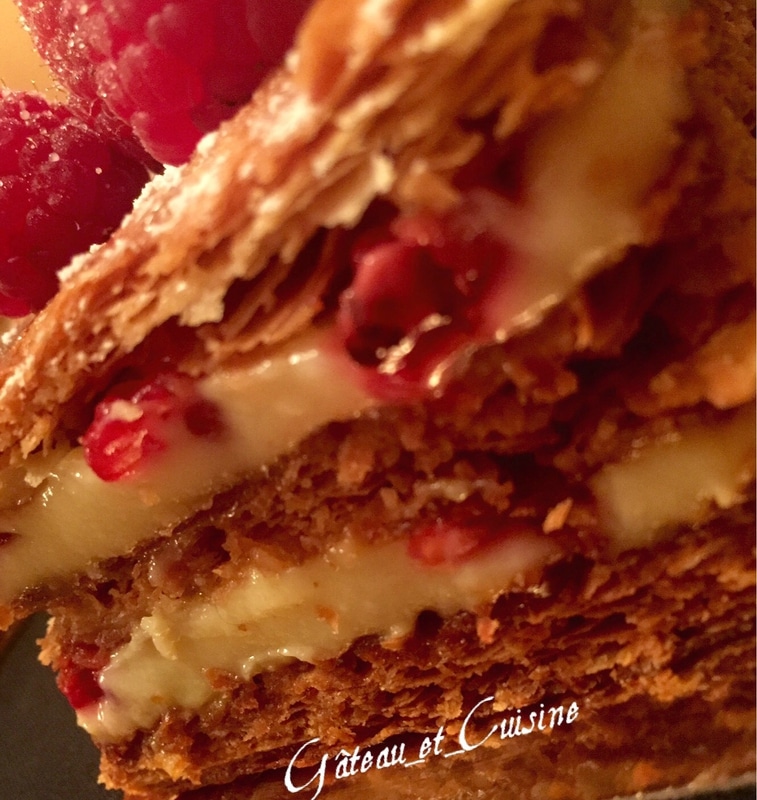
If you follow this step-by-step guide, illustrated with images, you’ll succeed in making puff pastry that’s truly exceptional, and with ease. A video version is also available to guide you along the way.
It’s true that the dough needs to rest in the refrigerator between folds. This can take up to 2 hours for some folds, especially in summer, but the result is well worth the effort.
For greater ease and to reduce chilling time, it’s ideal to use special laminating butter with 84% fat content. This dry PDO laminating butter (beurre de tourage AOP in French), used by professionals, is not always available in supermarkets but can be easily ordered online.
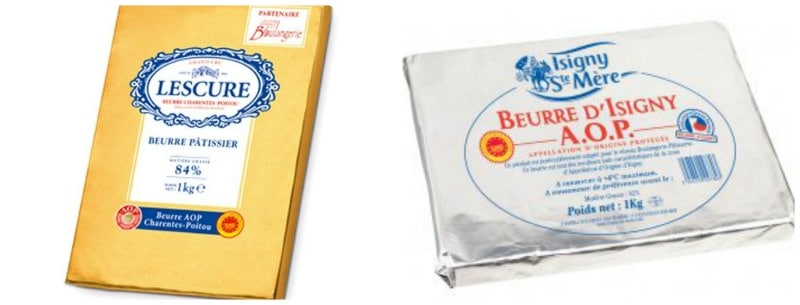
As I can’t find it, I use butter with 82% fat content, which delivers excellent results. Charente-Poitou PDO butter (beurre AOP in french) is a great choice, for exemple.

There are also two other types of puff pastry: inverse puff pastry and quick and easy puff pastry.
The inverted puff pastry is a variation of the classic puff pastry, where the butter (mixed with some flour) surrounds the main dough (détrempe), rather than the other way around. This technique results in a lighter and crispier puff, perfect for recipes like galette des rois.
The quick and easy puff pastry is a simplified version of classic puff pastry and inverted puff pastry. Cold butter is roughly mixed into the dough, and the folds are made without prior resting, with fewer turns, saving time. Although it’s less delicate, it still provides a good puff for quick recipes.
Table of Contents
The recipe on video
Ingredients:
NB: Find the printable recipe card at the end of the article
For the dough – Détrempe:
- 500 g (17.6 oz) flour
- 50 g soft butter (1.8 oz)
- 1 teaspoon salt
- About 300 ml cold water (10.5 oz)
- 1 teaspoon vinegar (optional)
For the folding:
- 350 g (12.3 oz) of butter with over 82% fat content, such as the Président brand, for example.
Note: If you find it, use special laminating butter with 84% fat content, or alternatively, special laminating margarine, which will make the folding process easier. Butter from Charente-Poitou, Isigny, or Deux-Sèvres with AOP (Protected Designation of Origin / PDO) is also very good.
Preparation steps :
Prepare the laminating butter
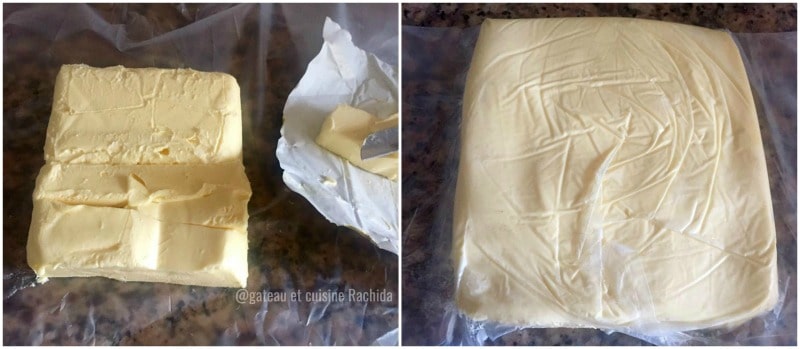
1. Make a small square with the butter, about 2 cm (0.8 inches) thick, which can be inserted into the center of your détrempe cut into a cross. Tap it with a rolling pin between two sheets of parchment paper.
2. Place the butter in the center of a sheet of parchment paper, then fold the sheet over it to form a square. Flatten the butter to form a square about 2 cm thick.
You thus obtain a square of butter ready for the folding. I used a freezer bag, which works just as well as parchment paper.
The main dough “détrempe”:
Follow the steps in the images
1. Roughly rub the butter (50 g / 1.8 oz) with the flour and salt with your fingertips until it resembles coarse crumbs. You can use a stand mixer with the paddle attachment.
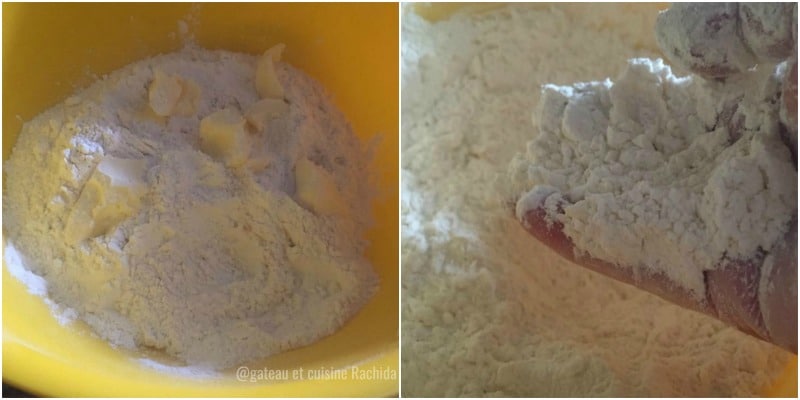 2. Gradually add the cold water, mixing gently without kneading until a dough ball forms.
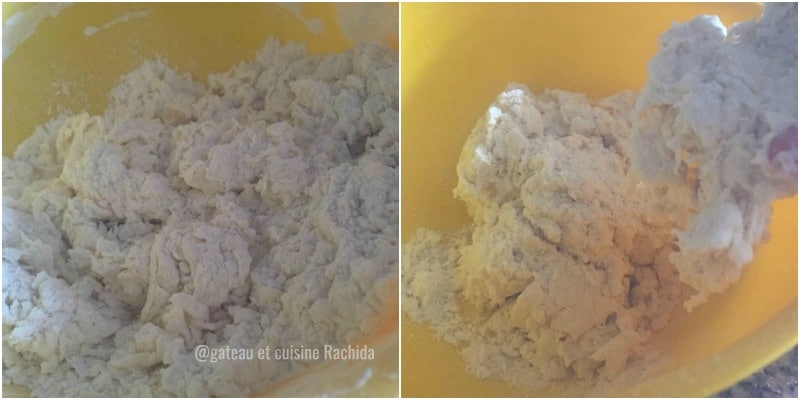 3. The amount of water will vary depending on the flour’s absorption. For me, about 2 tablespoons (27 ml / 0.95 oz) of water were left over.

4. Shape the dough into a ball and roll it on the work surface to smooth it slightly. Do not knead to avoid the dough becoming elastic.
Note: You can lightly work (fraiser) the dough on the work surface by pressing it with the palm of your hand, pushing it forward, and then bringing it back. Repeat this process two to three times. This helps incorporate the butter without overworking.
Score the ball in a cross shape without reaching the bottom with the knife (just make a nice cross-shaped cut).
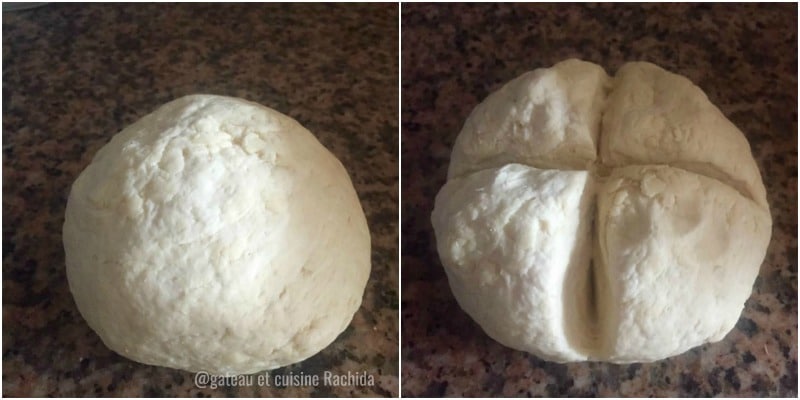
5. Wrap the dough and place it in the refrigerator with the butter for 30 minutes. The butter should not be hard, but not too soft either. It should have the same firmness as the dough.
6. After the resting time, take the dough and butter square out of the refrigerator and place the dough on a lightly floured work surface.
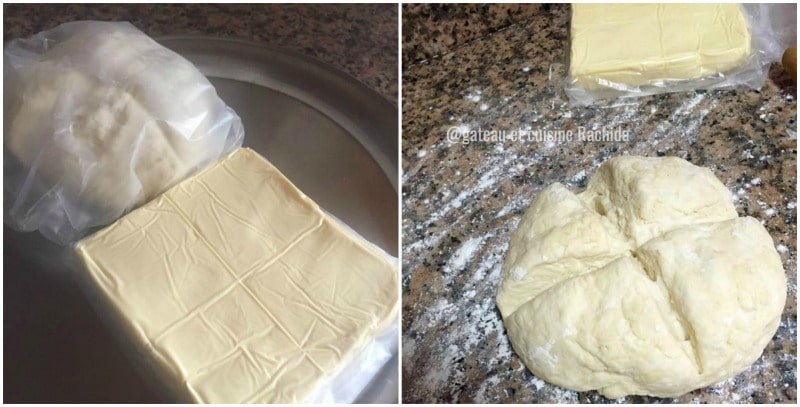
7. Gently flatten the four corners of the dough with the palm of your hand to stretch them slightly. Then, roll out the corners with the rolling pin to form a cross, making sure to leave the center slightly thicker.
Place the butter square in this center.
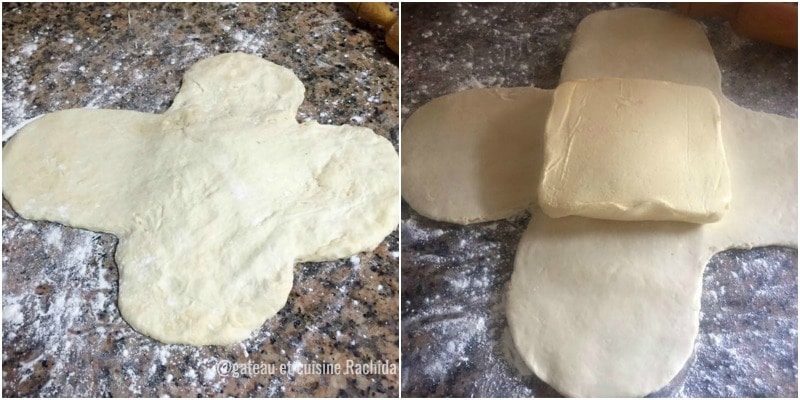
8. If you see that the sides will not cover the butter properly, roll them out a bit more. Fold the left side over the butter, then fold the bottom side over it.
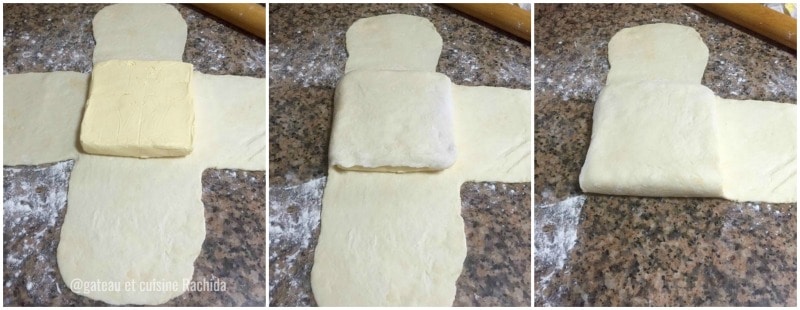
9. Fold the right side over, then fold the side furthest from you (the top one) over everything. Give this package a quarter turn clockwise (90 degrees). Gently press the top and bottom edges with a rolling pin to prevent the butter from escaping during rolling.
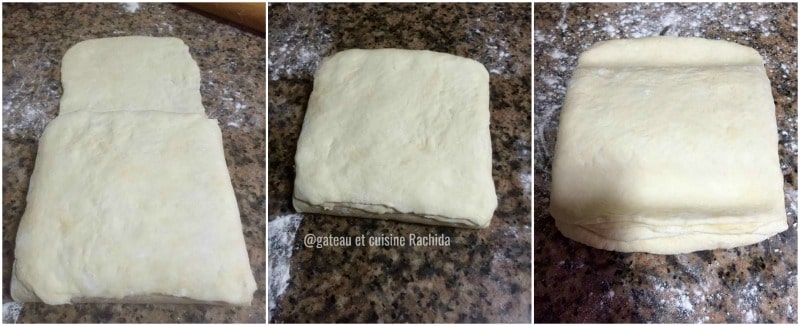
10. Roll out the dough into a long rectangle about 8 mm (0.3 inches) thick.
Fold in three to make 1st single turn/fold : Fold the top third of the dough, then fold the bottom third over the top.
You have just completed the 1st single turn/fold. Mark with your finger to remember the number of turns.
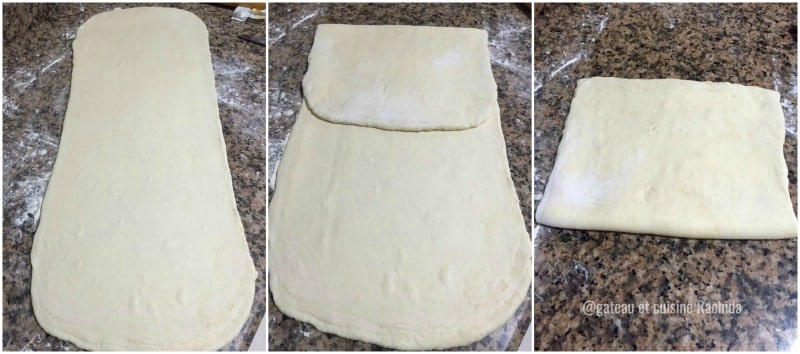
11. Turn the dough a quarter turn clockwise (90 degrees). The dough opening should be to your right. Wrap and place in the refrigerator for 1 hour.
This opening is called “the key”.
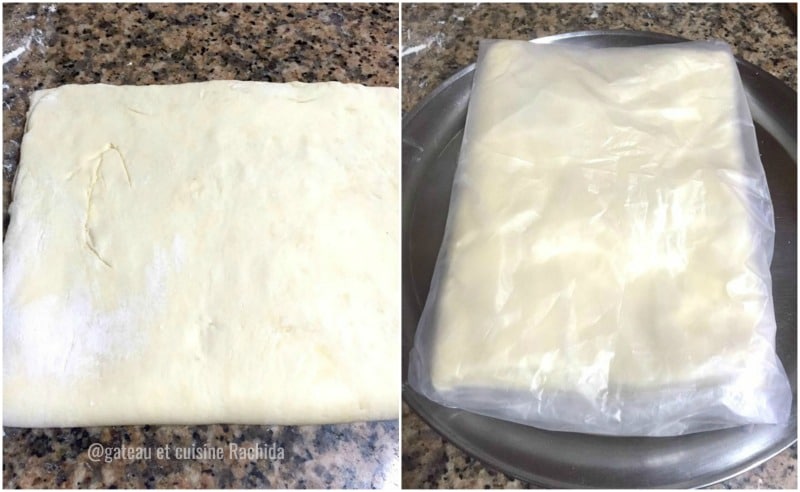
12. We turned the dough a quarter turn before placing it in the refrigerator; if you haven’t done so yet, do it now after taking it out of the refrigerator.
On the floured surface, roll out the dough into a rectangle, following the direction of the arrow in the first image below.
Note : Lightly dust the work surface from time to time to prevent the dough from sticking. Always use a soft-bristle brush to remove any excess flour to avoid altering the texture of the dough.
The rectangle should always have a thickness of approximately 8 mm (0.3 inches)
When rolling, avoid sliding the rolling pin beyond the edges of the rectangle. Always work on the puff pastry by rolling the pin forward and backward.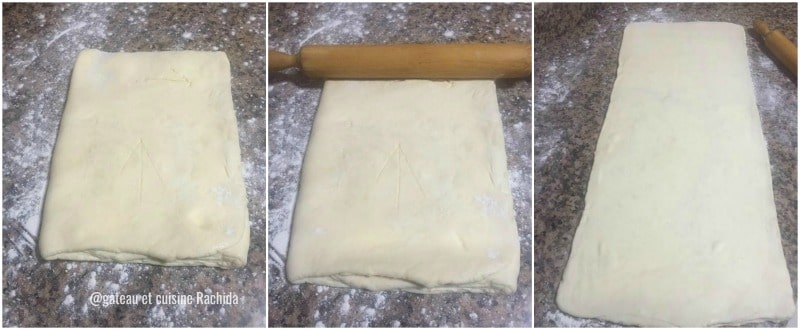
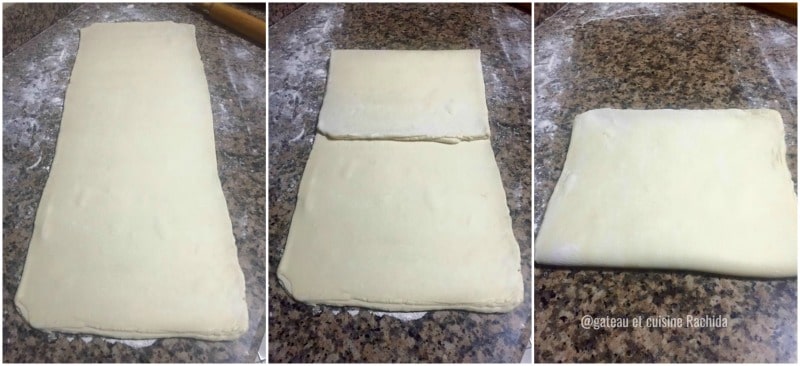
13. Fold in three to make the 2nd single turn/fold. Fold one third of the dough, then fold the bottom side over it.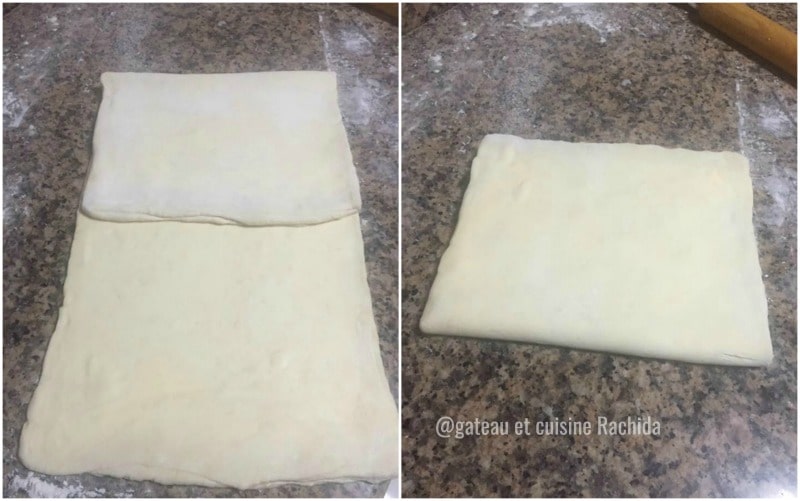
14. You have just completed 2nd single turns/folds of the dough. Wrap in plastic wrap and place in the refrigerator for 30 minutes or more if you notice that the dough and butter are sticking.
Mark with your finger to remember the number of turns made. Before starting another turn, always make a quarter turn to the dough (90 degrees). The opening should always be to your right.
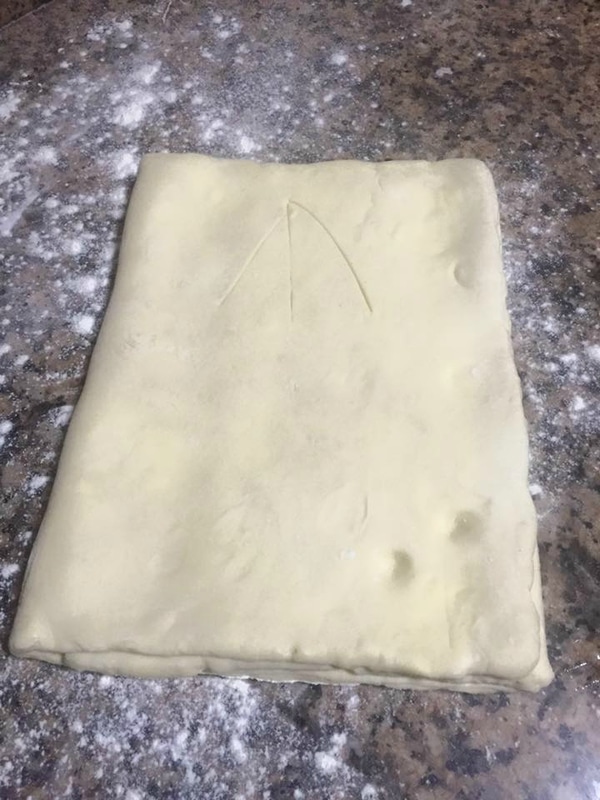
15. Perform the 3rd single turn/fold. Fold the top third of the dough, then fold the bottom third over the top.
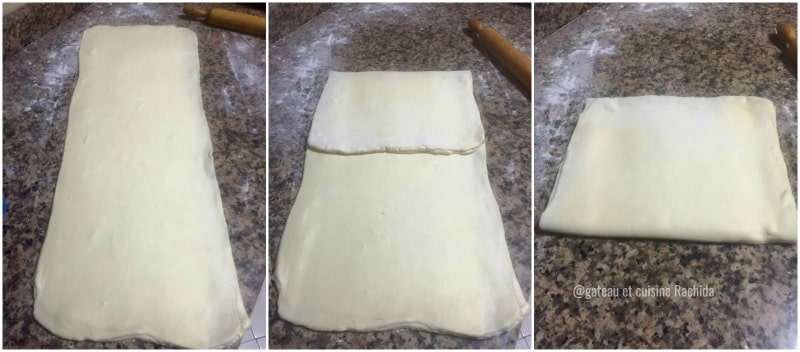
16. After the 3rd turn, wrap the dough and place it in the refrigerator for 1 hour.
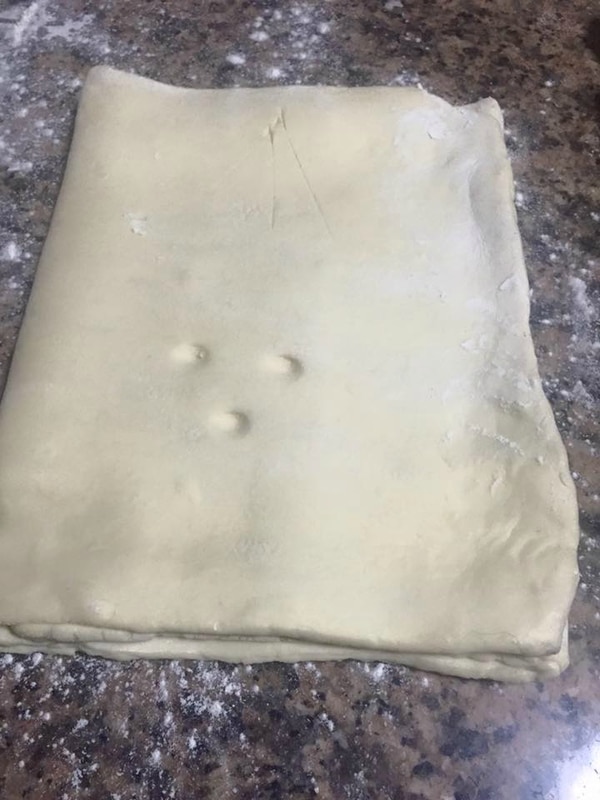
17. Make the 4th single turn by folding the dough in three: Fold one third of the dough, then fold the bottom side over it. Wrap the dough after this 4th turn and put it in the refrigerator for 2 hours, or until the next day.
The next day, give a 5th single turn. Wrap the dough, then let it rest for 30 minutes in the refrigerator.
Make the 6th single turn, then chill the dough until ready to use. Leave it in the refrigerator for at least 1 hour before using.
There you go, your puff pastry is ready!
Now that homemade puff pastry holds no secrets for you, the possibilities are endless with both sweet and savory recipes: savory turnovers, tarts, mille-feuilles, galettes, vol-au-vents, apple turnovers, and more. It’s your turn to get creative!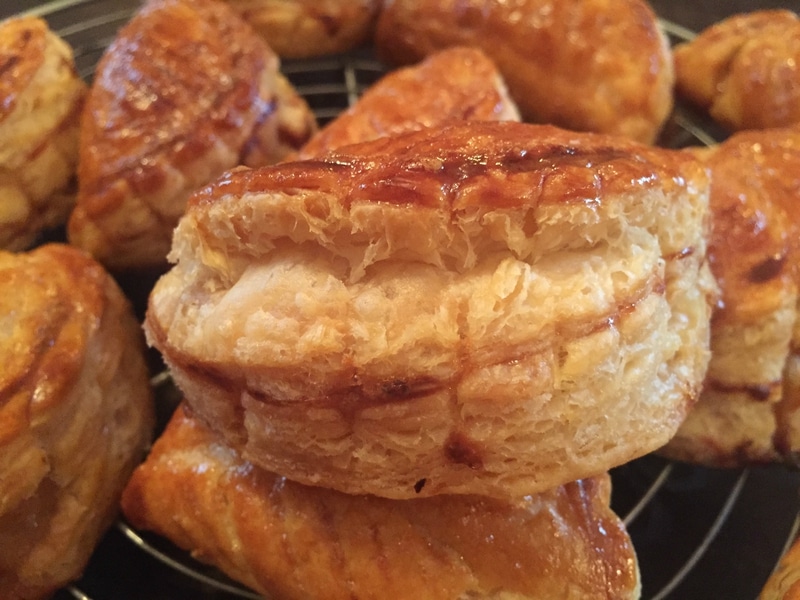

Puff Pastry Recipe ( Easy Step-by-Step with pictures )
INGREDIENTS
For the dough - Détrempe:
- 500 g all-purpose flour (17.6 oz)
- 50 g soft butter (1.8 oz)
- 1 teaspoon salt
- About 300 ml cold water (10.5 oz)
- 1 teaspoon vinegar optional
For the folding:
- 350 g butter with over 82% fat content, such as the Président brand, for example. If you find it, use special laminating butter with 84% fat content, or alternatively, special laminating margarine, which will make the folding process easier. Butter from Charente-Poitou, Isigny, or Deux-Sèvres with AOP (Protected Designation of Origin / PDO) is also very good.
PREPARATION
Prepare the laminating butter
- I suggest you take a look at the step-by-step images in the article.
- Make a small square with the butter, about 2 cm (0.8 inches) thick, which can be inserted into the center of your détrempe cut into a cross. Tap it with a rolling pin between two sheets of parchment paper.
- Place the butter in the center of a sheet of parchment paper, then fold the sheet over it to form a square. Flatten the butter to form a square about 2 cm thick.
- You thus obtain a square of butter ready for the folding. I used a freezer bag, which works just as well as parchment paper.
The main dough "détrempe":
- Roughly rub the butter (50 g / 1.8 oz) with the flour and salt with your fingertips until it resembles coarse crumbs. You can use a stand mixer with the paddle attachment.
- Gradually add the cold water, mixing gently without kneading until a dough ball forms.
- The amount of water will vary depending on the flour's absorption. For me, about 2 tablespoons (27 ml / 0.95 oz) of water were left over.
- Shape the dough into a ball and roll it on the work surface to smooth it slightly. Do not knead to avoid the dough becoming elastic.
- EDIT: You can lightly work (fraiser) the dough on the work surface by pressing it with the palm of your hand, pushing it forward, and then bringing it back. Repeat this process two to three times. This helps incorporate the butter without overworking.
- Score the ball in a cross shape without reaching the bottom with the knife (just make a nice cross-shaped cut).
- Wrap the dough and place it in the refrigerator with the butter for 30 minutes. The butter should not be hard, but not too soft either. It should have the same firmness as the dough.
- After the resting time, take the dough and butter square out of the refrigerator and place the dough on a lightly floured work surface.
- Gently flatten the four corners of the dough with the palm of your hand to stretch them slightly. Then, roll out the corners with the rolling pin to form a cross, making sure to leave the center slightly thicker.Place the butter square in this center.
- If you see that the sides will not cover the butter properly, roll them out a bit more. Fold the left side over the butter, then fold the bottom side over it.
- Fold the right side over, then fold the side furthest from you (the top one) over everything. Give this package a quarter turn clockwise (90 degrees).
- Gently press the top and bottom edges with a rolling pin to prevent the butter from escaping during rolling.Roll out the dough into a long rectangle about 8 mm (0.3 inches) thick.
- Fold in three to make 1st single turn/fold : Fold the top third of the dough, then fold the bottom third over the top.You have just completed the 1st single turn/fold. Mark with your finger to remember the number of turns.
- Turn the dough a quarter turn clockwise (90 degrees). The dough opening should be to your right. Wrap and place in the refrigerator for 1 hour.
- This opening is called "the key".
- We turned the dough a quarter turn before placing it in the refrigerator; if you haven’t done so yet, do it now after taking it out of the refrigerator.On the floured surface, roll out the dough into a rectangle, following the direction of the arrow in the image in the post.
- Note : Lightly dust the work surface from time to time to prevent the dough from sticking. Always use a soft-bristle brush to remove any excess flour to avoid altering the texture of the dough. The rectangle should always have a thickness of approximately 8 mm (0.3 inches)When rolling, avoid sliding the rolling pin beyond the edges of the rectangle. Always work on the puff pastry by rolling the pin forward and backward.
- Fold in three to make the 2nd single turn/fold. Fold one third of the dough, then fold the bottom side over it.You have just completed 2nd single turns/folds of the dough. Wrap in plastic wrap and place in the refrigerator for 30 minutes or more if you notice that the dough and butter are sticking.
- Mark with your finger to remember the number of turns made. Before starting another turn, always make a quarter turn to the dough (90 degrees). The opening should always be to your right.
- Perform the 3rd single turn/fold. Fold the top third of the dough, then fold the bottom third over the top.After the 3rd turn, wrap the dough and place it in the refrigerator for 1 hour.
- Make the 4th single turn by folding the dough in three: Fold one third of the dough, then fold the bottom side over it. Wrap the dough after this 4th turn and put it in the refrigerator for 2 hours, or until the next day. The next day, give a 5th single turn.
- Wrap the dough, then let it rest for 30 minutes in the refrigerator. Make the 6th single turn, then chill the dough until ready to use. Leave it in the refrigerator for at least 1 hour before using.
- There you go, your puff pastry is ready!
- Now that homemade puff pastry holds no secrets for you, the possibilities are endless with both sweet and savory recipes: savory turnovers, tarts, mille-feuilles, galettes, vol-au-vents, apple turnovers, and more. It's your turn to get creative!
Thank you for visiting my blog and for your comments.
You can also follow me on my youtube channel

