French pâte sablée is an essential shortcrust recipe, used to make all kinds of tarts. Its crumbly and melt-in-your-mouth texture results from the method of rubbing the flour with butter and sugar.
It is very easy to prepare and, along with sweet pastry, provides the perfect base for fruit tarts, chocolate tarts, and more. Mastering this basic recipe will allow you to create delicious tarts for any occasion.
It’s a relatively simple recipe, and by following all the tips closely, you’ll get a dough that won’t collapse if you want to blind bake it. The tart shell won’t puff up during baking, even if you don’t prick it. Its perfectly crumbly texture makes it one of the most famous tart crusts.
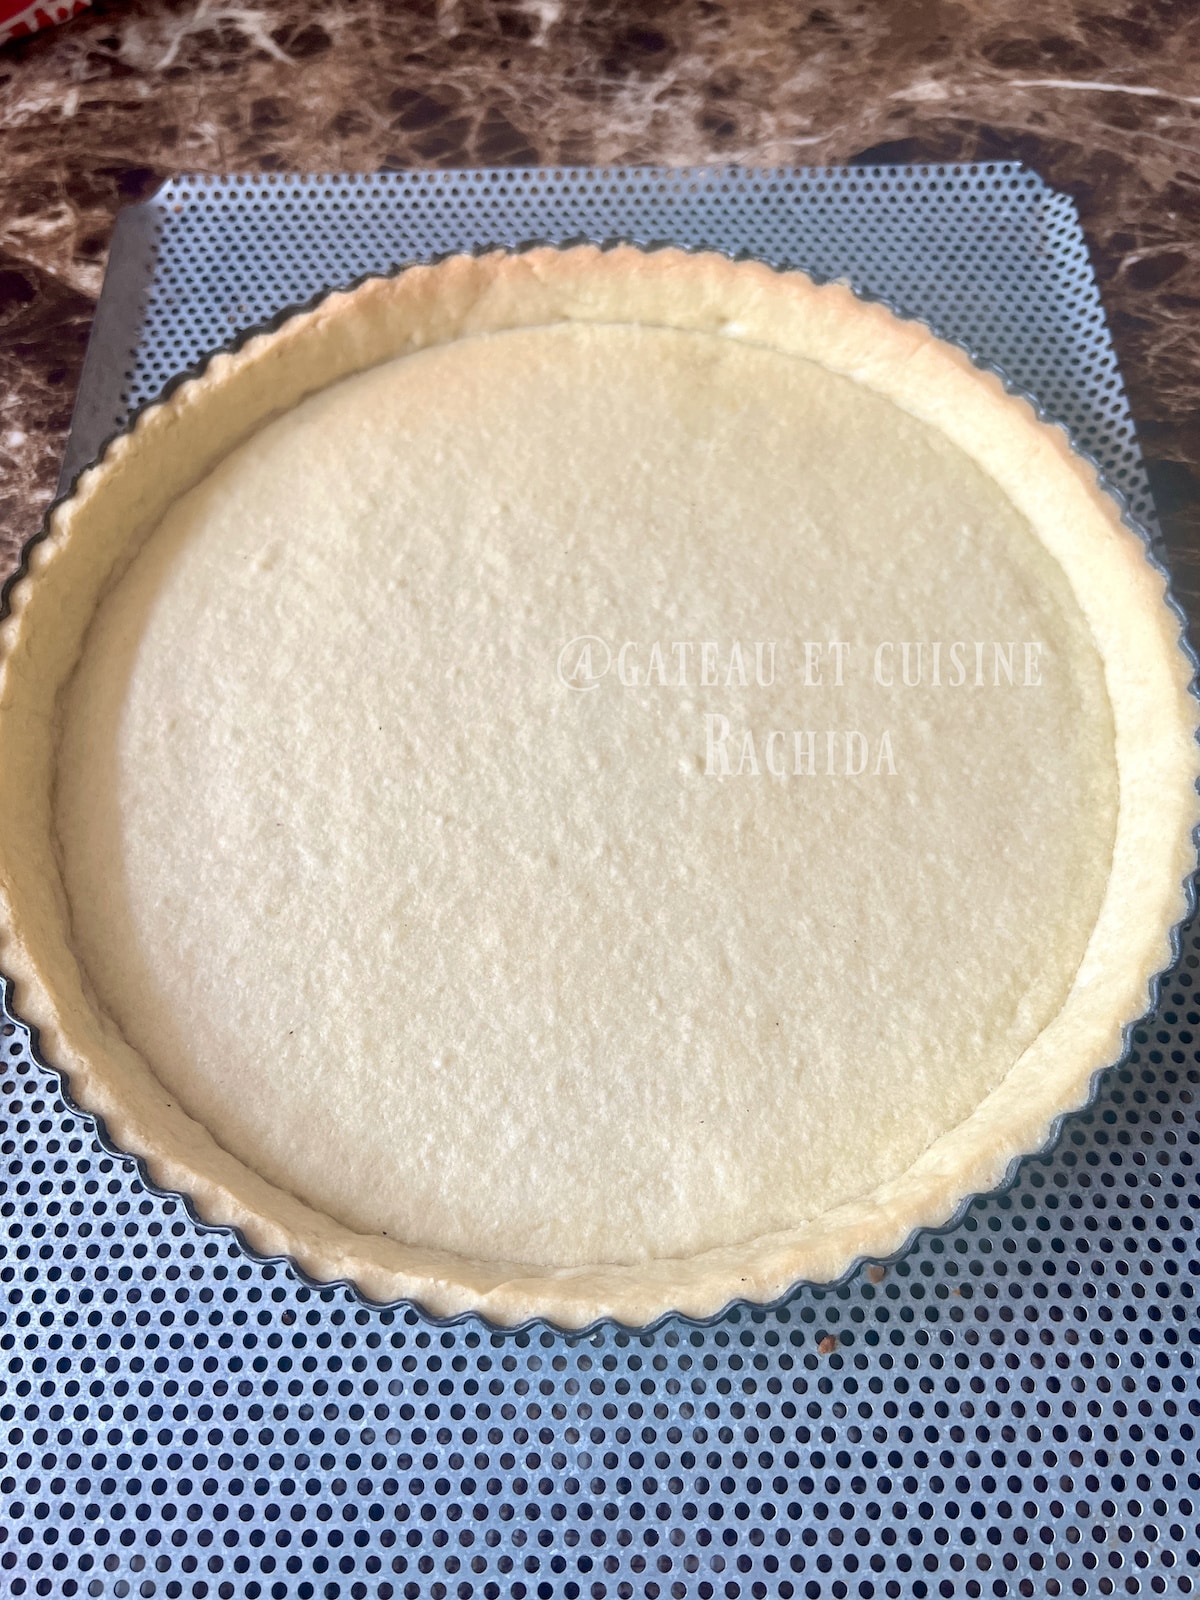
Table of Contents
Tips for Homemade Sweet Shortcrust Pastry
With these few tips, you’ll know how to prevent the shortcrust pastry from shrinking during baking and achieve a crumbly, crispy, and perfectly baked tart shell.
Choice of flour: For optimal results, it’s best to use a low-gluten flour, such as T55, which is less rich than T45. This prevents the dough from becoming too elastic. If not specified, T45 is generally sold as “cake flour” or “pastry flour,” while T55 is closer to “all-purpose flour.” These names (T45 and T55) are typically used in France.
Butter: Use good butter with a fat content of at least 82%. In warm weather, it melts less quickly and the dough is easier to handle. It stays firmer longer at room temperature. Work with cold but not hard butter, cut into small pieces. The butter should not melt into the dough, as this ensures a crumbly texture after baking.
Rubbing in: Rub the flour and butter together until you achieve a crumbly texture, then combine with the egg without overworking the dough. Do not try to form it into a ball. Stop as soon as the ingredients come together into a dough. You can see this in the images in the preparation steps.
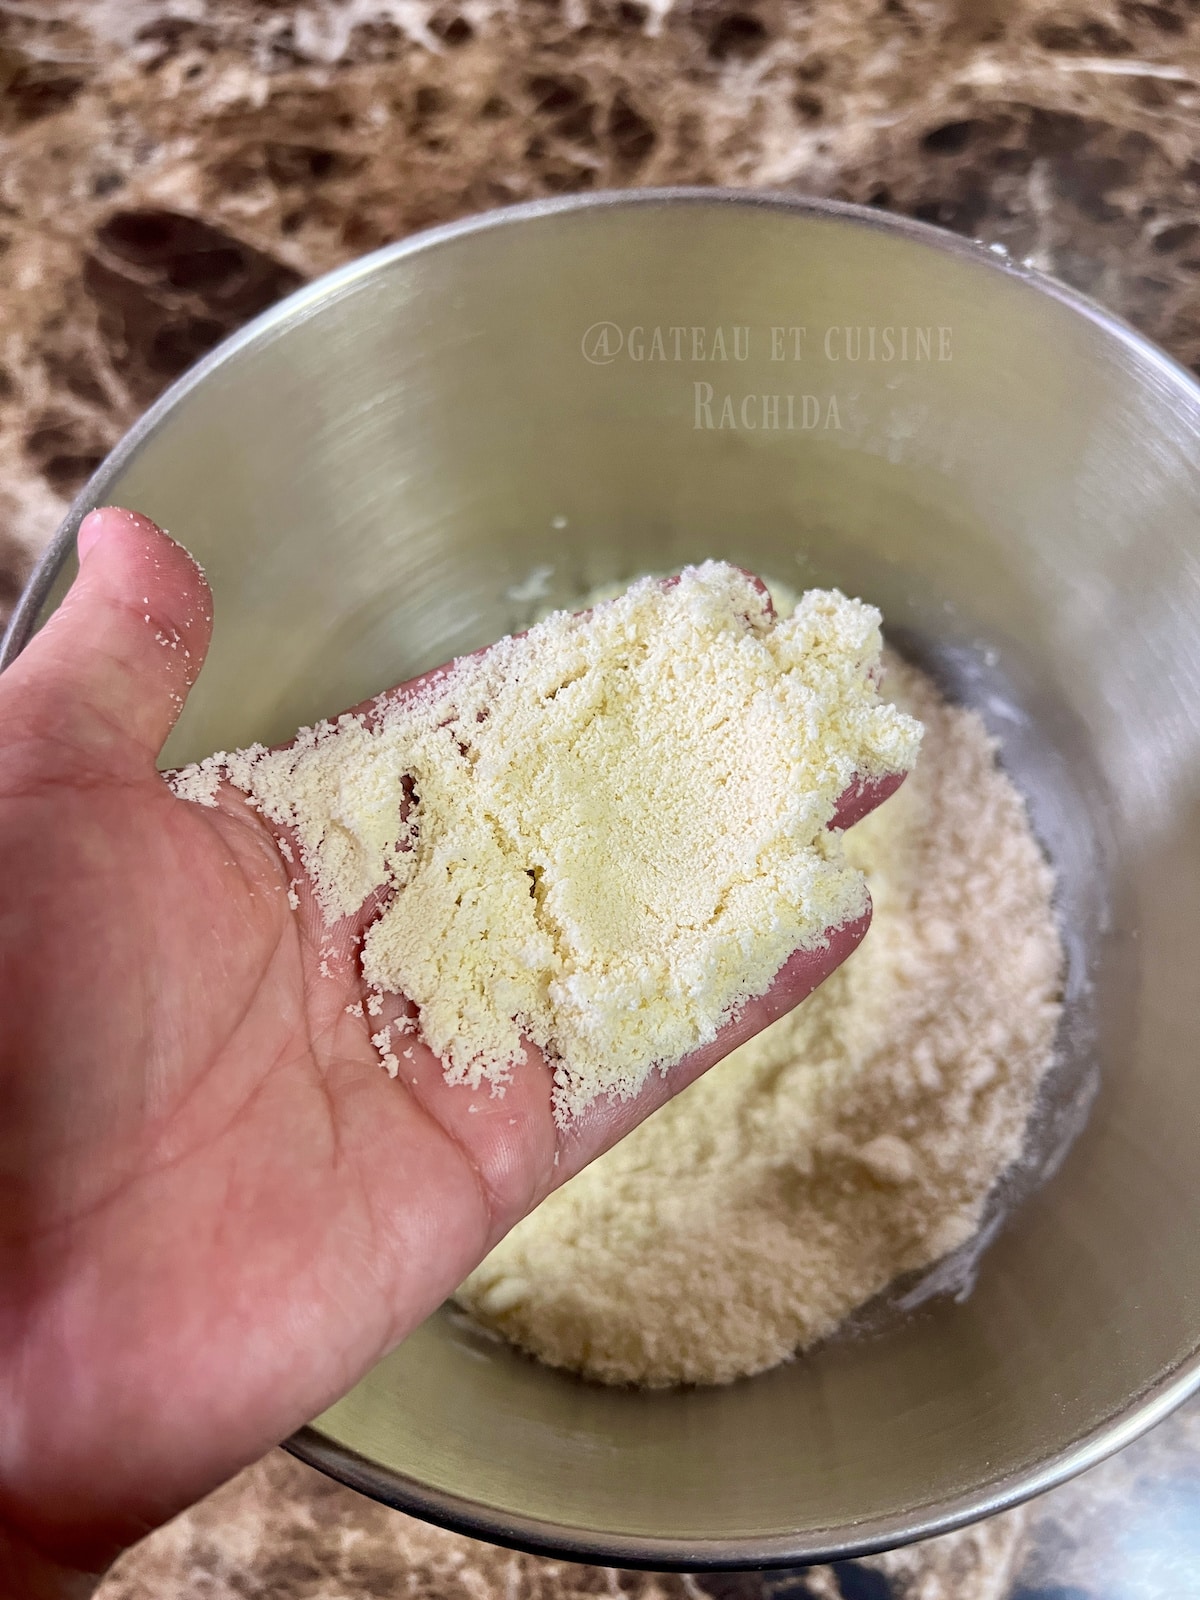
rubbing in flour , butter and sugar
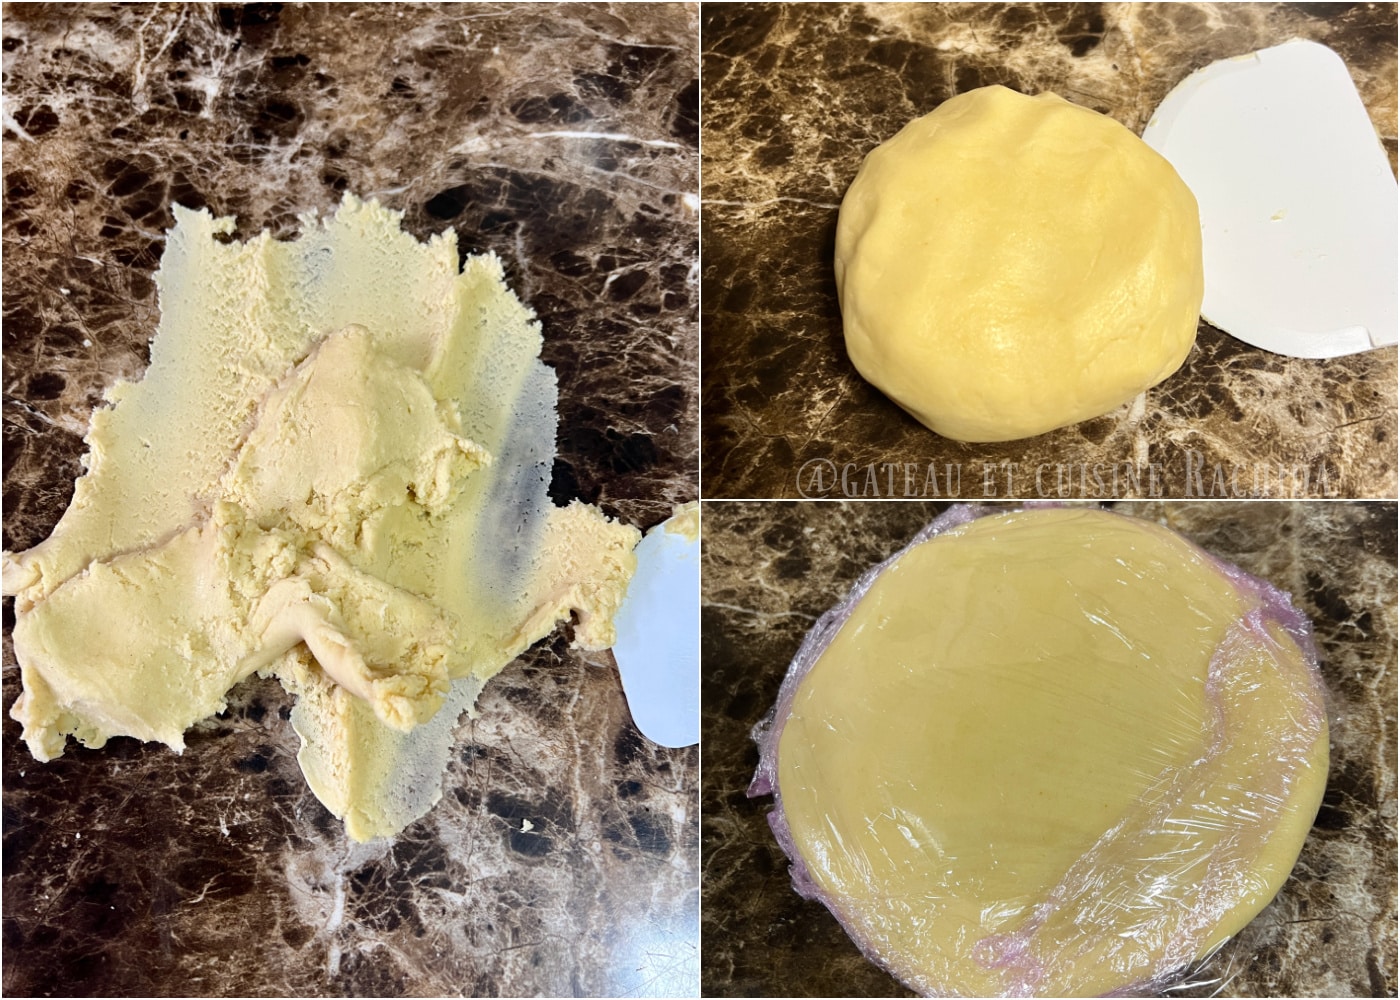
Fraisage (or frasage): Turn the dough out onto the work surface and press it with the palm of your hand. This action involves briefly pressing the dough by pushing it in front of you, repeated 2 to 3 times to ensure that the butter is well incorporated and the dough is homogeneous. After fraisage, gather the dough into a ball, then flatten it into a disk and wrap it in plastic wrap for resting.
Chilling: Preferably, prepare the dough the day before or let it rest in the refrigerator for at least 2 hours. This will allow the gluten to relax, resulting in a dough that’s easy to roll out and won’t shrink during baking.
Freezing: Before baking, place the dough in the freezer for 30 minutes to 1 hour to firm it up and ensure it retains its shape during baking.
Blind baking: You can perform blind baking without needing to use weights or dock the dough. If the dough has rested well and hasn’t been overworked, the tart shell will stay in place during baking.
To ensure even better results, use a perforated tart mold or ring along with a perforated baking sheet and/or a Silpain baking mat. You will never have issues with your shortcrust pastry collapsing or puffing up during baking.
However, you can always prick the dough with a fork or use weights.
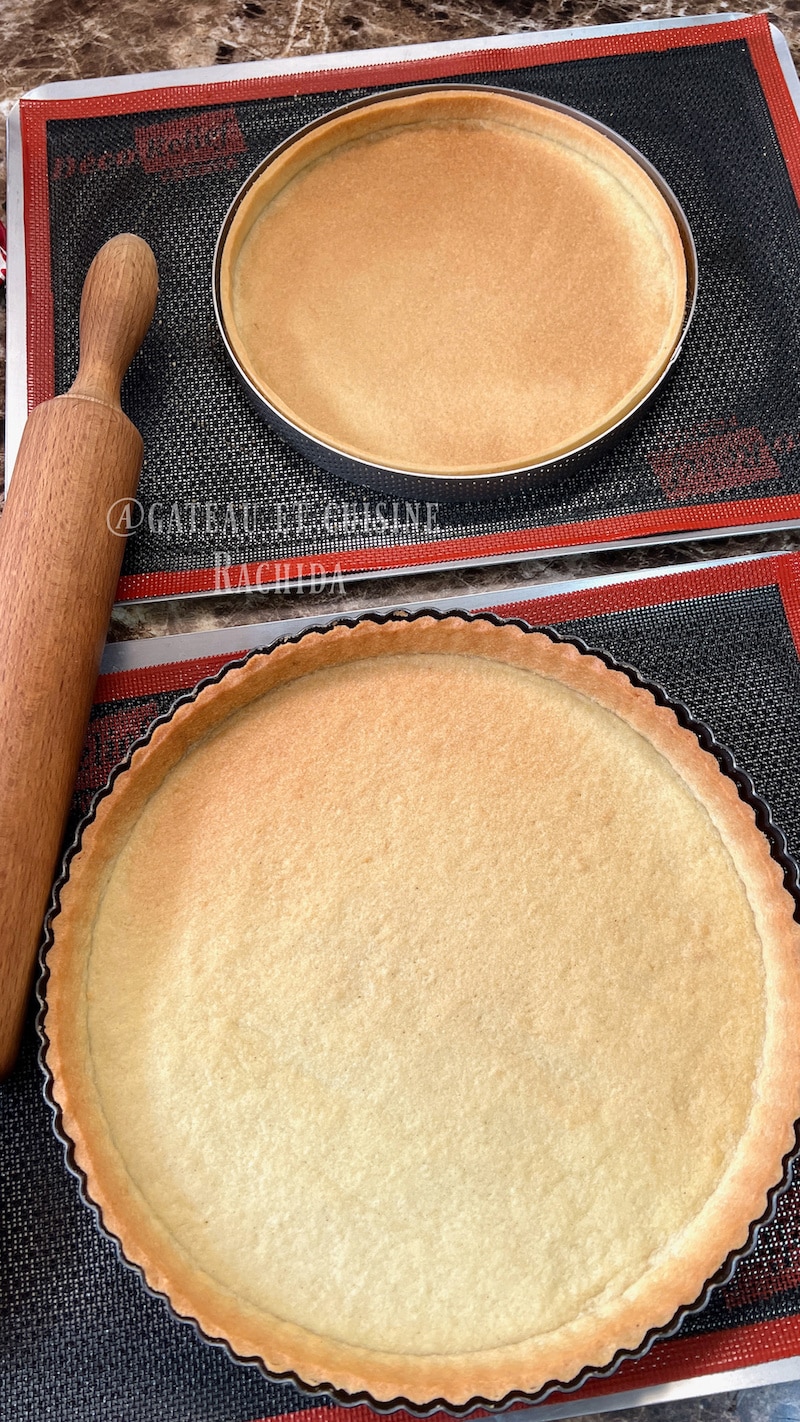
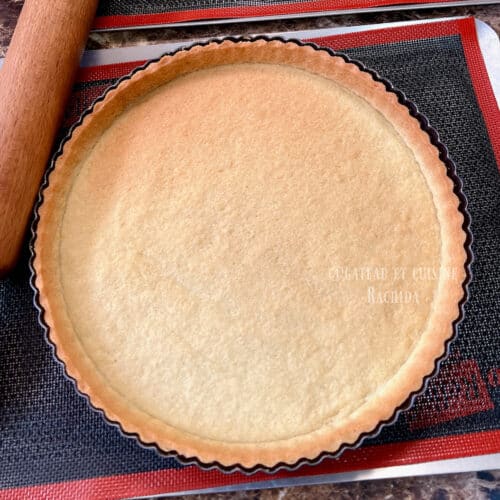
Baked pie crust
Preparation steps :
NB: Find the recipe card with the ingredients, which you can print at the end of the post.
In the bowl of a stand mixer or in a large mixing bowl, sift the flour and powdered sugar.
Add the salt, almond powder and seeds from the split vanilla pod. Mix well.
Add the cold but not hard butter and work it with the stand mixer fitted with the paddle attachment (K) or with your fingertips to rub in the butter until you achieve a crumbly texture. The butter should no longer be visible.
Add the lightly beaten egg and mix briefly to combine everything until the dough begins to come together. Stop the mixer midway to scrape down the sides of the bowl. Don’t stir until the mixture forms a ball.
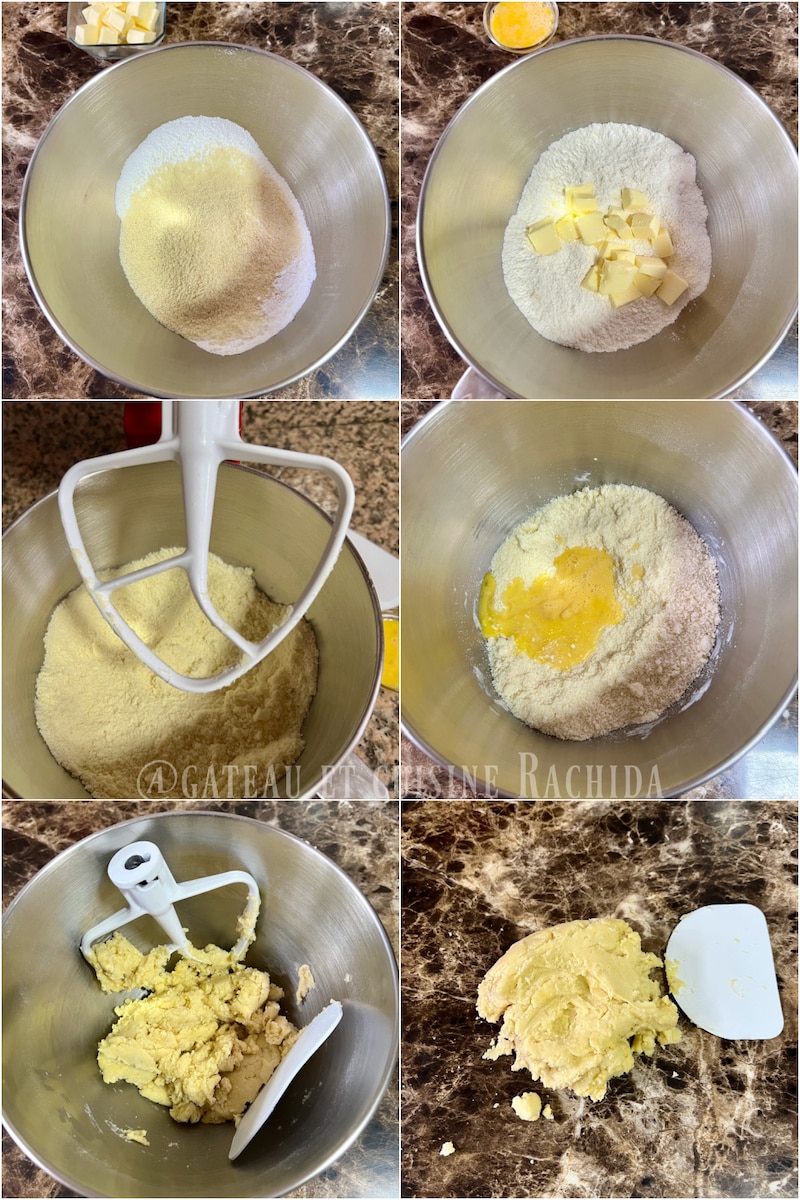
If the dough is dry, add a little more egg. The dough should be soft and easily shape into a ball. Even if it is sticky, it will firm up in the refrigerator.
Turn the dough out onto the work surface, then press and push it in front of you with the palm of your hand, 2 to 3 times. This ensures that the butter is well incorporated and the texture is homogenous.
Gather the dough into a ball using a bench scraper. Flatten slightly to form a disk. This will speed up its cooling and make it easier to roll out.
Wrap in cling film and leave in the fridge for at least 2 hours (ideally overnight to relax).
Before rolling out, take the dough out of the fridge and leave to rest for 5-10 minutes to soften slightly.
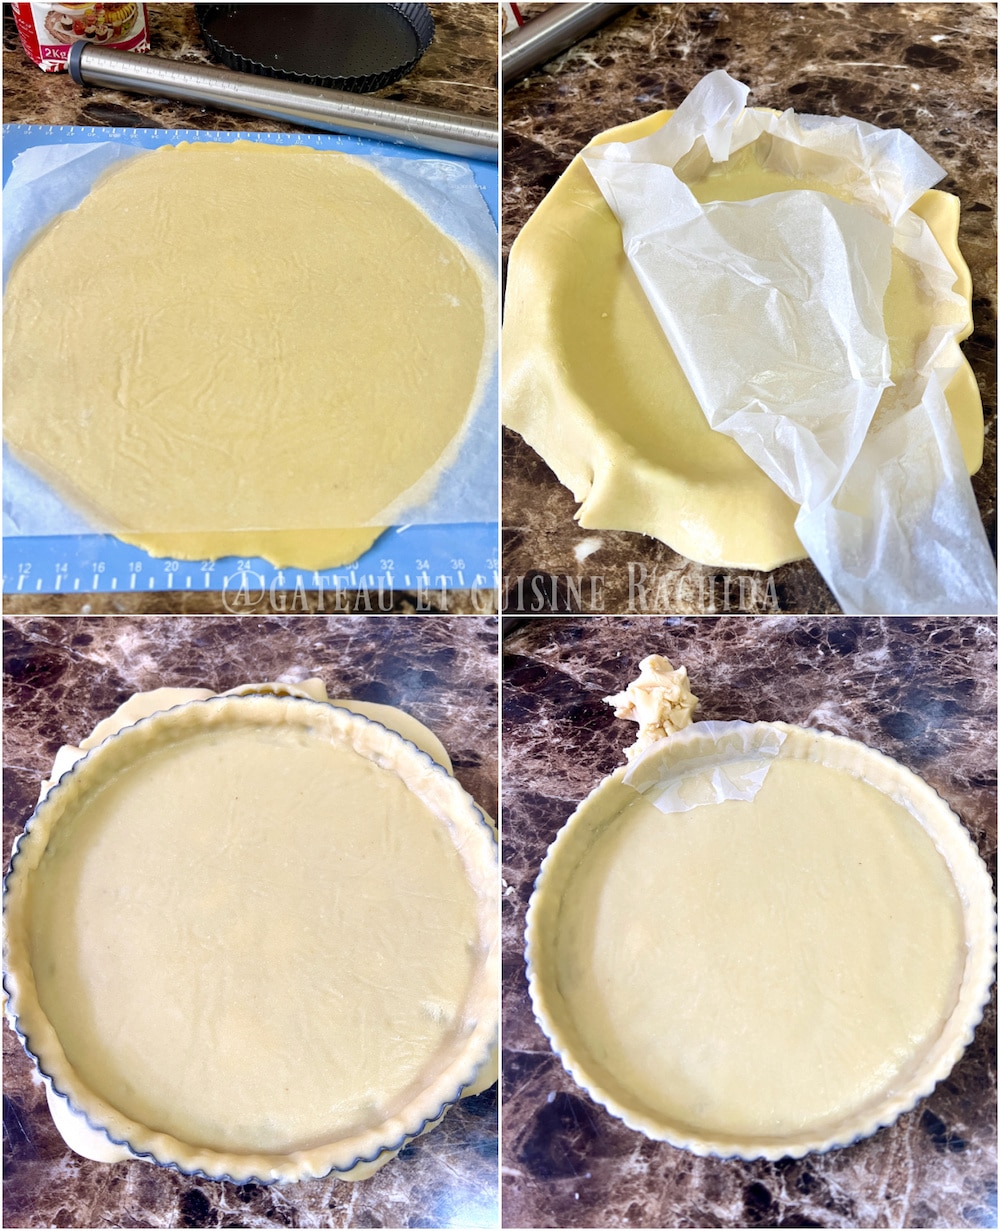
Roll out the dough on a lightly floured surface to a thickness of 2 to 3 mm. In warm weather, roll it out between two Silpat baking mats or two sheets of parchment paper. Firm it up a bit in the refrigerator if it becomes sticky.
Gently place the rolled-out dough into the buttered tart pan. Gently press the dough into the bottom and sides of the pan. Make sure to press the dough firmly against the sides of the pan, forming a right angle between the bottom and the sides. This helps prevent the dough from shrinking during baking.
To smooth the bottom and sides without leaving fingerprints, place a piece of parchment paper over the dough. Use your fingers to press down over the paper to evenly flatten the dough and achieve a smooth surface. Refine the dough by pushing any excess up towards the top, which helps to even out the thickness along the entire height of the sides of the pan.
Trim the excess dough by rolling a rolling pin over the edge of the pan, then use a knife to even out and create clean edges.
For blind baking, place the tart mold in the freezer for 30 minutes to 1 hour before baking. You can bake it without using weights or pricking it with a fork.
Note: Use a perforated tart ring and a perforated baking sheet or a Silpain baking mat for optimal results.
Preheat the oven to 160°C (320°F) fan-assisted or 170°C (340°F) static.
Bake for about 15 minutes for blind baking. It should be lightly golden.
Let the tart shell cool before filling, then bake again to finish the cooking.
You can also bake all the way through. Bake until the tart shell is golden brown. The blind-baked tart shell will be used for fillings that do not require further baking, such as chocolate tart, lemon tart, etc.
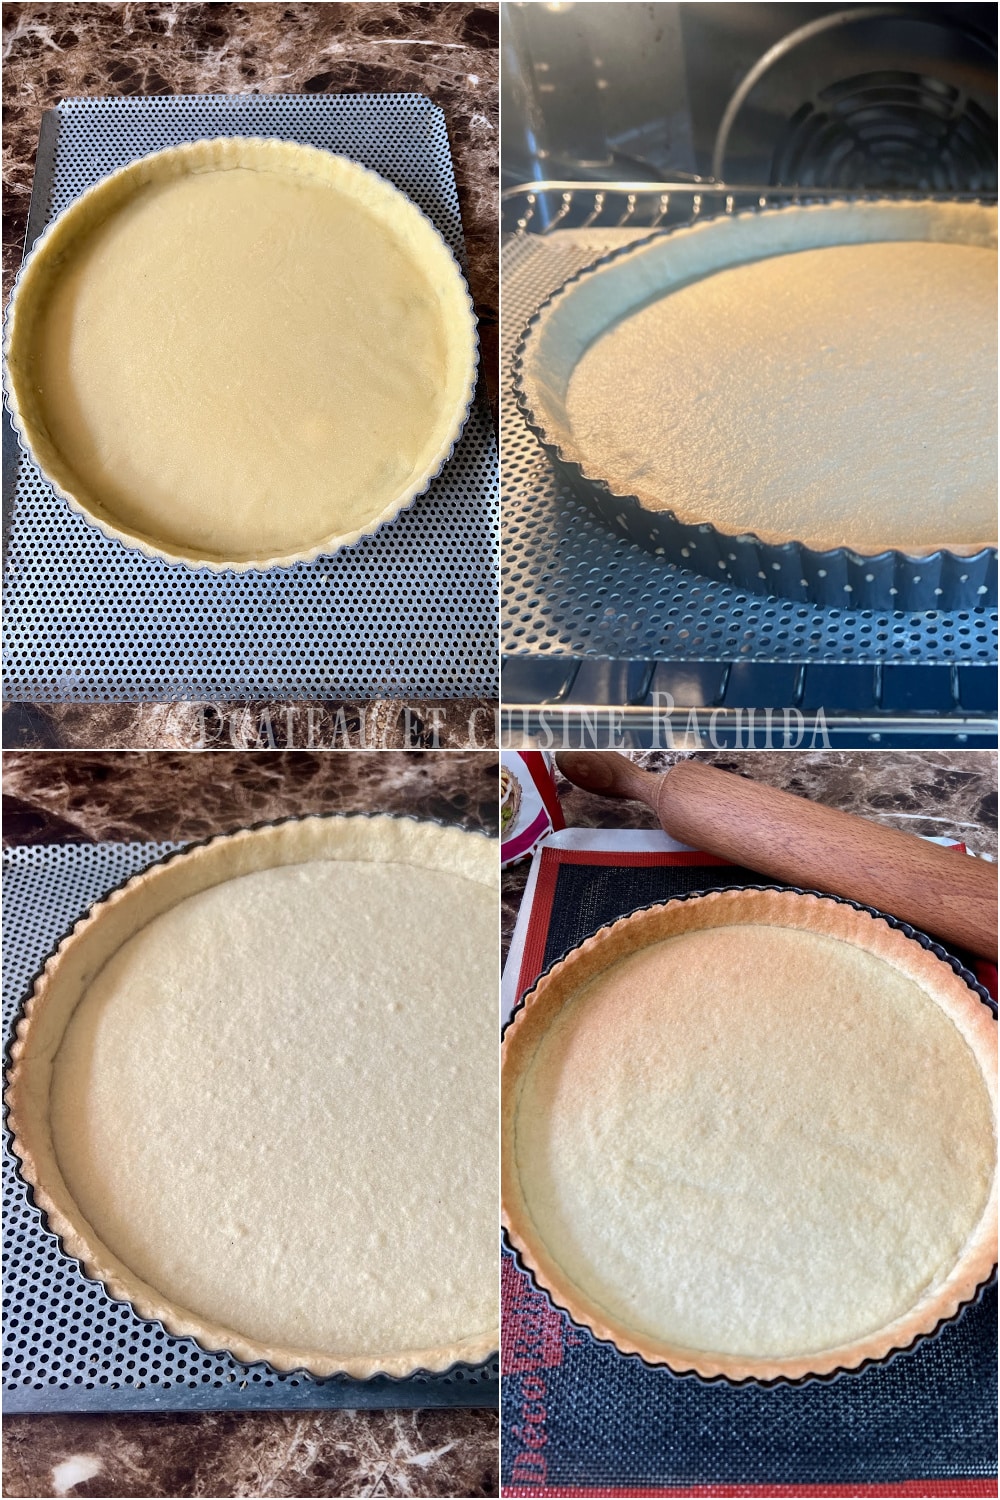
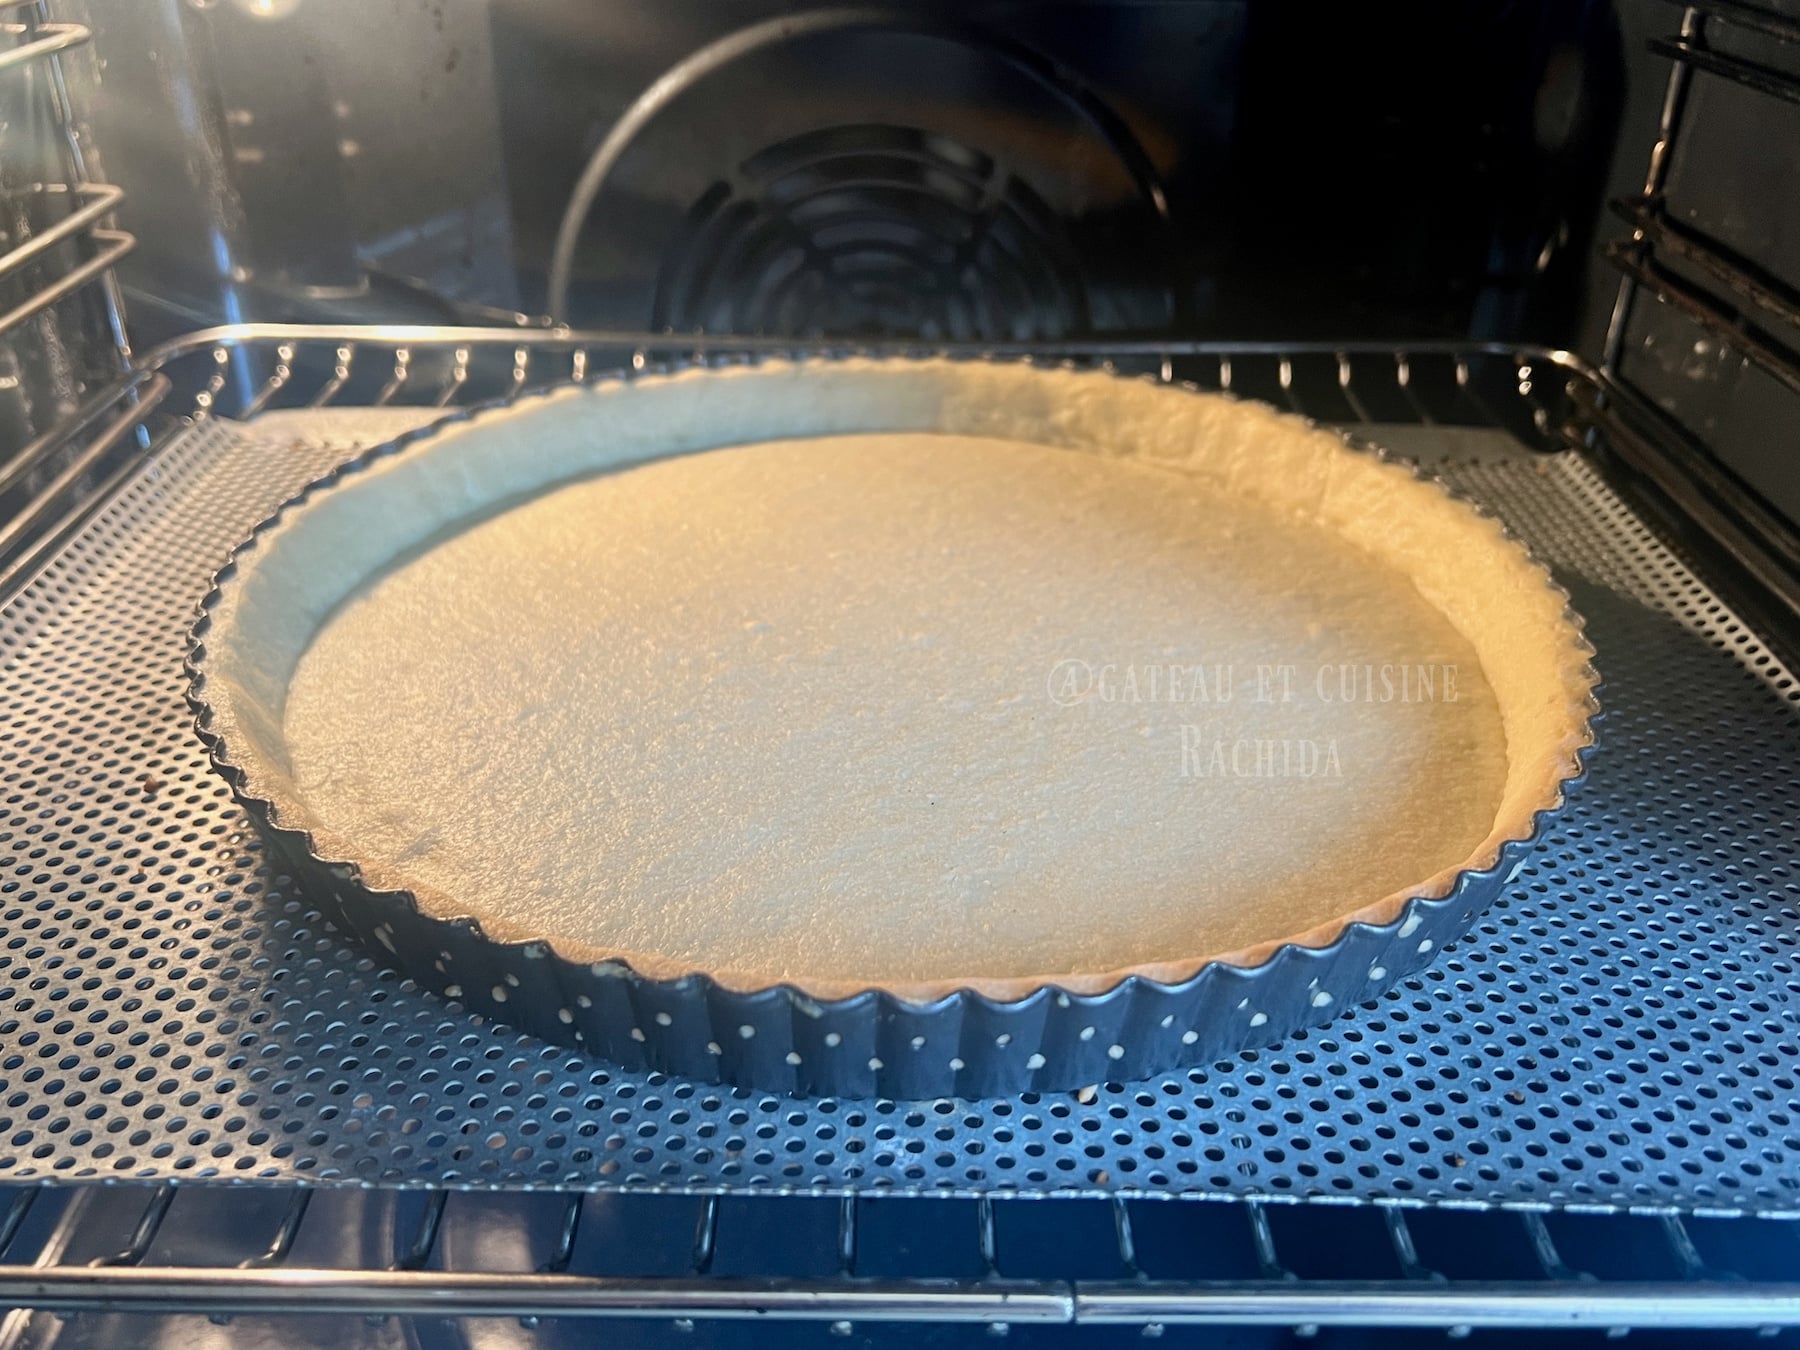
Pre-baking the tart shell
Note: If you want to line the tart mold in two steps, with a disc for the bottom and strips for the sides, you can see the method in my article on sweet pastry or how to line tart rings like a pro. This method is more practical in the summer when the dough becomes sticky quickly.
How to Store Sweet Shortcrust Pastry:
Once the sweet shortcrust pastry is ready, you can store it in the refrigerator for 2-3 days. You can also freeze it for up to 3 months.
Freeze it in a ball or already rolled out. Before use, allow to defrost in the refrigerator, taking it out of the freezer the day before.
Baked or pre-baked tart shells also freeze well. You can reheat them in the oven for about ten minutes to restore their crispiness.
Sweet Shortcrust Pastry Recipe (pâte sablée)
INGRÉDIENTS
For 2 tart shells, 22 cm each (8.7 inches) :
- 250 g all-purpose flour
- 130 g unsalted butter cold but not hard , cut into small pieces
- 100 g powdered sugar
- 30 g almond flour (1 oz ) (optional)
- 1 large egg (60 g / 2 oz), adjusted according to flour absorption
- 1/3 teaspoon salt (1 g / 0.04 oz)
- 1 vanilla bean optional
PRÉPARATION
- In the bowl of a stand mixer or in a large mixing bowl, sift the flour and powdered sugar.
- Add the salt, almond powder and seeds from the split vanilla pod. Mix well.
- Add the cold but not hard butter and work it with the stand mixer fitted with the paddle attachment (K) or with your fingertips to rub in the butter until you achieve a crumbly texture. The butter should no longer be visible.
- Add the lightly beaten egg and mix briefly to combine everything until the dough begins to come together. Stop the mixer midway to scrape down the sides of the bowl. Don't stir until the mixture forms a ball.
- If the dough is dry, add a little more egg. The dough should be soft and easily shape into a ball. Even if it is sticky, it will firm up in the refrigerator.
- Turn the dough out onto the work surface, then press and push it in front of you with the palm of your hand, 2 to 3 times. This ensures that the butter is well incorporated and the texture is homogenous.
- Gather the dough into a ball using a bench scraper. Flatten slightly to form a disk. This will speed up its cooling and make it easier to roll out.
- Wrap in cling film and leave in the fridge for at least 2 hours (ideally overnight to relax).
- Before rolling out, take the dough out of the fridge and leave to rest for 5-10 minutes to soften slightly.
- Roll out the dough on a lightly floured surface to a thickness of 2 to 3 mm. In warm weather, roll it out between two Silpat baking mats or two sheets of parchment paper. Firm it up a bit in the refrigerator if it becomes sticky.
- Gently place the rolled-out dough into the buttered tart pan. Gently press the dough into the bottom and sides of the pan. Make sure to press the dough firmly against the sides of the pan, forming a right angle between the bottom and the sides. This helps prevent the dough from shrinking during baking.
- To smooth the bottom and sides without leaving fingerprints, place a piece of parchment paper over the dough. Use your fingers to press down over the paper to evenly flatten the dough and achieve a smooth surface. Refine the dough by pushing any excess up towards the top, which helps to even out the thickness along the entire height of the sides of the pan.
- Trim the excess dough by rolling a rolling pin over the edge of the pan, then use a knife to even out and create clean edges.
- For blind baking, place the tart mold in the freezer for 30 minutes to 1 hour before baking. You can bake it without using weights or pricking it with a fork.
- Note: Use a perforated tart ring and a perforated baking sheet or a Silpain baking mat for optimal results.
- Preheat the oven to 160°C (320°F) fan-assisted or 170°C (340°F) static.
- Bake for about 15 minutes for blind baking. It should be lightly golden.
- Let the tart shell cool before filling, then bake again to finish the cooking.
- You can also bake all the way through. Bake until the tart shell is golden brown. The blind-baked tart shell will be used for fillings that do not require further baking, such as chocolate tart, lemon tart, etc.
- Note: If you want to line the tart mold in two steps, with a disc for the bottom and strips for the sides, you can see the method in my article on sweet pastry or how to line tart rings like a pro. This method is more practical in the summer when the dough becomes sticky quickly.
Thank you for visiting my blog and your comments.