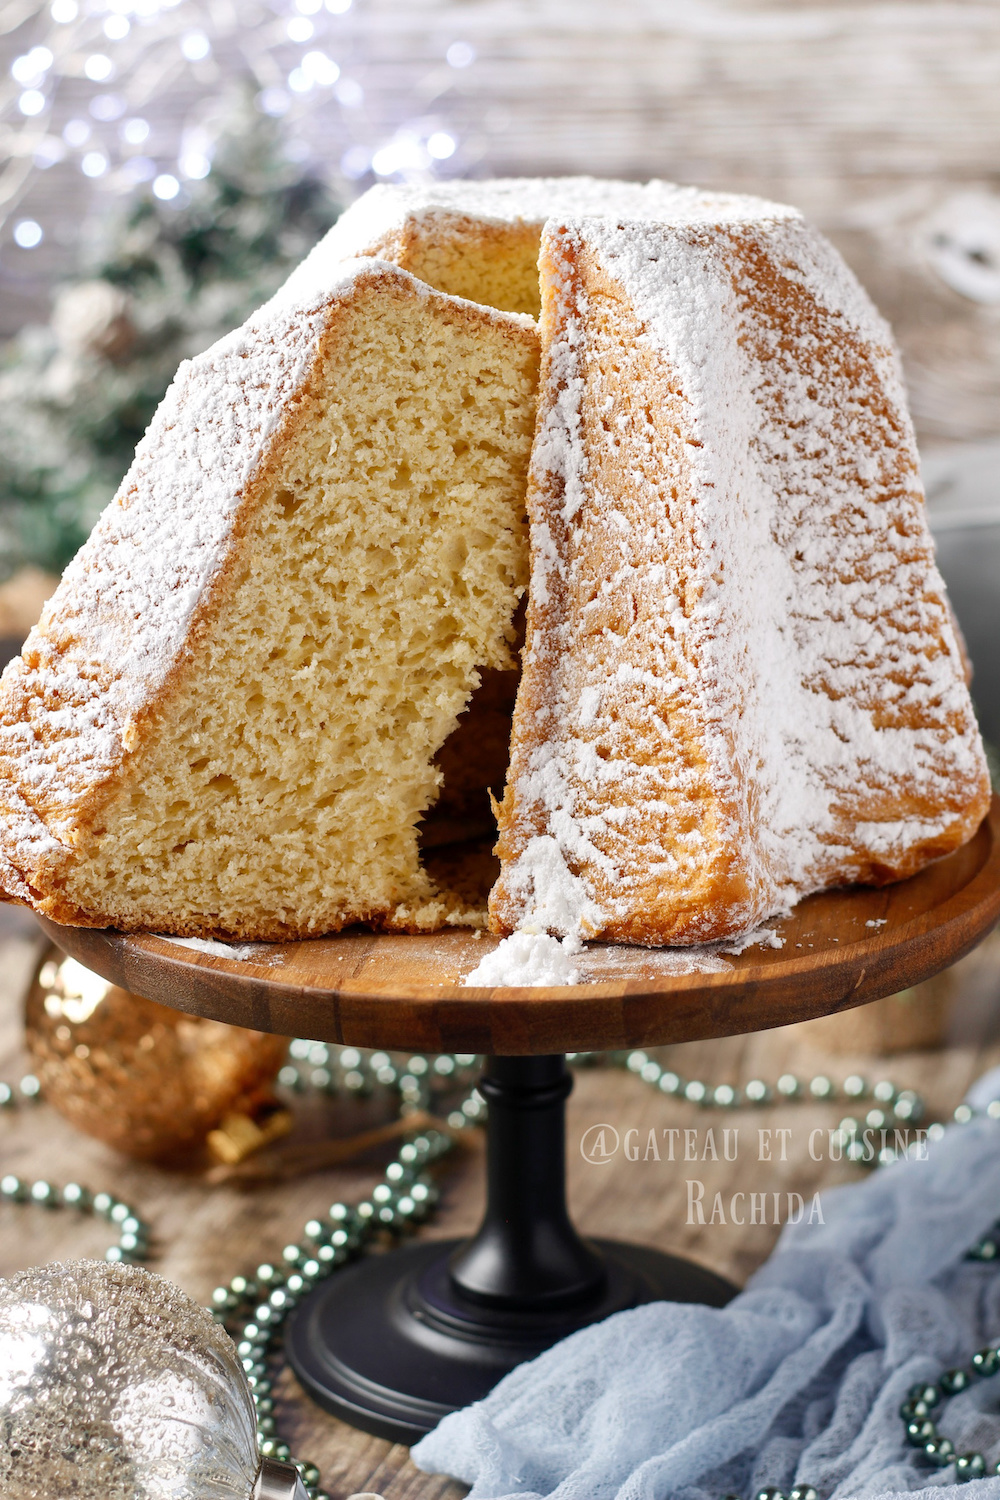
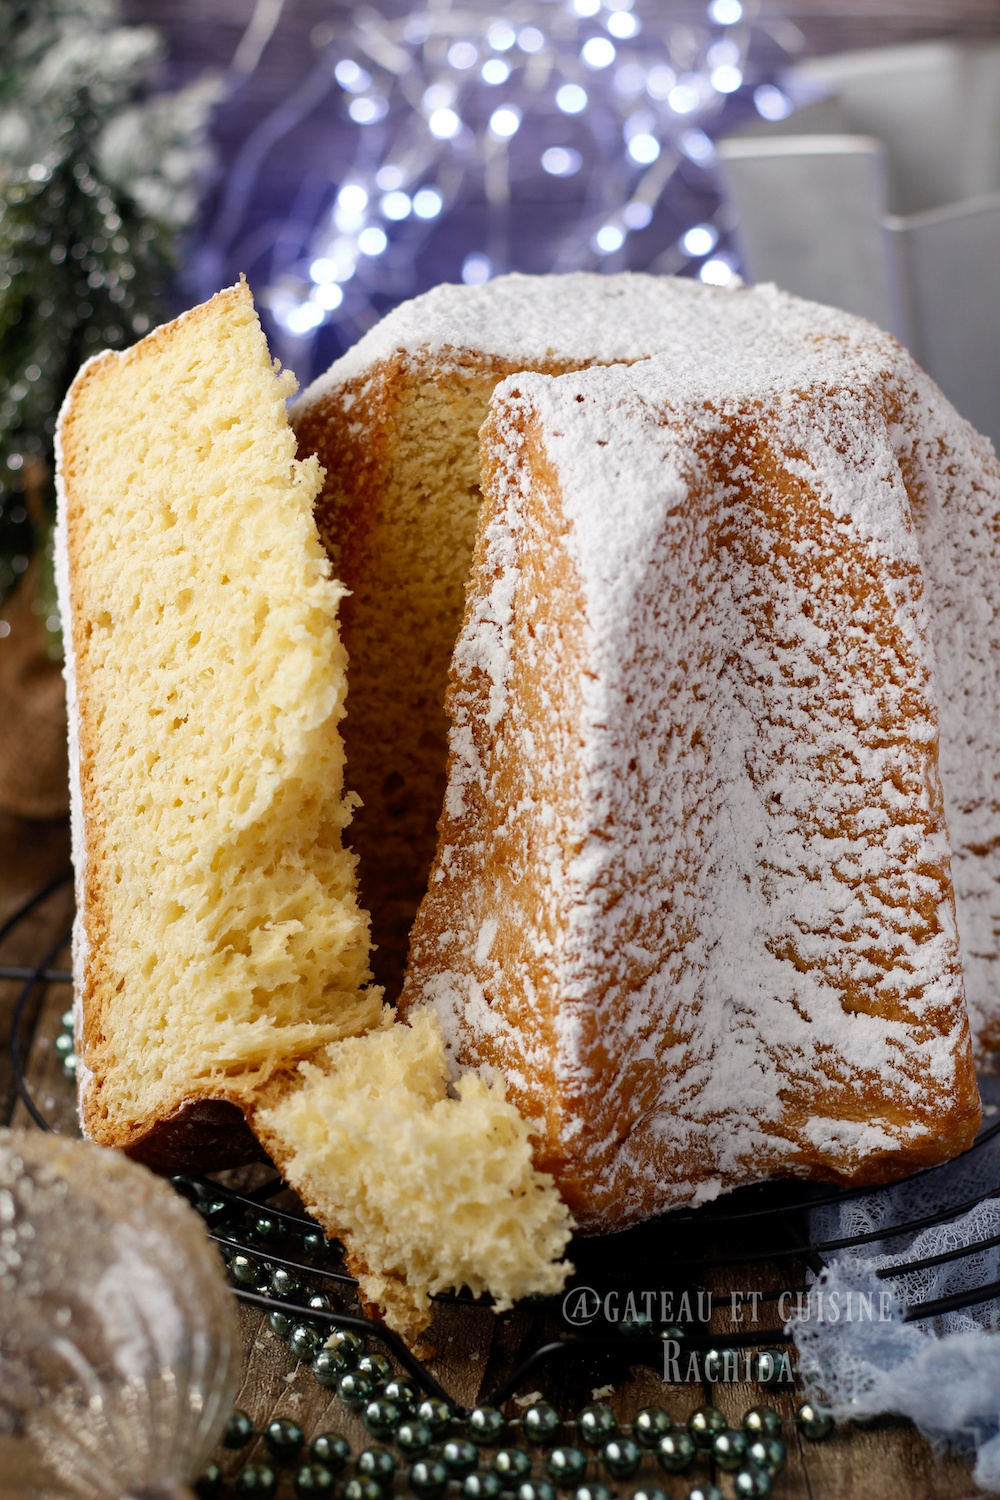
Pandoro is a traditional Italian Christmas brioche cake from Verona, in the Veneto region of northern Italy. It is known for its fine, incredibly soft and light crumb that gently pulls apart into delicate strands, the result of long, careful kneading and slow fermentation.
Plain and delicately flavored with vanilla, without candied fruit or raisins, pandoro is baked in an eight point star shaped mold that gives it its iconic look. Once baked, it is generously dusted with powdered sugar, evoking freshly fallen snow. Alongside the famous panettone, pandoro is an essential part of Italian holiday traditions and a true centerpiece of the festive table.
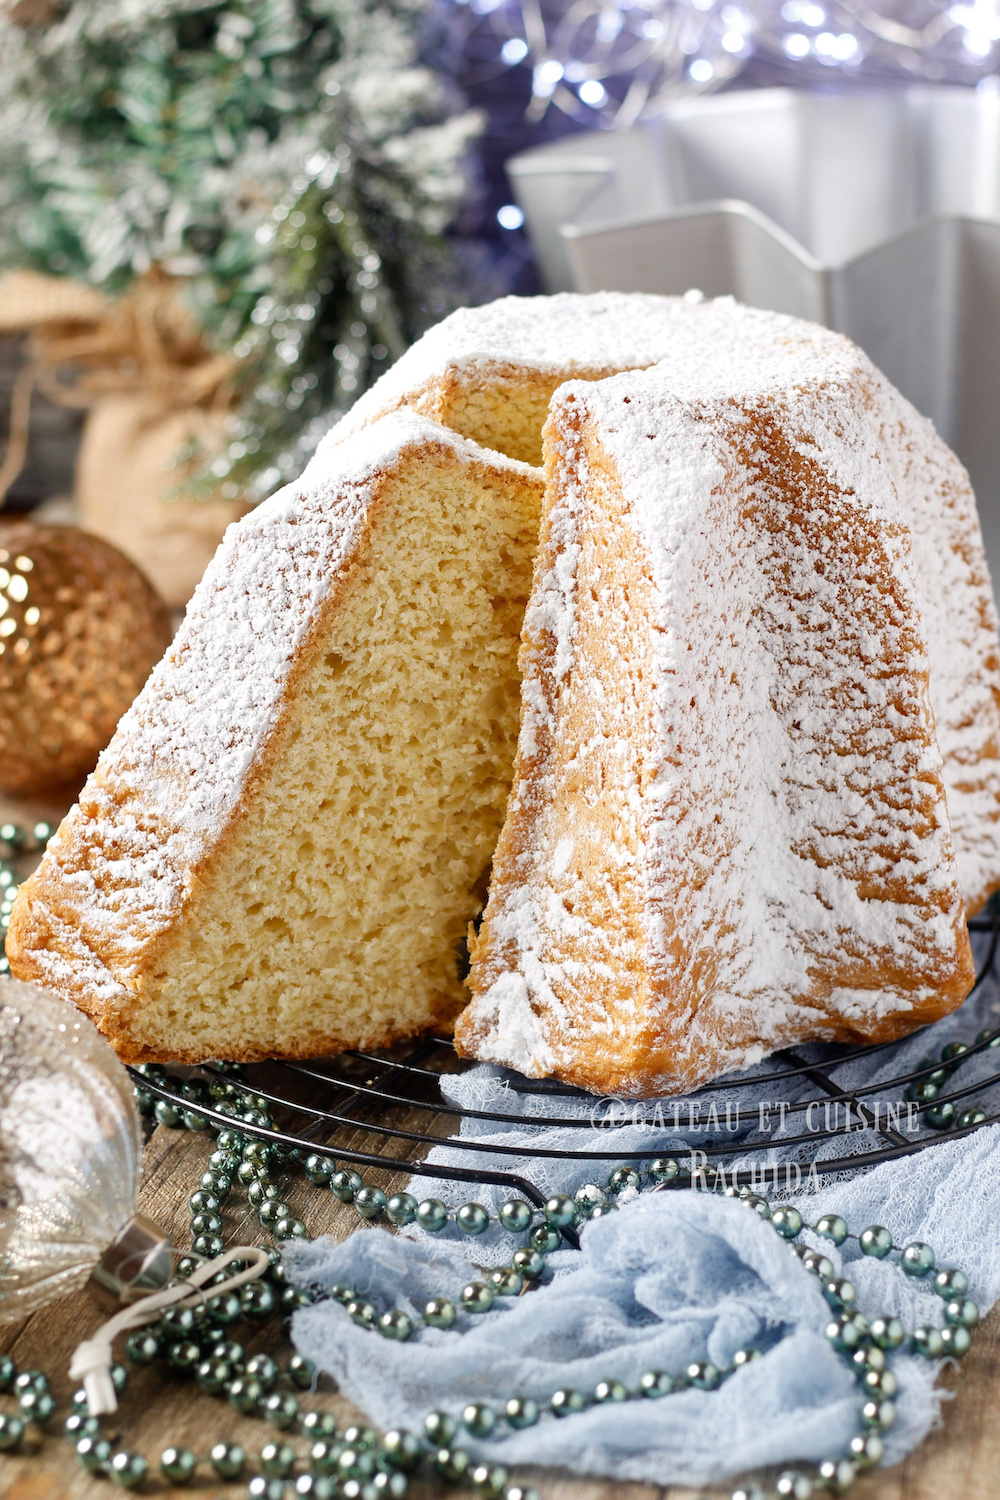
At Christmas, some recipes become true traditions, and this Italian brioche cake is one of them. Pandoro captures the sweetness and elegance of the holiday season with its soft texture, light vanilla flavor, and generous dusting of powdered sugar that looks just like snow. It’s a cake made to be shared, sliced into generous pieces, and enjoyed together around the table.
Alongside the famous panettone, pandoro is one of the two classic Italian Christmas cakes. It is known for its iconic star shape, soft texture, and delicate flavor, making it a staple of holiday celebrations.
I finally achieved the perfect pandoro texture, without sourdough, thanks to proper kneading and a long rise divided into three stages. The result is a pandoro that is very soft and light, with a fine crumb that gently pulls apart. Unlike the panettone, which is rich in candied fruit and raisins, pandoro stands out for its simplicity and delicate flavor.
Even though it’s a large brioche cake with generous slices, it always disappears quickly. Making pandoro at home means carrying on an Italian Christmas tradition, perfect for sharing and enjoying together. It can also be served in a more festive way, sliced and filled with whipped cream or lemon curd, then stacked to create an elegant Christmas tree centerpiece for the holiday table.
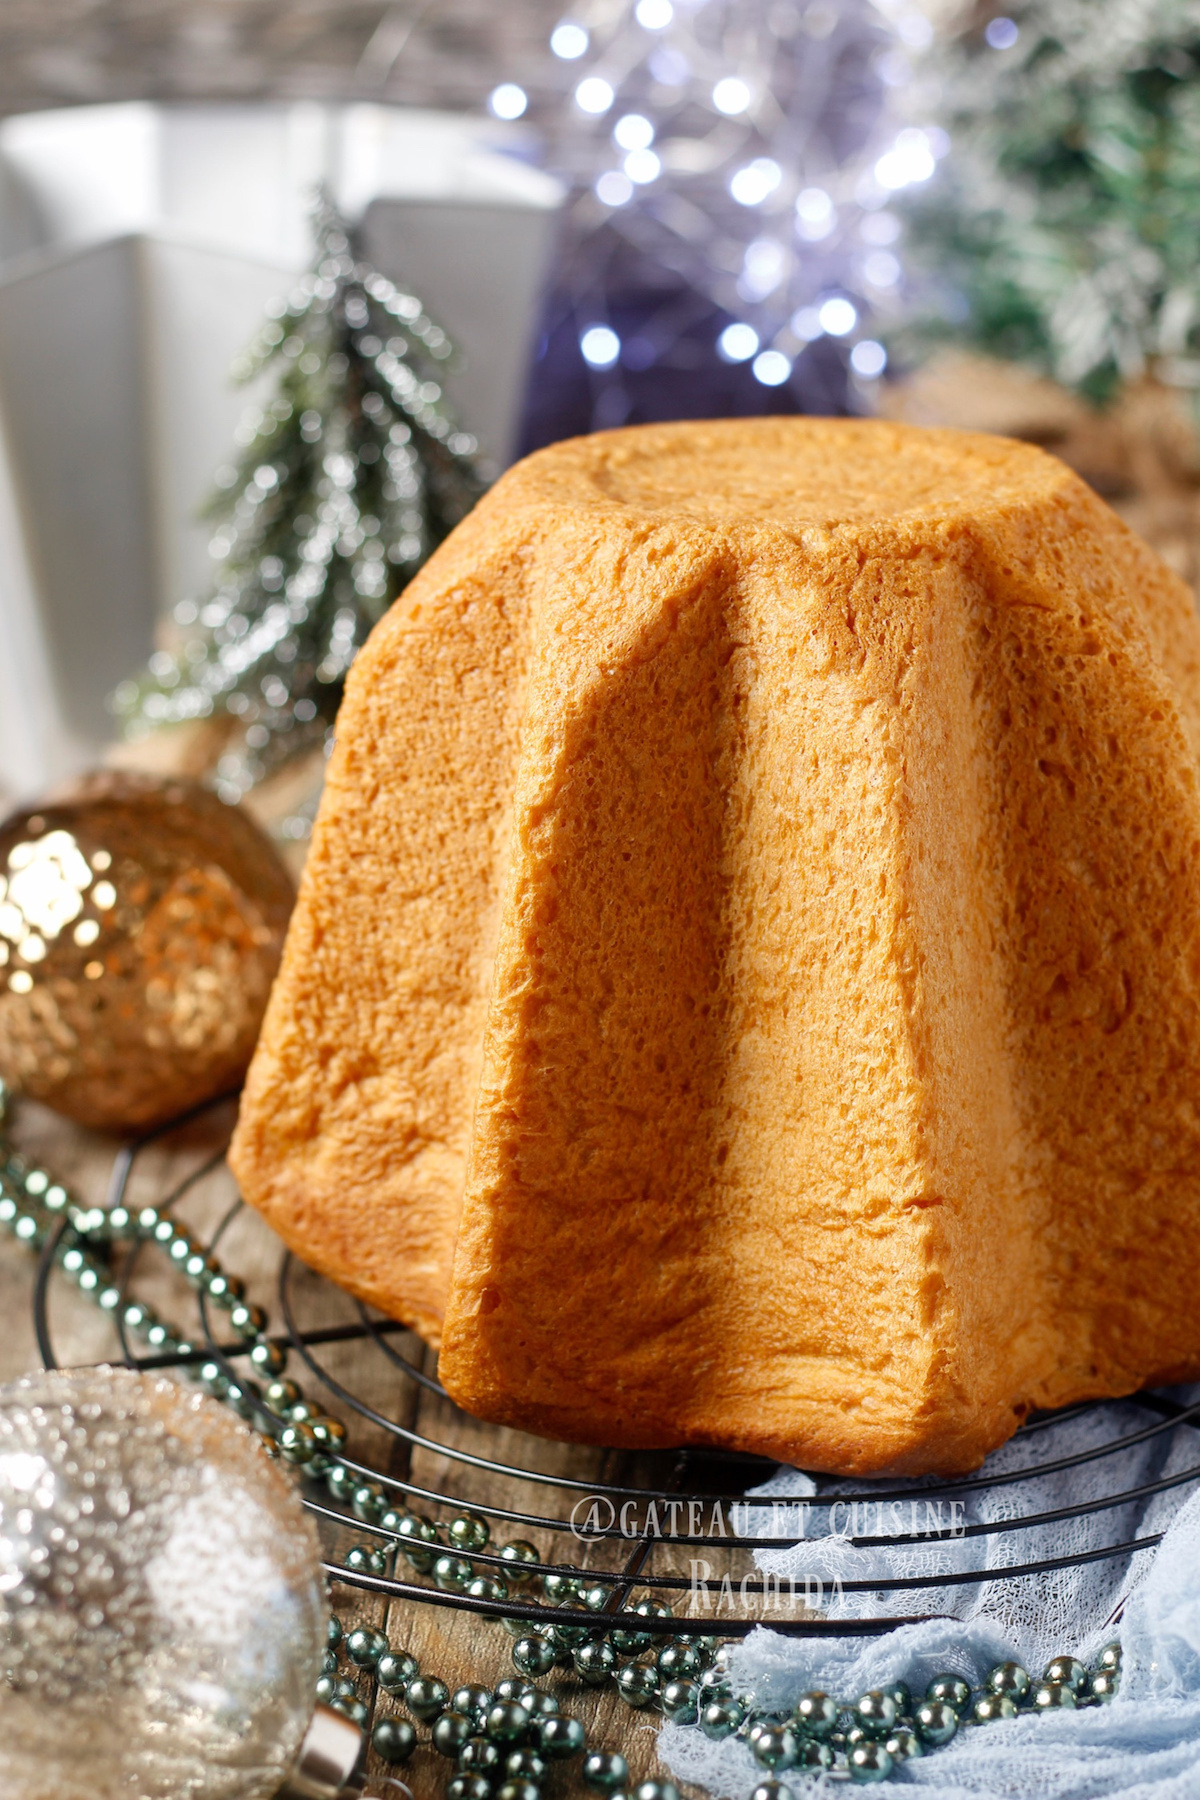
Table of Contents
Tips for making perfect pandoro
Choosing the right flour: Use a strong flour with at least 12% protein. In Italy, the most commonly used flour for pandoro is Manitoba flour, which usually has a strength between W330 and W350, depending on the brand.
The closest equivalent is bread flour with 12-13% protein, which provides the strength and elasticity needed for pandoro. A very good option is King Arthur Bread Flour, widely used for brioche and enriched doughs.
Prepare a biga: A biga is a yeast based pre ferment, similar to a poolish, prepared in advance. The biga plays an essential role in making a successful pandoro. It adds strength to the dough, improves fermentation, develops flavor, and helps create a lighter, more even texture.
Two stage kneading: Kneading is done in two stages. The first dough helps build the structure and develop the gluten network. After a resting and rising period, the dough becomes more relaxed and elastic. The second dough allows you to continue kneading without breaking down the structure that has already formed.
Knead slowly and patiently: Take your time to achieve a dough that is smooth, supple, and very elastic, able to stretch into a thin windowpane without tearing. Kneading should always be done at a low speed, using only speed 1 or 2, to avoid overheating the dough and to preserve gluten elasticity.
Keep an eye on the dough temperature: Make sure the dough temperature doesn’t exceed 25°C (77°F) during kneading. If the dough gets too warm, the butter will start to melt, the dough becomes more fragile, and it loses structure. If the dough begins to warm up before it is fully elastic and able to form a proper windowpane, place the mixing bowl in the freezer for about 10 minutes, then resume kneading.
Pandoro ingredients (for a 1 kg pandoro mold)
NB: You can print out the recipe card at the end of the article.
If you don’t have a pandoro mold, you can use a bundt mold instead. I’ve included the link to my mold in the recipe card.
Biga (yeast starter)
- 100 g strong flour (3.5 oz), at least 12% protein
- 1 egg yolk
- 20 g sugar (0.7 oz)
- 50 ml milk (1.7 fl oz)
- 15 g fresh baker’s yeast (0.5 oz)
First dough
- Biga (yeast starter)
- 250 g strong flour (8.8 oz), at least 12% protein
- 100 g granulated sugar (3.5 oz)
- 1 egg
- 1 egg yolk
- 100 g unsalted butter (3.5 oz)
- 3 g fresh baker’s yeast (0.1 oz)
- 20 ml water (0.7 fl oz)
Second dough
- First dough, risen
- 100 g strong flour (3.5 oz), at least 12% protein
- 1 egg
- 30 g granulated sugar (1 oz)
- 100 g unsalted butter (3.5 oz)
- 5 g salt (0.18 oz)
- 2 teaspoons vanilla extract
How to make pandoro
Prepare the biga
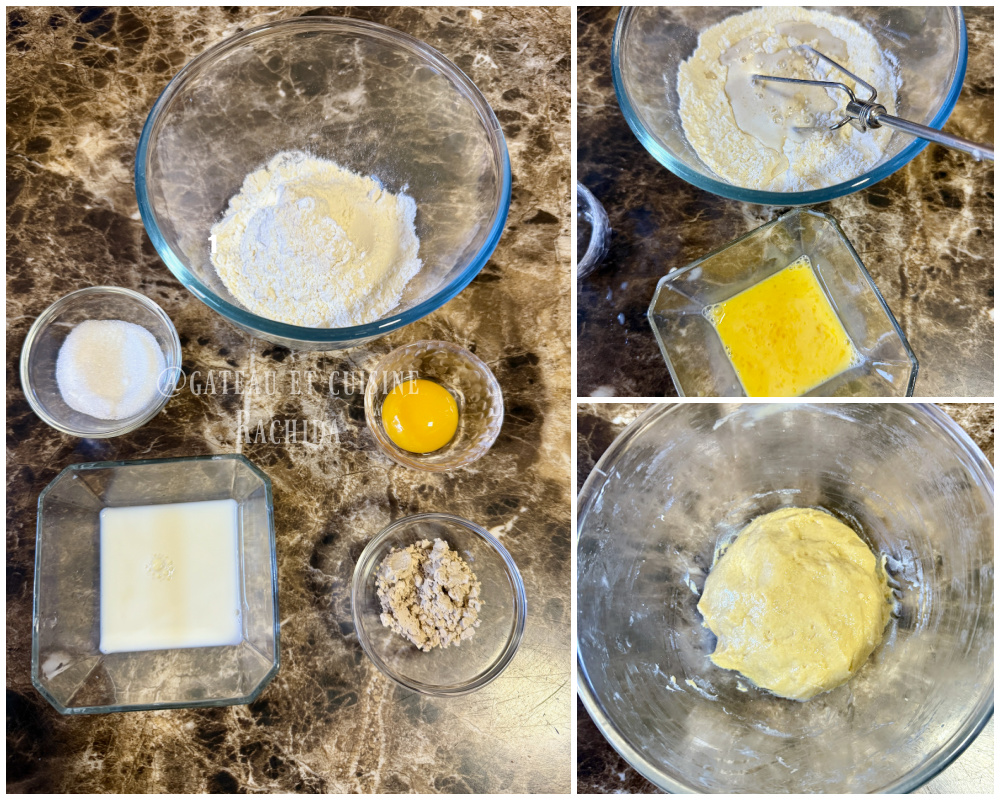
1. Place the flour and sugar in a bowl or in the bowl of a stand mixer.
2. Dissolve the fresh yeast in half of the milk. Mix the egg yolk with the remaining milk, then pour everything over the flour.
3. Mix with a whisk or spoon, then work the dough with your hand for 1 to 2 minutes.
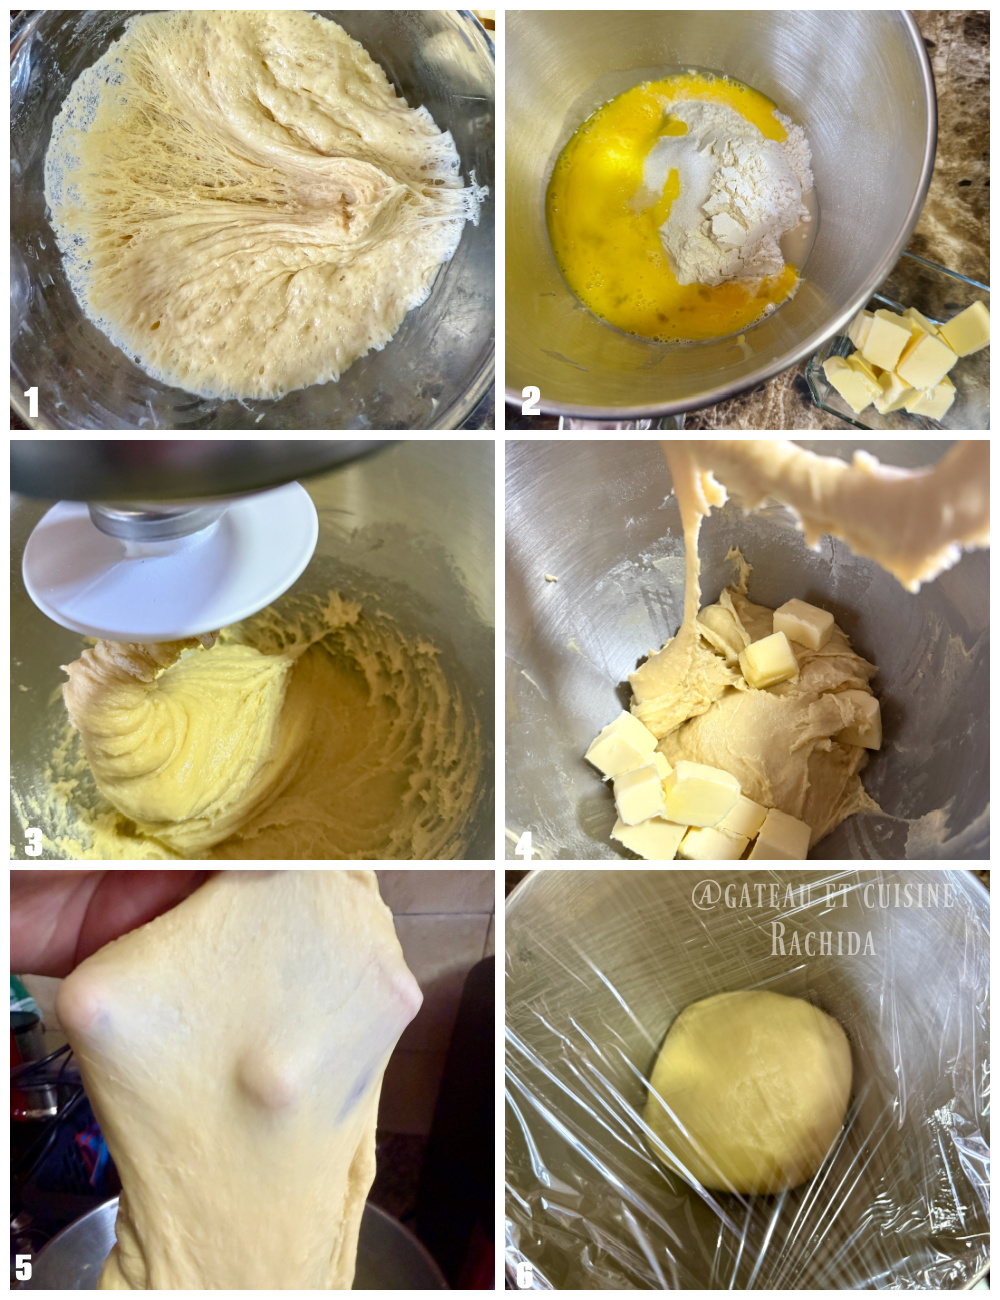
4. Cover and let rise in a draft free spot until the biga triples in volume. This can take 1½ to 3 hours, depending on room temperature.
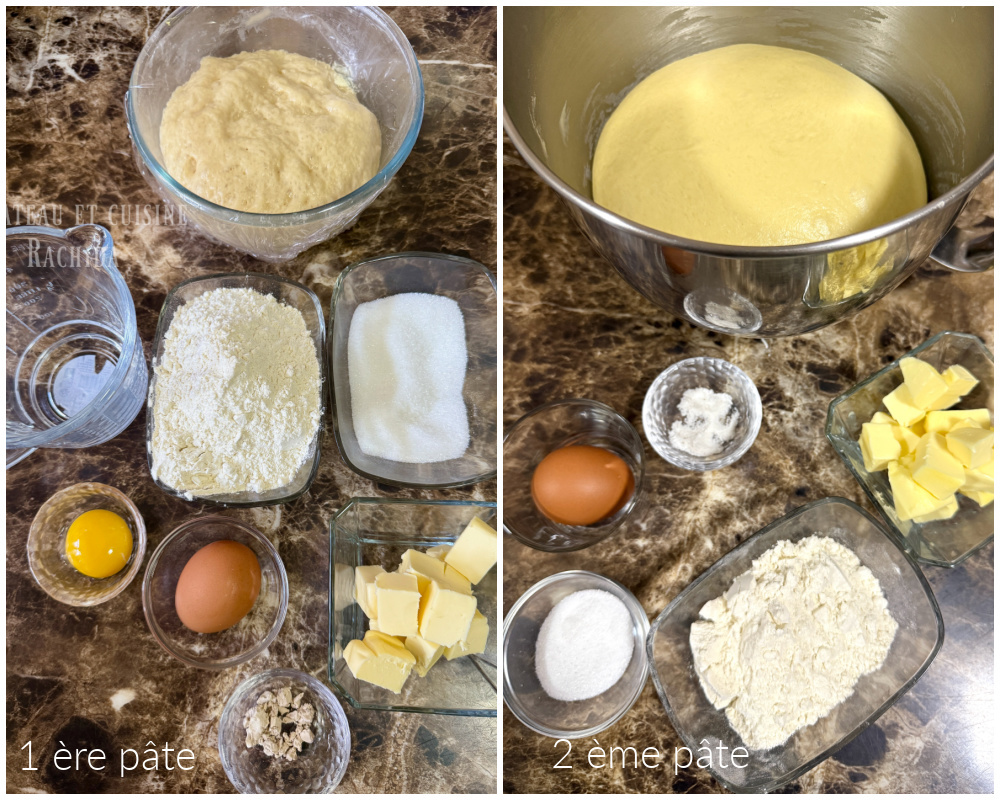
Prepare the first dough (first kneading)
1. Dissolve the fresh yeast in the water reserved for the first dough.
2. Place the biga in the bowl of a stand mixer, then add the dissolved yeast, flour, sugar, egg, and egg yolk.
3. Knead for 5 minutes on speed 1.
4. Continue kneading for 10 minutes on speed 2, until the dough starts to wrap around the dough hook.
5. Add the butter, then continue kneading for 10 minutes on speed 2.
Note: If the dough warms up and reaches 26°C (79°F), stop kneading, place the mixing bowl in the freezer for 10 minutes, then resume kneading.
6. The dough should be smooth, pull away from the sides of the bowl, and wrap nicely around the dough hook.
7. It should be very elastic. When doing the windowpane test, you should be able to stretch it very thin until you can see your fingers through it, without tearing.
8. Shape the dough into a smooth ball and cover the mixer bowl with plastic wrap.
9. Cover with a kitchen towel and let rise until the dough triples in volume. This usually takes about 4 hours, depending on room temperature. Always rely on the volume rather than the time. The dough should triple.
Tip for rising dough in winter
Place the bowl in a turned off oven with a bowl of boiling water set on the bottom of the oven.
If the dough is slow to rise, replace the cooled water with fresh boiling water. This creates a simple homemade proofing environment.
Prepare the second dough (final kneading)
1. Once the dough has tripled in volume, place the bowl in the refrigerator for about 20 minutes to cool the dough.
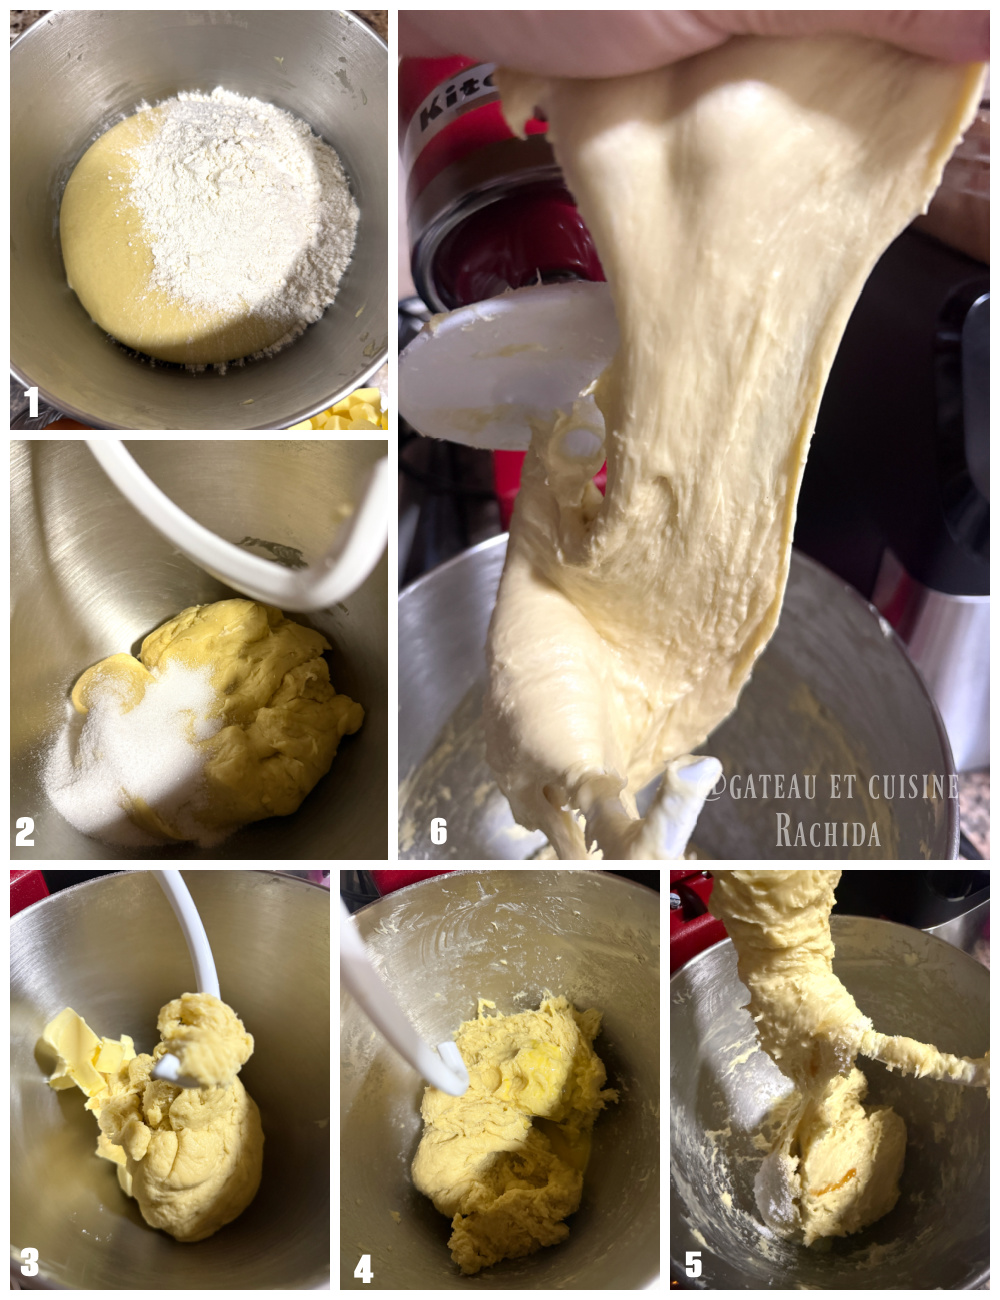
2. Remove the dough from the refrigerator, add the flour (100 g / 3.5 oz ) on top, then knead for 5 minutes on speed 1 to incorporate the flour.
3. Add the sugar and continue kneading for 5 minutes, still on speed 1.
4. Add the butter and knead for 5 minutes on speed 2.
5. Add the egg, then continue kneading for about 7 minutes, until it is fully incorporated.
6. Add the vanilla and salt, then continue kneading on speed 2 for 10 minutes, until you get a smooth, supple, elastic dough that pulls away from the sides of the bowl and wraps around the dough hook.
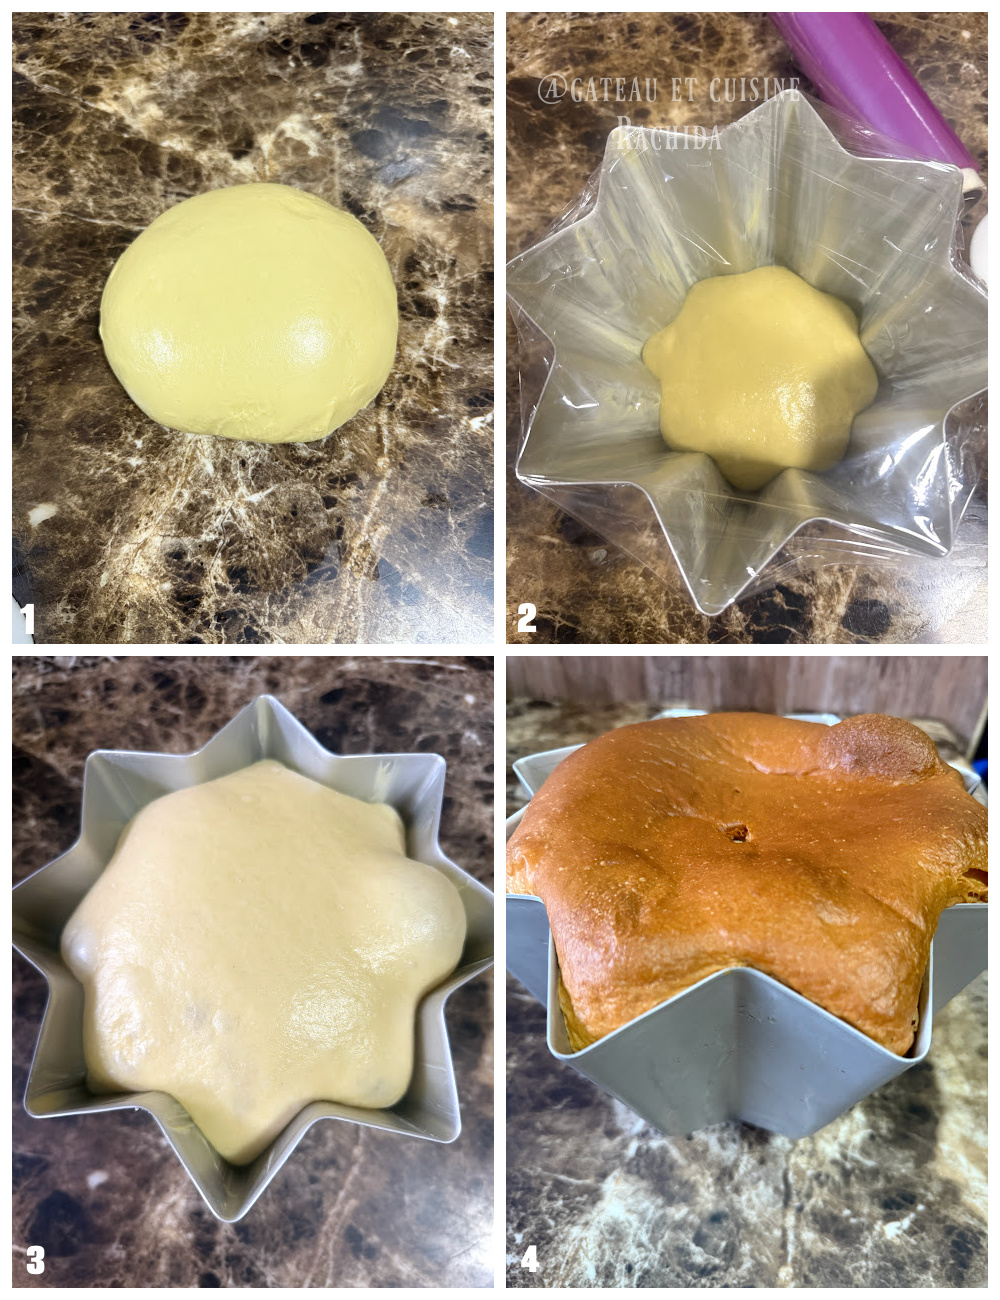
7. Turn the dough out onto a lightly floured work surface. Fold it over itself 3 to 4 times, bringing the edges toward the center. Flip the dough over, then shape it into a smooth, tight ball. Let it rest uncovered for 20 minutes.
8. Generously butter a 1 kg pandoro mold. Shape the dough again into a tight ball, then place it in the mold.
9. Cover the mold loosely with plastic wrap and let the dough rise in a draft free spot until it almost reaches the top of the mold. I placed the mold in a turned off oven and let it rise overnight.
10. Toward the end of the rise, gently remove the plastic wrap so it doesn’t stick to the dough.
Baking the pandoro
1. Preheat the oven to 170°C (340°F), using conventional (static) heat.
2. Place the pandoro in the oven and bake for about 55 minutes.
3. Check for doneness after 45 minutes. The pandoro should be nicely golden, and a skewer inserted into the center should come out clean.
Note: The top of the pandoro tends to brown fairly quickly. Keep an eye on it after 20 minutes of baking and loosely cover with aluminum foil if needed.
4. Remove from the oven and let rest for 25 minutes, then unmold onto a wire rack.
5. Cover with a clean kitchen towel and let cool completely before serving, generously dusted with powdered sugar. You can also slice it horizontally and fill it with mascarpone whipped cream for a more indulgent presentation.
How to store pandoro
Pandoro keeps very well at room temperature, stored in a cool, dry place, away from heat and humidity.
Once completely cooled, wrap the pandoro in plastic wrap or place it in a well sealed cellophane bag. It will stay soft and moist for 4 to 5 days.
Other recipes you might enjoy
Stollen, traditional German Christmas cake
Cougnous, Belgian Christmas brioches
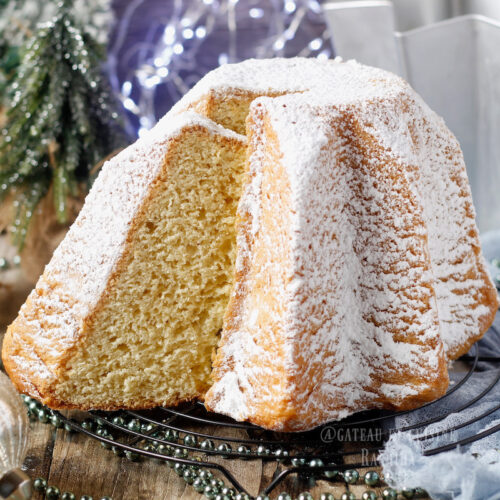
Italian Pandoro, Traditional Christmas Cake
Matériel
INGRÉDIENTS
Pandoro ingredients (for a 1 kg pandoro mold)
Biga (yeast starter)
- 100 g strong flour at least 12% protein
- 1 egg yolk
- 20 g sugar
- 50 ml milk
- 15 g fresh baker’s yeast
First dough
- Biga yeast starter
- 250 g strong flour at least 12% protein
- 100 g granulated sugar
- 1 egg
- 1 egg yolk
- 100 g unsalted butter
- 3 g fresh baker’s yeast
- 20 ml water
Second dough
- First dough risen
- 100 g strong flour at least 12% protein
- 1 egg
- 30 g granulated sugar
- 100 g unsalted butter
- 5 g salt
- 2 teaspoons vanilla extract
PRÉPARATION
Prepare the biga
- Place the flour and sugar in a bowl or in the bowl of a stand mixer.
- Dissolve the fresh yeast in half of the milk. Mix the egg yolk with the remaining milk, then pour everything over the flour.
- Mix with a whisk or spoon, then work the dough with your hand for 1 to 2 minutes.
- Cover and let rise in a draft free spot until the biga triples in volume. This can take 1½ to 3 hours, depending on room temperature.
Prepare the first dough (first kneading)
- Dissolve the fresh yeast in the water reserved for the first dough.
- Place the biga in the bowl of a stand mixer, then add the dissolved yeast, flour, sugar, egg, and egg yolk.
- Knead for 5 minutes on speed 1.
- Continue kneading for 10 minutes on speed 2, until the dough starts to wrap around the dough hook.
- Add the butter, then continue kneading for 10 minutes on speed 2.
- Note: If the dough warms up and reaches 26°C (79°F), stop kneading, place the mixing bowl in the freezer for 10 minutes, then resume kneading.
- The dough should be smooth, pull away from the sides of the bowl, and wrap nicely around the dough hook.
- It should be very elastic. When doing the windowpane test, you should be able to stretch it very thin until you can see your fingers through it, without tearing.
- Shape the dough into a smooth ball and cover the mixer bowl with plastic wrap.
- Cover with a kitchen towel and let rise until the dough triples in volume. This usually takes about 4 hours, depending on room temperature. Always rely on the volume rather than the time. The dough should triple.
- Tip for rising dough in winter :Place the bowl in a turned off oven with a bowl of boiling water set on the bottom of the oven.If the dough is slow to rise, replace the cooled water with fresh boiling water. This creates a simple homemade proofing environment.
Prepare the second dough (final kneading)
- Once the dough has tripled in volume, place the bowl in the refrigerator for about 20 minutes to cool the dough.
- Remove the dough from the refrigerator, add the flour (100 g / 3.5 oz ) on top, then knead for 5 minutes on speed 1 to incorporate the flour.
- Add the sugar and continue kneading for 5 minutes, still on speed 1.
- Add the butter and knead for 5 minutes on speed 2.
- Add the egg, then continue kneading for about 7 minutes, until it is fully incorporated.
- Add the vanilla and salt, then continue kneading on speed 2 for 10 minutes, until you get a smooth, supple, elastic dough that pulls away from the sides of the bowl and wraps around the dough hook.
- Turn the dough out onto a lightly floured work surface. Fold it over itself 3 to 4 times, bringing the edges toward the center. Flip the dough over, then shape it into a smooth, tight ball. Let it rest uncovered for 20 minutes.
- Generously butter a 1 kg pandoro mold. Shape the dough again into a tight ball, then place it in the mold.
- Cover the mold loosely with plastic wrap and let the dough rise in a draft free spot until it almost reaches the top of the mold. I placed the mold in a turned off oven and let it rise overnight.
- Toward the end of the rise, gently remove the plastic wrap so it doesn’t stick to the dough.
Baking the pandoro
- Preheat the oven to 170°C (340°F), using conventional (static) heat.
- Place the pandoro in the oven and bake for about 55 minutes.
- Check for doneness after 45 minutes. The pandoro should be nicely golden, and a skewer inserted into the center should come out clean.
- Note: The top of the pandoro tends to brown fairly quickly. Keep an eye on it after 20 minutes of baking and loosely cover with aluminum foil if needed.
- Remove from the oven and let rest for 25 minutes, then unmold onto a wire rack.
- Cover with a clean kitchen towel and let cool completely before serving, generously dusted with powdered sugar. You can also slice it horizontally and fill it with mascarpone whipped cream for a more indulgent presentation.
Thank you for your visit and your comments