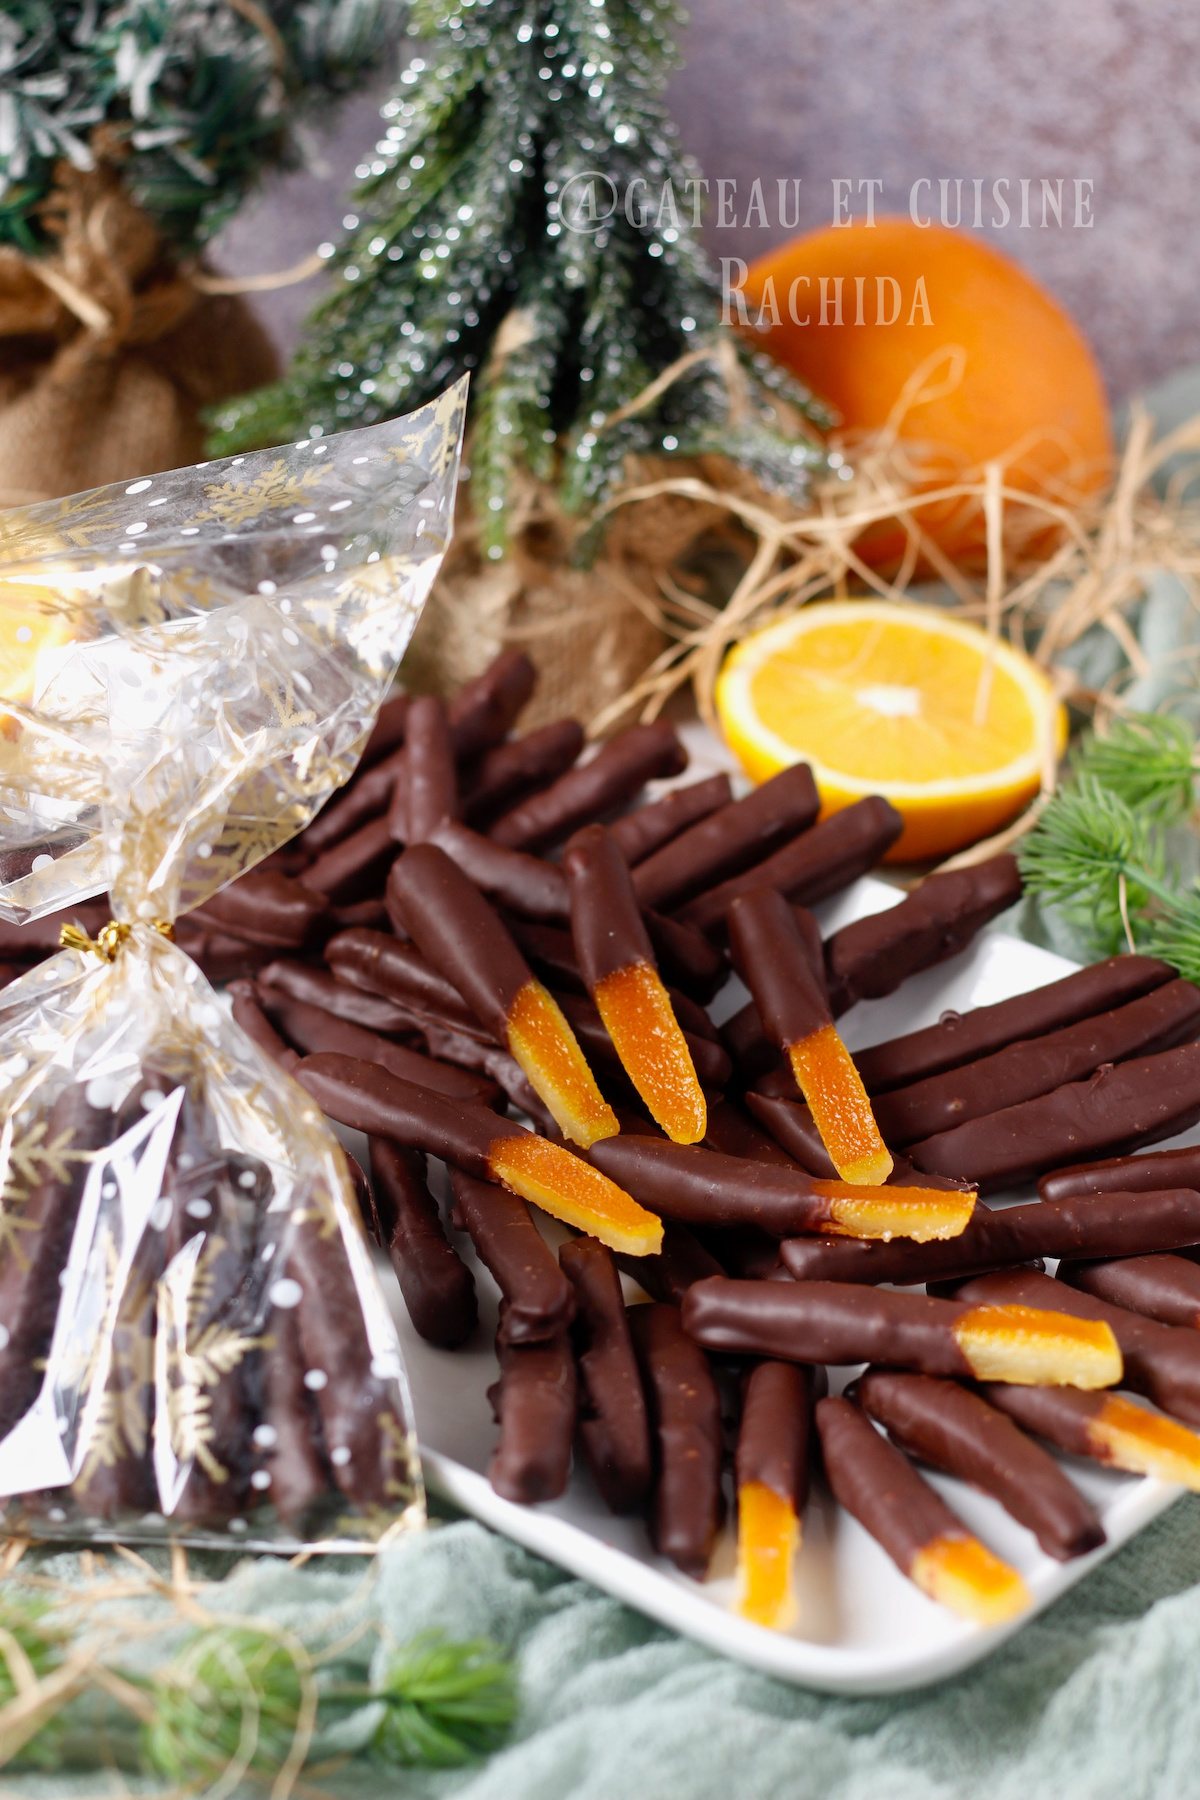
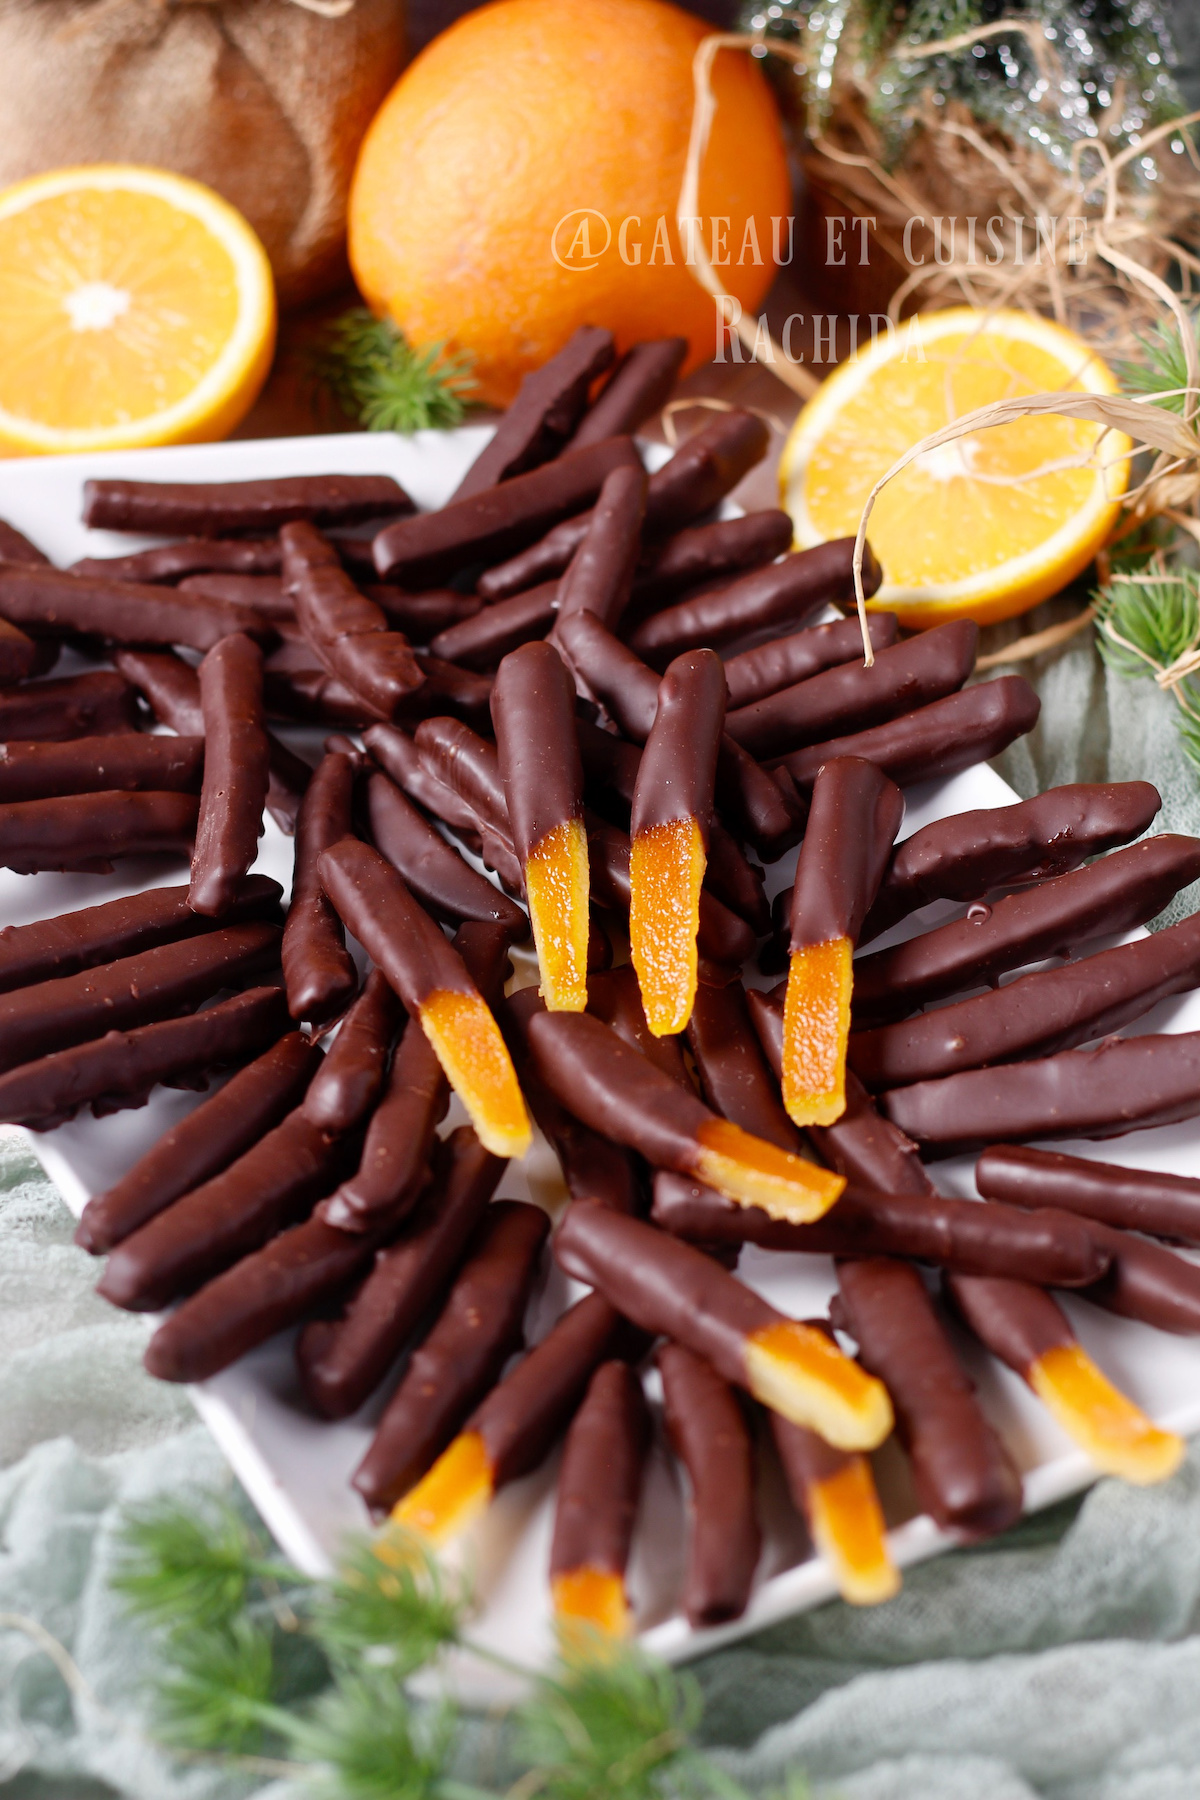
Candied orange peel coated in dark chocolate, known in French as orangettes, is made from thin strips of candied orange peel covered in rich dark chocolate. The balance between the gentle bitterness of the orange and the intensity of the chocolate creates a perfectly balanced bite with a texture that is both tender and pleasantly crisp. Simple to make, this homemade treat makes an elegant edible gift or a delicious bite to enjoy with a cup of coffee.
Homemade chocolate candied orange peel is a timeless confection, loved for its simple elegance and rich flavor. It fits perfectly into any assortment of homemade chocolates, alongside chocolate truffles, homemade chocolate gianduja, and other festive treats often prepared for the holidays or given as edible gifts. No thermometer is needed for the candying process itself, but tempering the chocolate is highly recommended to achieve a crisp snap and a smooth, glossy finish. A thermometer is only required for that step.
The orange peels are blanched several times to mellow their natural bitterness, then slowly candied in a sugar syrup. This process is done in stages and requires a bit of patience, but it remains very approachable and only takes a few minutes at a time. Unlike more time intensive confections such as candied chestnuts, this method does not require days of waiting.
Once the peels are fully candied, they can be completely coated in dark chocolate or simply dipped on one side for a quicker, more rustic finish. Both options work beautifully and allow you to tailor the final result to your preference.
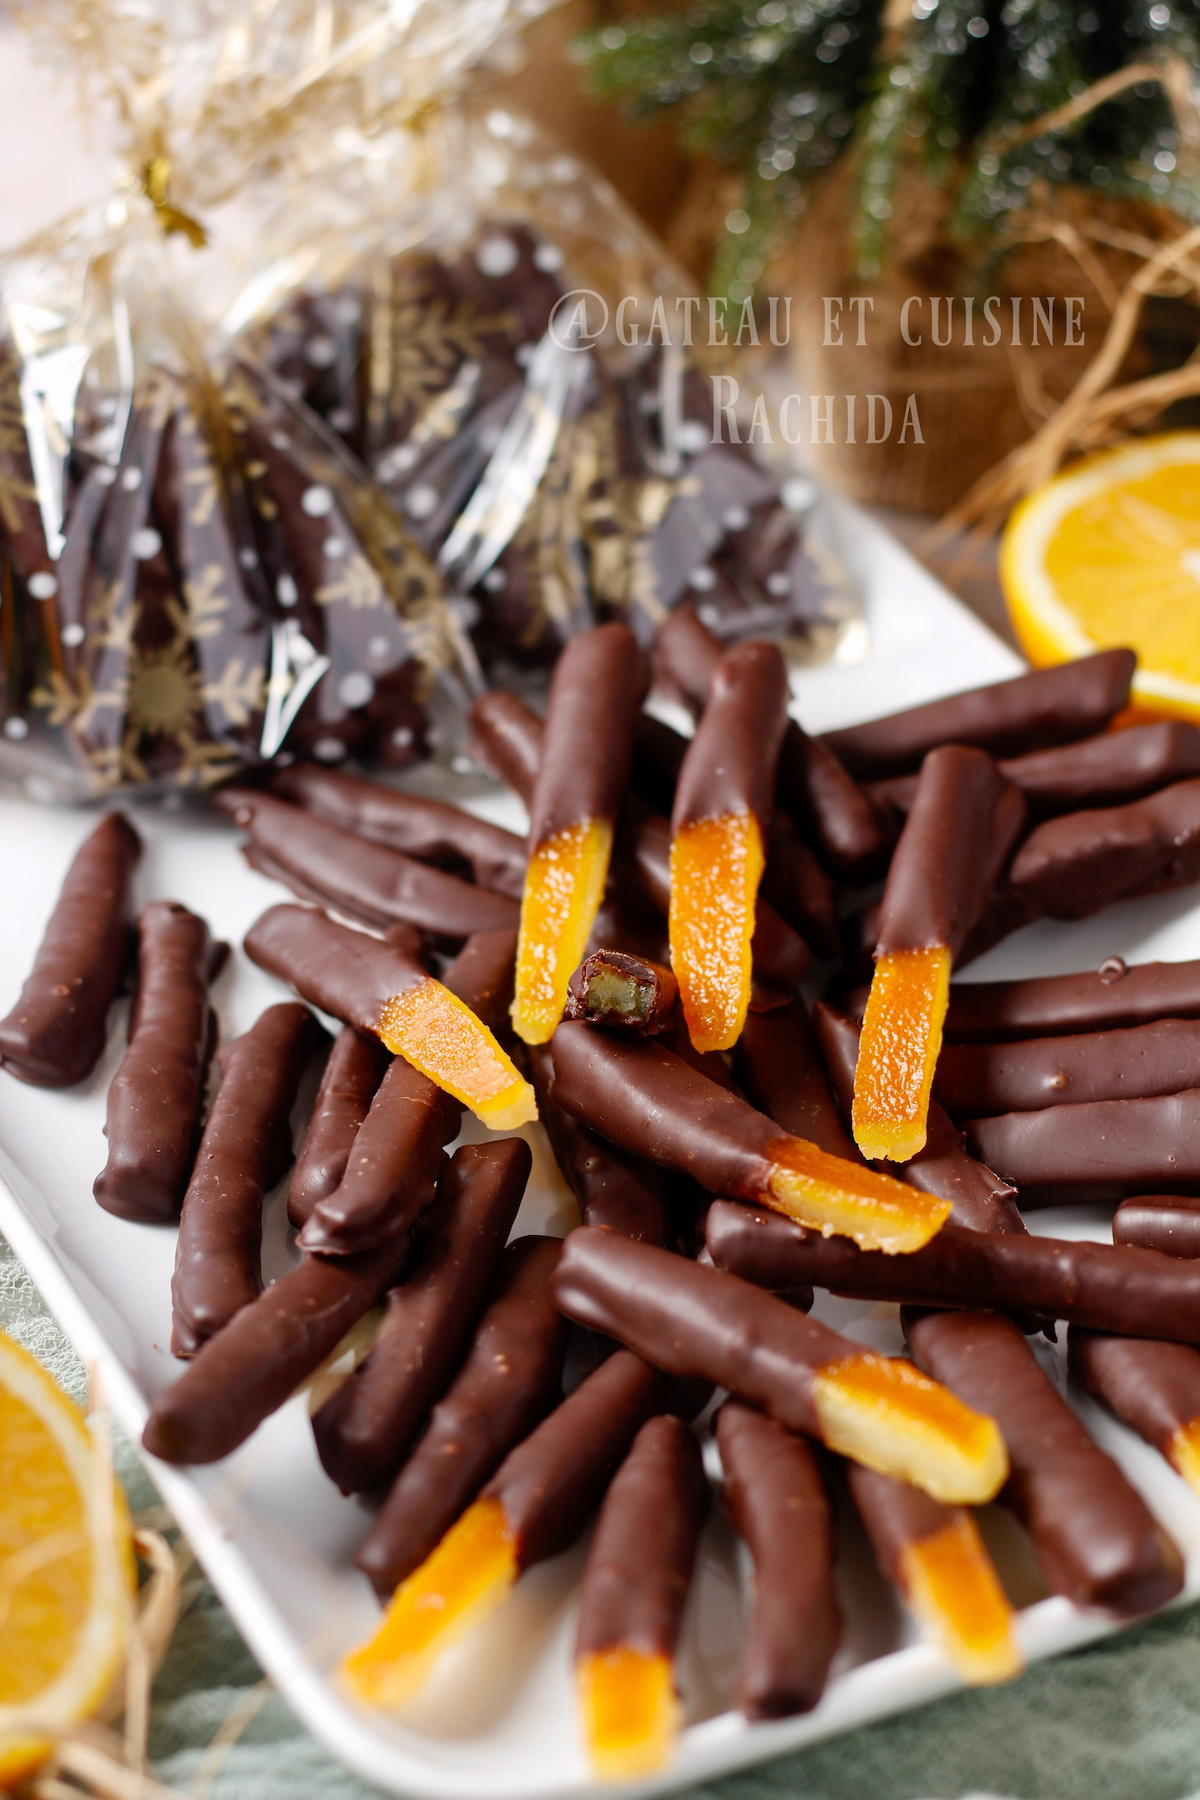
Table of Contents
Tips for Perfect Homemade Candied Orange Peel
Choosing the oranges: Use organic, unwaxed oranges with a thick peel, as they are best suited for candying. Cut the peels into even strips so they cook and finish uniformly.
Properly blanching the peels: Blanch the orange peels until they are tender but still hold their shape. This step helps reduce bitterness and ensures a soft, pleasant texture after candying.
Drying after candying: After candying the peels in sugar syrup, let them drain thoroughly until the next day before coating them in chocolate. This prevents the syrup from seeping out and bleeding through the chocolate coating.
Tempering the chocolate: Temper the chocolate to achieve a crisp snap and prevent it from melting too quickly in your hand. For this recipe, I chose to temper the chocolate using Mycryo cocoa butter.
Preventing syrup seepage: To prevent syrup from seeping through the chocolate coating, lightly dust the candied orange peel with cocoa powder before coating. Gently shake off any excess cocoa before dipping into the chocolate.
Simplified version: You can also use ready made candied orange peel strips and simply dip them in chocolate.
Ingredients for about 80 pieces of candied orange peel
Note: You’ll find the printable recipe card at the end of the post.
- 4 to 5 large navel orange – preferably organic and unwaxed (230 g candied orange peel strips – 8 oz)
- 230 g granulated sugar (8 oz)
- 400 ml water (13.5 fl oz)
- 2 pinches salt or baking soda (optional)
- 300 g dark chocolate for coating (10.6 oz)
- 3 g cocoa butter Mycryo for tempering the chocolate (0.1 oz, optional. You can also use a classic tempering method)
If you’re used to baking, I recommend using a precision scale for small measurements.
How to Candy Orange Peel
Preparing the orange peels
1. Wash the oranges thoroughly, then pat them dry.
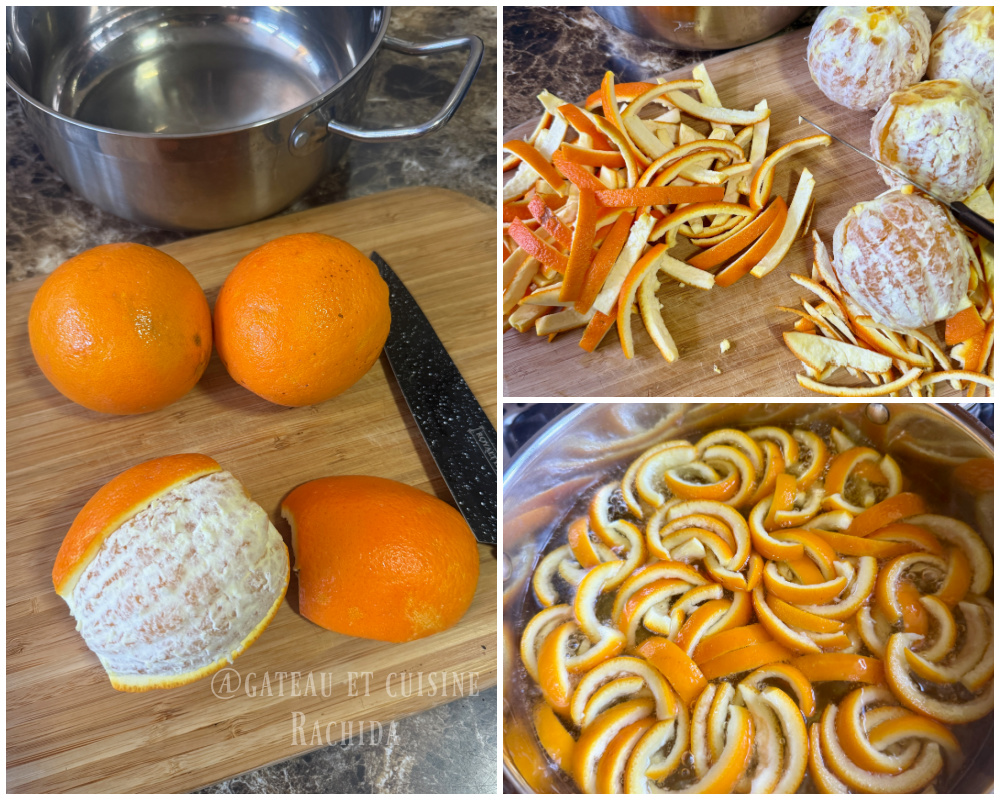
2. Score the peel of each orange into 3 or 4 sections, then gently remove the peels by sliding your finger underneath.
3. Cut each piece of orange peel into strips about 6 to 8 cm long (2½ to 3 inches) and about ½ cm wide (¼ inch).
Save the orange flesh to make a fruit salad or fresh juice.
Blanching the Orange Peels
1. In a large saucepan, cover the orange peels with cold water and bring to a boil. Once boiling, cook for 5 minutes, then drain and rinse. This step will be repeated twice.
2. Return the peels to the saucepan after discarding the cooking water. Cover with fresh cold water, add 2 pinches of salt or baking soda, and bring back to a boil. Cook for 5 minutes once boiling, then drain and rinse.
3. Return the orange peels to the saucepan one last time, cover with fresh cold water, and bring to a boil. Cook for another 5 minutes, then drain.
Note: Adjust the blanching time so the peels become tender while still holding their shape. If the orange peel is thin, it can become too soft if over blanched.
Candying Orange Peel
1. In the same saucepan, combine the water and sugar and bring to a boil over medium heat.
2. Once boiling, add the orange peels and cook for 5 minutes from the moment the boil resumes. Turn off the heat, cover, and let cool completely, preferably until the next day. You may continue the process the same day if needed. The peels will gradually absorb the syrup, becoming translucent.
3. The next day, bring the syrup and orange peels back to a boil. Cook for 5 minutes from the moment the boil resumes, then turn off the heat and let cool completely. You can stop at this stage if the syrup has reduced sufficiently.
4. For the third and final cooking, bring everything back to a boil, then continue cooking for about 5 minutes, until the syrup is reduced and just barely coats the orange peels. Be careful not to reduce it too much, as the syrup can become overly sticky or start to caramelize. The peels should be translucent. Turn off the heat and let cool slightly.
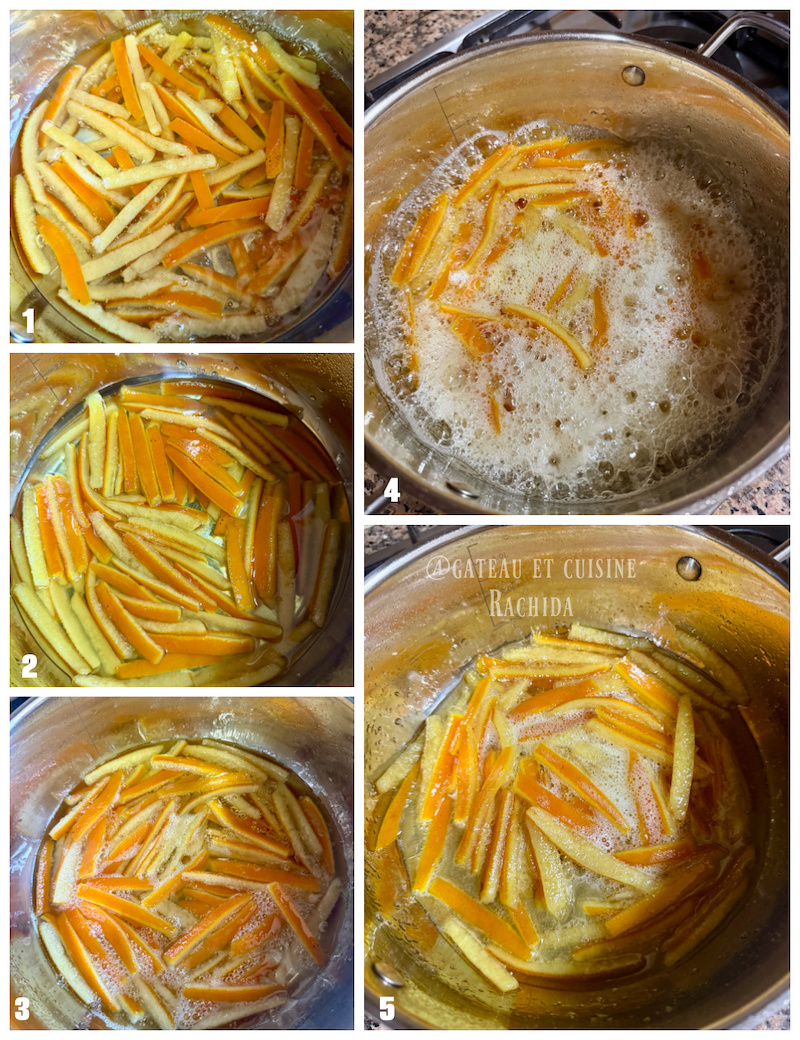
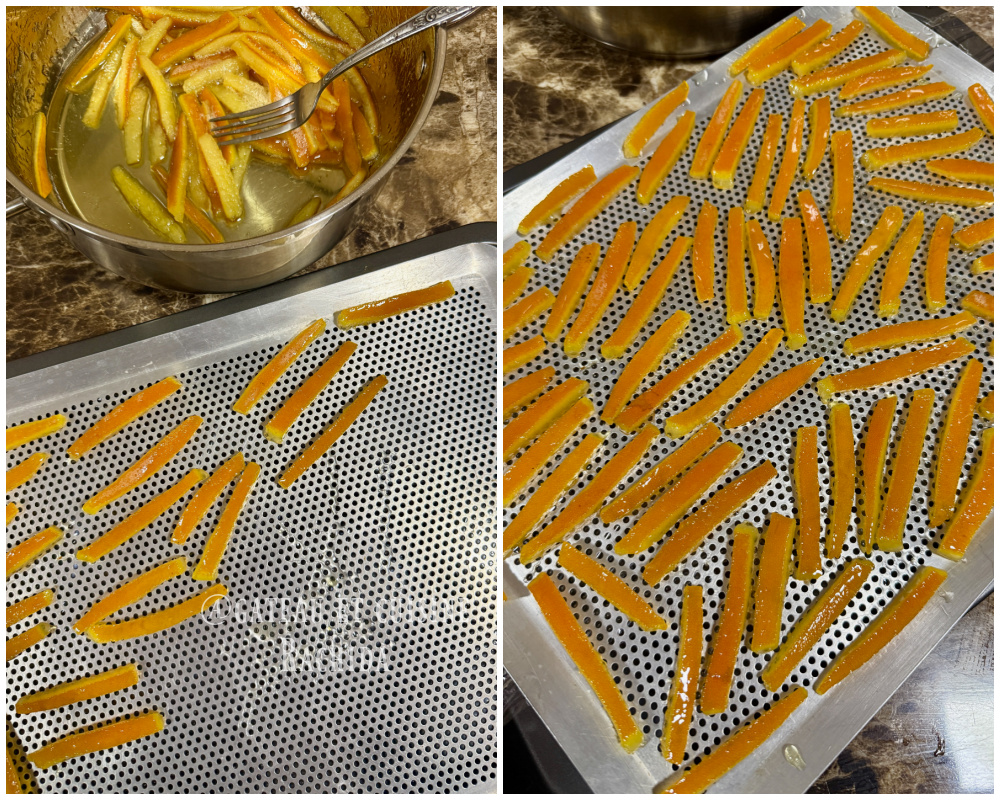
5. Remove the candied orange peel from the syrup and place it on a perforated baking tray. Let it drain thoroughly until the next day.
The following day, coat the candied orange peel in chocolate.
Coating the Candied Orange Peel with Dark Chocolate
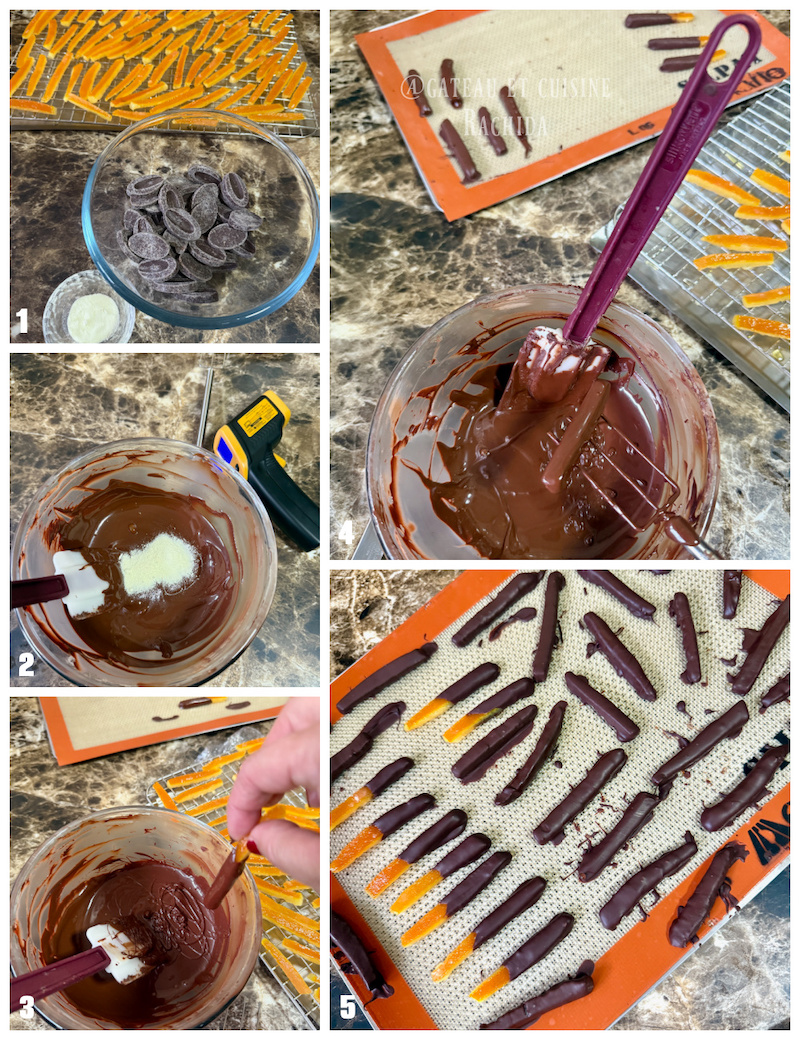
1. Gently melt the dark chocolate using a double boiler or the microwave until it reaches 50°C (122°F). Remove from the heat, then let the chocolate cool down to 34°C (93°F), stirring occasionally.
2. Add the cocoa butter Mycryo and mix well until completely dissolved.
3. Allow the chocolate to cool further to 31 to 32°C (88 to 90°F), which is the ideal working temperature for dark chocolate.
Tempering curve reminder with Mycryo
- Dark chocolate melted to 50°C (122°F)
- Mycryo added at 34°C (93°F)
- Working temperature 31 to 32°C (88 to 90°F)
You can either dip just half of each strip or fully coat the candied orange peel, depending on the finish you prefer. I like to do both.
4. Dip one end of each strip into the tempered chocolate, then let the excess chocolate drip off before placing them on a silicone mat or parchment paper.
5. For full coating, dip the candied orange peel one piece at a time into the melted chocolate. Remove using a chocolate dipping fork, tongs, or a regular fork.
6. Let the excess chocolate drip back into the bowl before placing the pieces on a silicone baking mat or parchment paper.
7. Allow the chocolate to set and crystallize for about 20 minutes at room temperature.
8. Store the candied orange peel in an airtight container or package them in bags, perfect for gifting.
Storing Chocolate Coated Candied Orange Peel
Once the chocolate is fully set and crystallized, store the candied orange peel in an airtight container or package them in gift bags. If stacking them, separate each layer with parchment paper.
Keep them in a cool, dry place, away from heat and humidity.
You can also freeze them and serve them straight from the freezer. The chocolate stays nicely crisp, while the candied orange peel remains tender.
When properly candied and coated with well tempered chocolate, they can be stored for up to one year.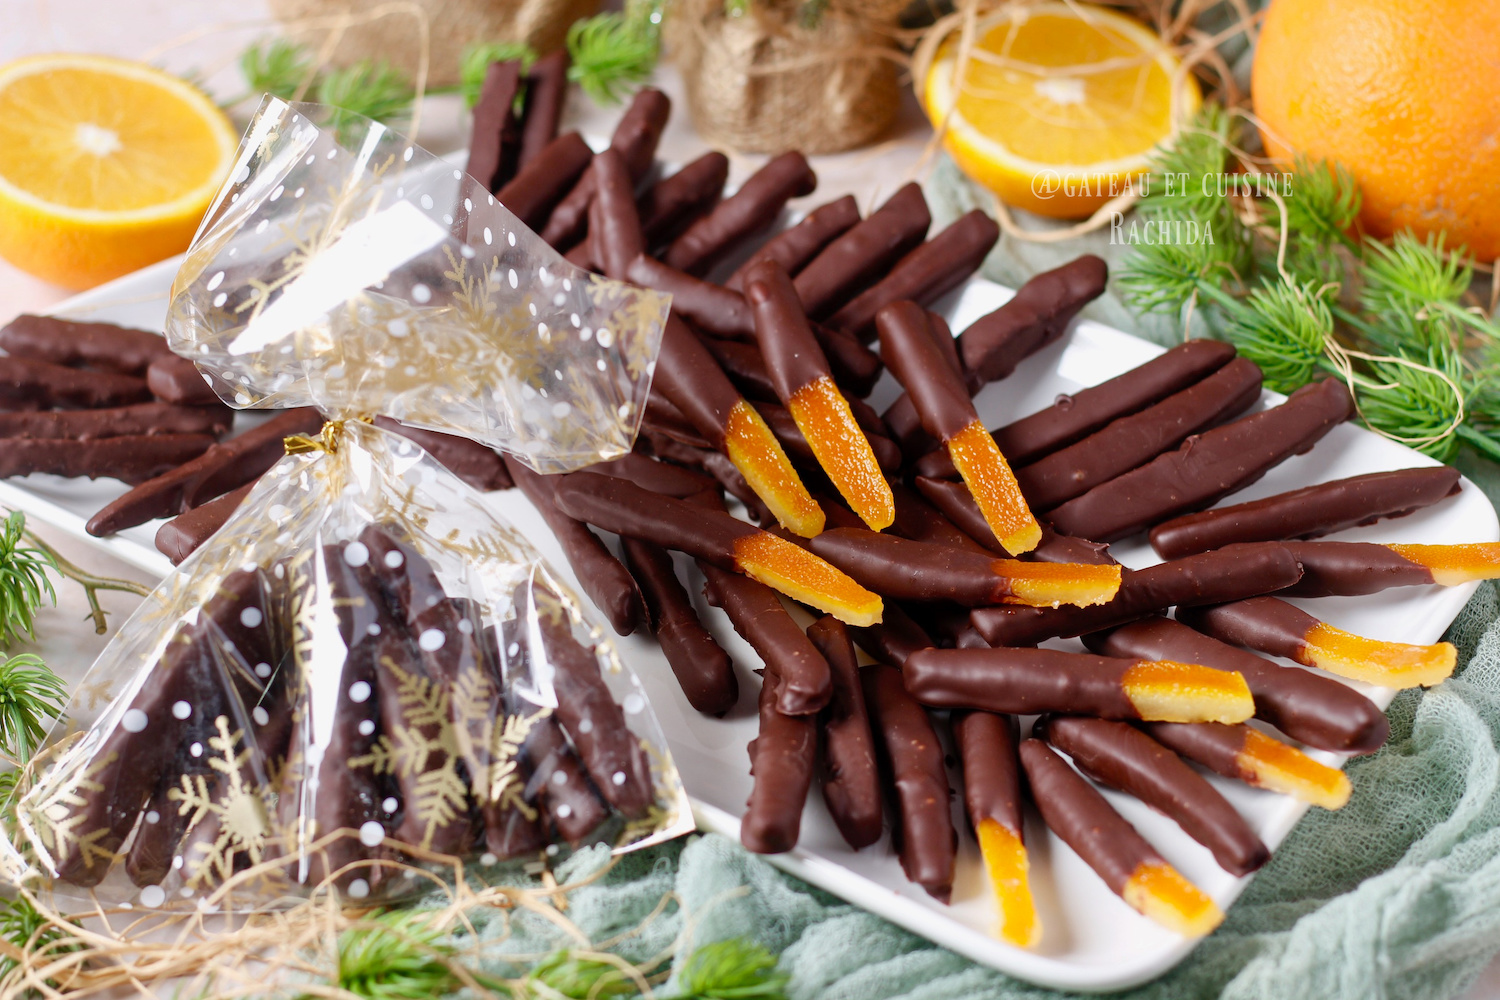
FAQ: How to Make Perfect Chocolate Candied Orange Peel
Why blanch the orange peels several times?
Blanching helps reduce the natural bitterness of orange peels. Repeating this step several times results in balanced, pleasant tasting candied orange peel that is not overly bitter.
Why let the peels dry well before coating them in chocolate?
If the peels are not properly dried, syrup can seep through the chocolate coating after dipping. The peels should be well drained and dry on the surface to ensure a clean, professional finish.
Do you need to temper the chocolate?
Yes, tempering the chocolate is essential for successful chocolate coated candied orange peel. It creates a crisp shell that sets properly and does not melt in your hand. However, if you plan to eat them quickly, you can simply dip the peels in melted chocolate without tempering.
Why Is My Chocolate Sticky or Not Fully Set?
This usually happens when the chocolate is not properly tempered or when it is worked at too high a temperature. Proper tempering ensures stable crystallization and a chocolate coating that sets well and feels dry to the touch.
Can you use the same recipe with other citrus fruits?
Yes, this recipe works well with other citrus fruits such as lemon, grapefruit, or blood orange. Simply adjust the number of blanching steps depending on the bitterness of the citrus used.
Can you make candied orange peel without chocolate?
Yes, absolutely. Once the peels are fully candied and well drained, you can roll them in granulated sugar. They can then be enjoyed on their own or used in baking and pastry recipes.
More Christmas Recipes for the Holidays

Recipe Homemade Chocolate Orangettes
INGRÉDIENTS
- 4 to 5 large navel orange preferably organic and unwaxed (230 g candied orange peel strips - 8 oz)
- 230 g granulated sugar
- 400 ml water
- 2 pinches salt or baking soda optional
- 300 g dark chocolate for coating
- 3 g cocoa butter Mycryo for tempering the chocolate 0.1 oz, optional. You can also use a classic tempering method
PRÉPARATION
Preparing the orange peels
- Wash the oranges thoroughly, then pat them dry.
- Score the peel of each orange into 3 or 4 sections, then gently remove the peels by sliding your finger underneath.
- Cut each piece of orange peel into strips about 6 to 8 cm long (2½ to 3 inches) and about ½ cm wide (¼ inch).
- Save the orange flesh to make a fruit salad or fresh juice.
Blanching the Orange Peels
- In a large saucepan, cover the orange peels with cold water and bring to a boil. Once boiling, cook for 5 minutes, then drain and rinse. This step will be repeated twice.
- Return the peels to the saucepan after discarding the cooking water. Cover with fresh cold water, add 2 pinches of salt or baking soda, and bring back to a boil. Cook for 5 minutes once boiling, then drain and rinse.
- Return the orange peels to the saucepan one last time, cover with fresh cold water, and bring to a boil. Cook for another 5 minutes, then drain.
- Note: Adjust the blanching time so the peels become tender while still holding their shape. If the orange peel is thin, it can become too soft if over blanched.
Candying Orange Peel
- In the same saucepan, combine the water and sugar and bring to a boil over medium heat.
- Once boiling, add the orange peels and cook for 5 minutes from the moment the boil resumes. Turn off the heat, cover, and let cool completely, preferably until the next day. You may continue the process the same day if needed. The peels will gradually absorb the syrup, becoming translucent.
- The next day, bring the syrup and orange peels back to a boil. Cook for 5 minutes from the moment the boil resumes, then turn off the heat and let cool completely. You can stop at this stage if the syrup has reduced sufficiently.
- For the third and final cooking, bring everything back to a boil, then continue cooking for about 5 minutes, until the syrup is reduced and just barely coats the orange peels. Be careful not to reduce it too much, as the syrup can become overly sticky or start to caramelize. The peels should be translucent. Turn off the heat and let cool slightly.
- Remove the candied orange peel from the syrup and place it on a perforated baking tray. Let it drain thoroughly until the next day.
- The following day, coat the candied orange peel in chocolate.
Coating the Candied Orange Peel with Dark Chocolate
- Gently melt the dark chocolate using a double boiler or the microwave until it reaches 50°C (122°F). Remove from the heat, then let the chocolate cool down to 34°C (93°F), stirring occasionally.
- Add the cocoa butter Mycryo and mix well until completely dissolved.
- Allow the chocolate to cool further to 31 to 32°C (88 to 90°F), which is the ideal working temperature for dark chocolate.
- Tempering curve reminder with Mycryo- Dark chocolate melted to 50°C (122°F)- Mycryo added at 34°C (93°F)- Working temperature 31 to 32°C (88 to 90°F)
- You can either dip just half of each strip or fully coat the candied orange peel, depending on the finish you prefer. I like to do both.
- Dip one end of each strip into the tempered chocolate, then let the excess chocolate drip off before placing them on a silicone mat or parchment paper.
- For full coating, dip the candied orange peel one piece at a time into the melted chocolate. Remove using a chocolate dipping fork, tongs, or a regular fork.
- Let the excess chocolate drip back into the bowl before placing the pieces on a silicone baking mat or parchment paper.
- Allow the chocolate to set and crystallize for about 20 minutes at room temperature.
- Store the candied orange peel in an airtight container or package them in bags, perfect for gifting.
Thank you for your visit and your comments