To enhance a dessert, you can either use a chocolate mirror glaze or a velvet-effect spray.
You have several recipes for mirror glaze;on the blog, so let’s take a look at the velvet texture technique.
Those who bake frequently are very familiar with what velvet texture is, but those who are new to baking may be hearing about it for the first time.
Table of Contents
What is Chocolate velvet texture?
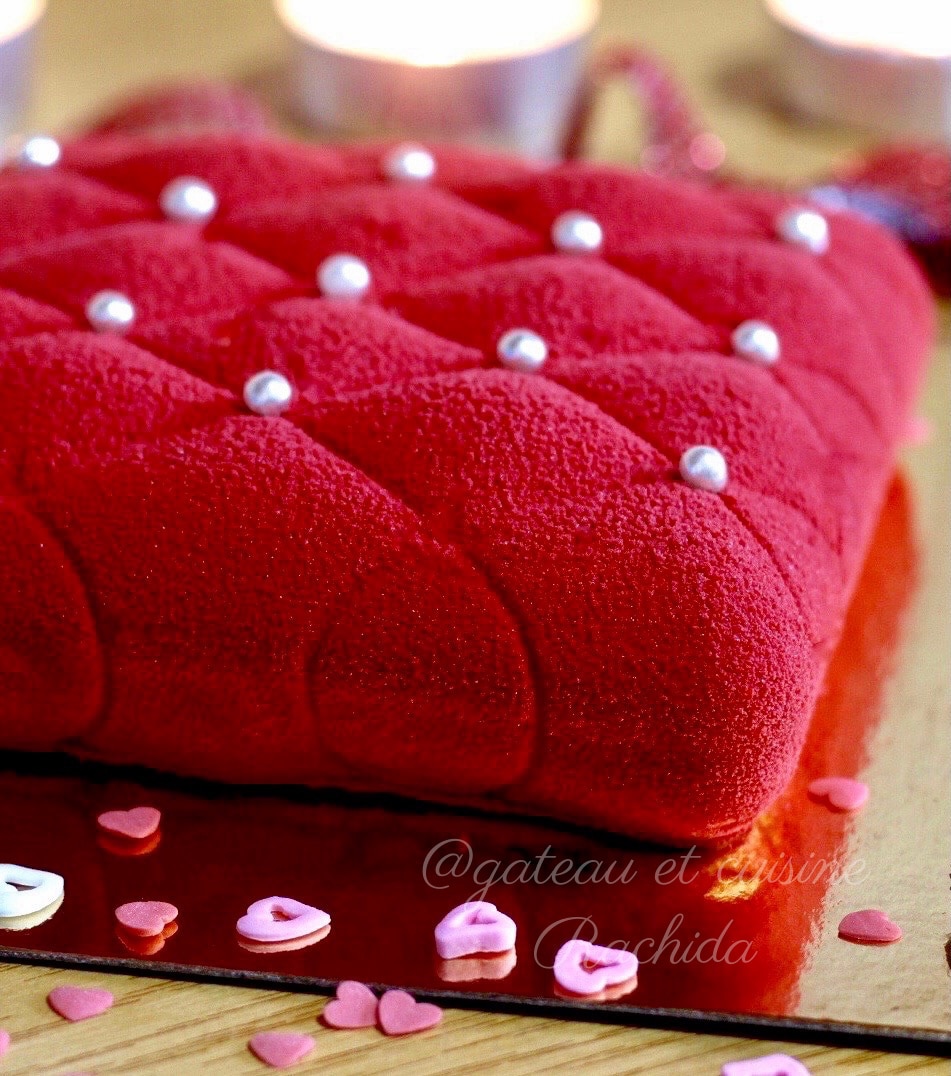
Velvet spray is a mixture of dark, milk, or white chocolate melted with cocoa butter, which is sprayed onto a frozen mousse-based “entremets” cake. The thermal shock occurs when the slightly warm chocolate comes into contact with the frozen entremets, resulting in a pearlescent, velvety effect on the surface. The fine chocolate particles sprayed onto it immediately freeze upon contact with the icy surface.
There are two ways to create a velvet effect:
👉 1. Velvet spray can
You can easily find velvet spray cans on online websites.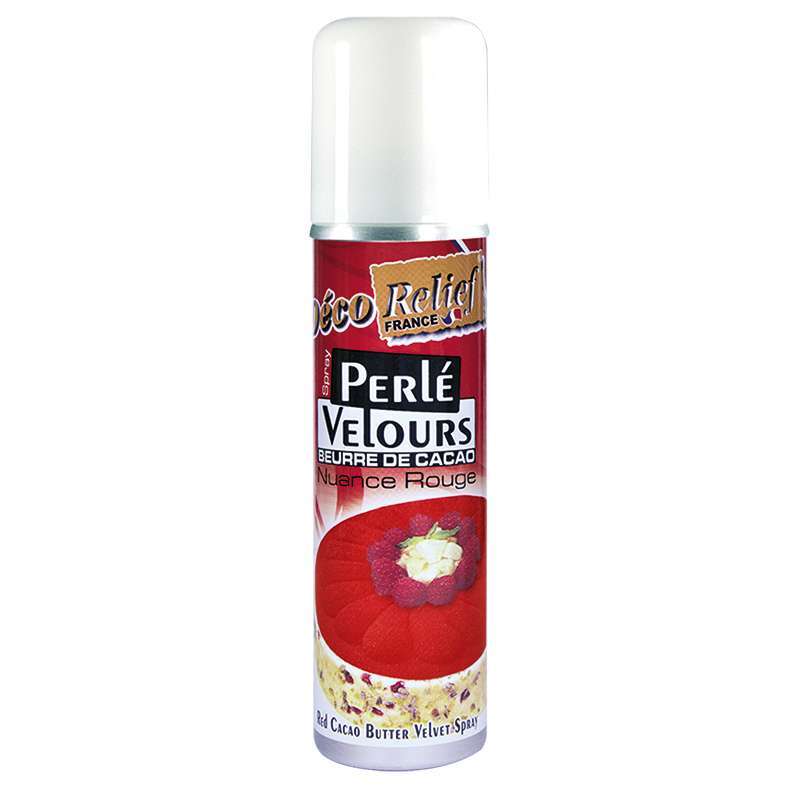
Velvet spray is very easy to use, but I find it quite expensive for regular use. Its great advantage is that it’s quick to apply. Simply run the can under hot tap water for 1 or 2 minutes to liquefy the chocolate and cocoa butter.
Shake the can well before spraying it on the dessert straight out of the freezer. Keep a distance of about 30 cm (12 in) to ensure the velvet spray comes out as a fine mist rather than clumps if you’re too close. Cover the area where you’ll be spraying, as it’s very messy, similar to painting.
Spray a thin layer; otherwise, the velvet effect may crack and won’t look very nice. To avoid overloading, use a velvet spray color that matches your mousse cake. A thin layer will be enough to cover it.
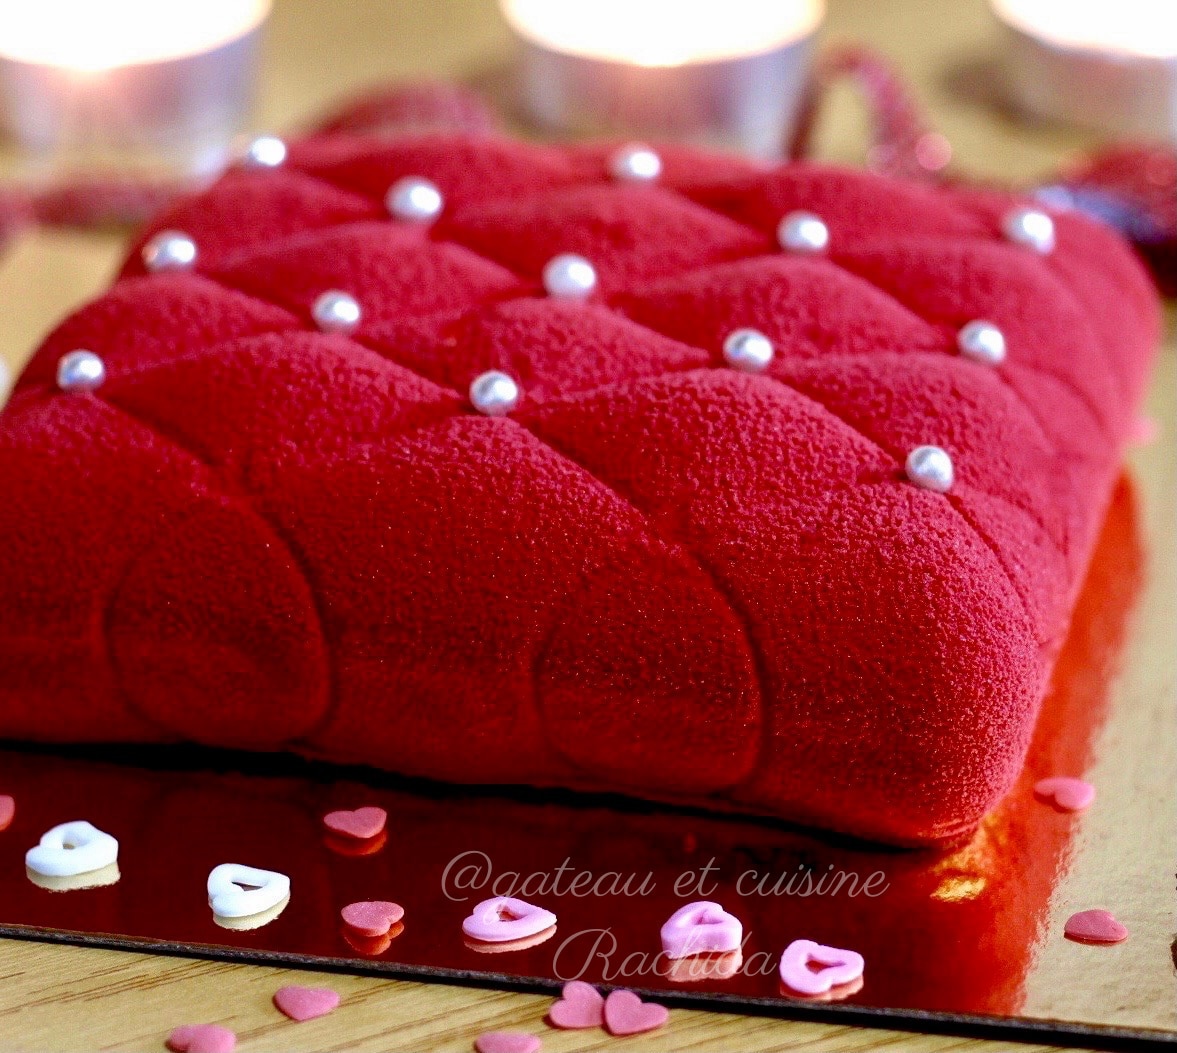
Below, I’ve used red on white, but I tried to spray as little as possible to just cover the dessert. It would have looked much better if the mousse cake had been red, or if I’d used a white velvet spray instead.
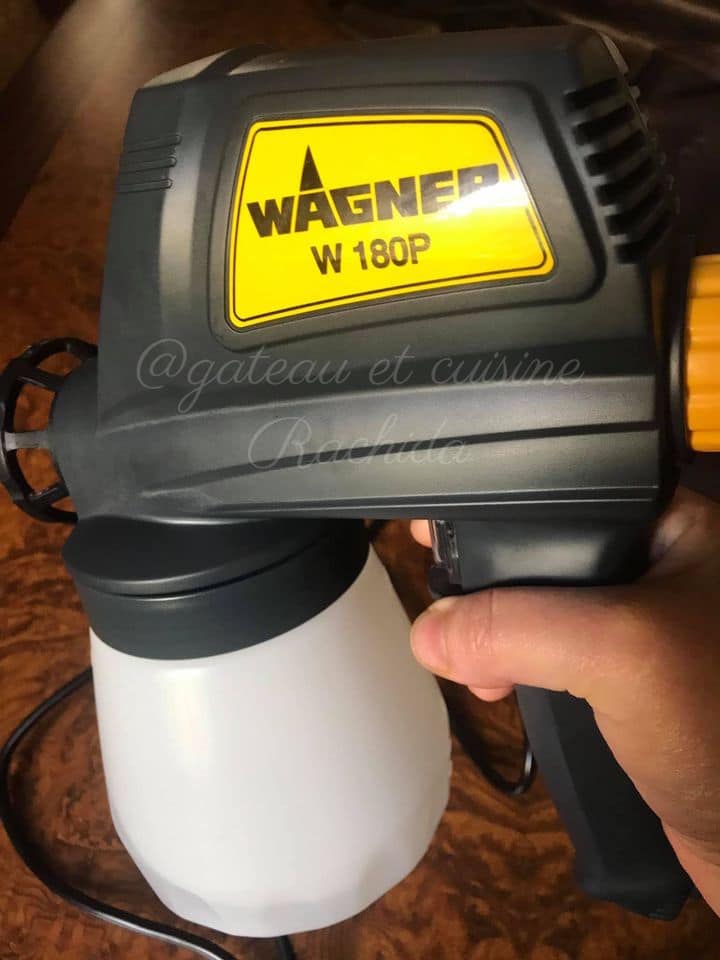
👉 2. A spray gun specially dedicated to spraying your pastries
Some time ago, I finally invested in a paint gun. I hesitated a lot about which spray gun would give the best results. After reading many reviews on Amazon and in pastry groups, I finally made a decision. My choice was the Wagner paint gun shown below.
If you only bake occasionally, velvet spray is more suitable.
I was a little apprehensive about using it, but in the end, it’s very easy to handle. Before applying it to a dessert, I tested it by spraying water to check the spray pattern.
The spray power is adjustable, and I recommend doing a small test on the side before spraying a dessert. I use the medium setting, and the flow is impeccable. A fine layer of chocolate gently settles on the mousse cake in tiny droplets, without creating any clumps.
Testing on the side before applying to the cake prevents the gun from spitting at the start.
It’s easy to manage, and the only downside is that it’s a bit noisy.
The reservoir is quite large, so for a small quantity of chocolate, you can use a smaller container such as a jam jar or a glass yoghurt pot. Make sure there’s enough liquid height to avoid drawing in air at the end of the spraying process.
| The paint gun must be cleaned immediately after use. Fill it with hot water and start spraying to clean the nozzle and the entire duct. The water jet must come out clean, with no trace of chocolate. If you let the chocolate solidify in the nozzle, it will damage the nozzle and your paint gun will no longer work properly |
The advantage of using a spray gun for creating a velvet texture is that you can make custom colors. You can tint the mixture of white chocolate and cocoa butter with oil-soluble coloring, and even blend several shades to achieve the exact hue you want. For example, here I added a touch of black to red to create a vibrant red color.
The ratio of chocolate to cocoa butter varies depending on the recipe. Some use 60% chocolate to 40% cocoa butter, while others use equal parts of each. I follow the Valrhona school recipe, which uses a 70/30% ratio. According to a chef from the Valrhona school, these proportions make the velvet texture less likely to crack or peel, although after trying all three ratios, I didn’t notice any difference.
Here are the Valrhona school proportions, but you can also use a 1:1 ratio (50/50), especially if your chocolate isn’t very fluid.
I purchased this Wagner paint sprayer on Amazon for around $65. You can opt for a cheaper one if you only plan to use it occasionally.
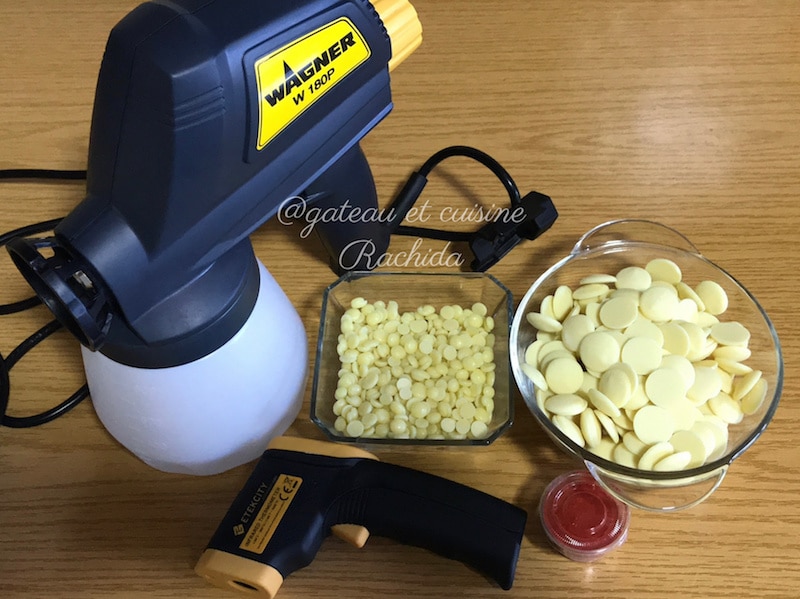
Ingredients:
NB: Find the printable recipe card at the end of the article.
For a 20/22 cm (8-9 inches) mousse cake
White or Colored Velvet texture
- 140 g white chocolate (5 oz)
- 60 g cocoa butter (2.1 oz)
- oil-based food coloring
Dark Chocolate Velvet texture
- 140 g dark chocolate (5 oz)
- 60 g cocoa butter (2.1 oz)
Milk Chocolate, Caramel, or Dulcey Velvet texture
- 120 g milk chocolate or Dulcey (4.2 oz)
- 80 g cocoa butter (2.8 oz)
Preparation steps :
Before You Start
- Prepare all the ingredients.
- Have a thermometer on hand (though you can manage without one).
- Get your spray gun ready.
- Use an immersion blender, such as a Bamix.
- Protect the surface where you’ll be spraying.
You can do this in the bathroom or even inside the dishwasher for easy cleanup with hot water once you’re done. Alternatively, use a large cardboard box and place your mousse cake on a rotating tray inside. Choose the setup that works best for you, but keep in mind, it’s a very messy process!
The quantity shown in the photos was enough for two entremets.
Melt the white chocolate and cocoa butter in a double boiler. You can melt them together in the same container.
Stir to combine, then add the fat-soluble coloring.
Blend with the immersion blender. Add more coloring if you want a deeper shade.
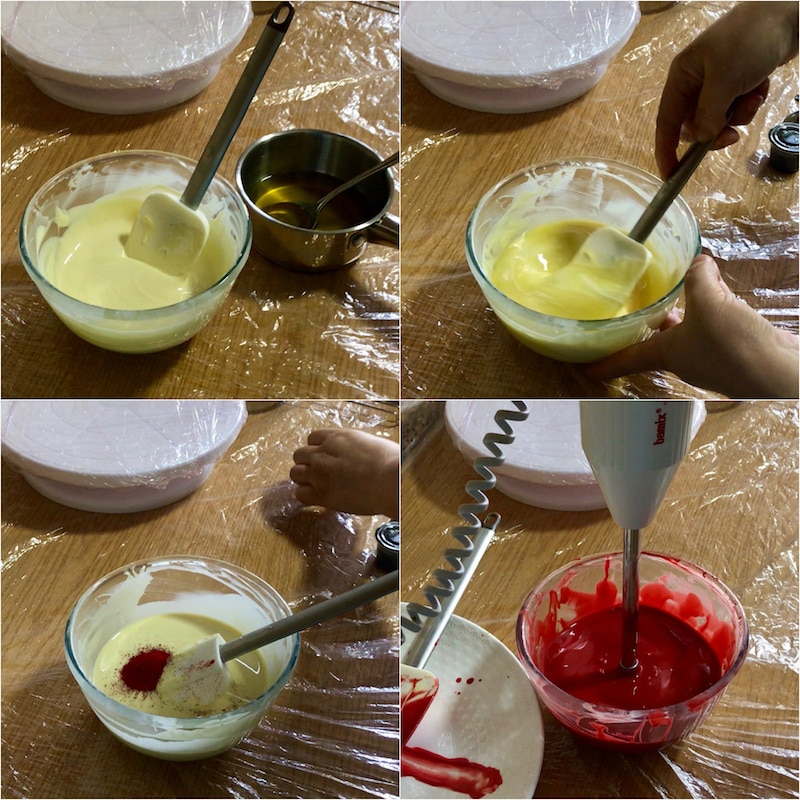
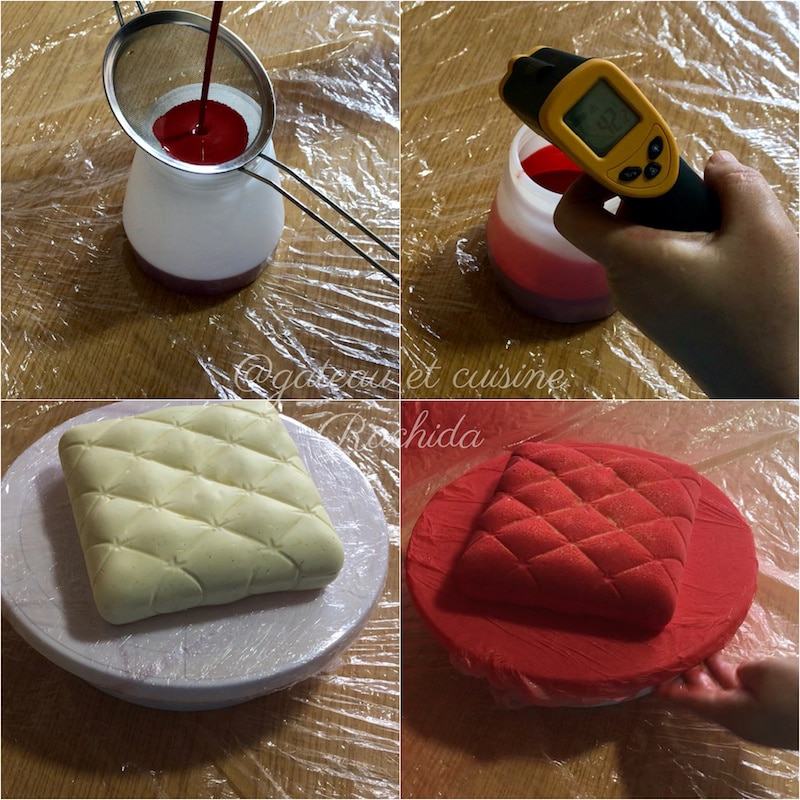
Pour the mixture through a fine sieve into the spray gun reservoir and use immediately at 42°C (107.6°F).
For smaller quantities, pour the mixture into a small jar or container before placing it into the reservoir.
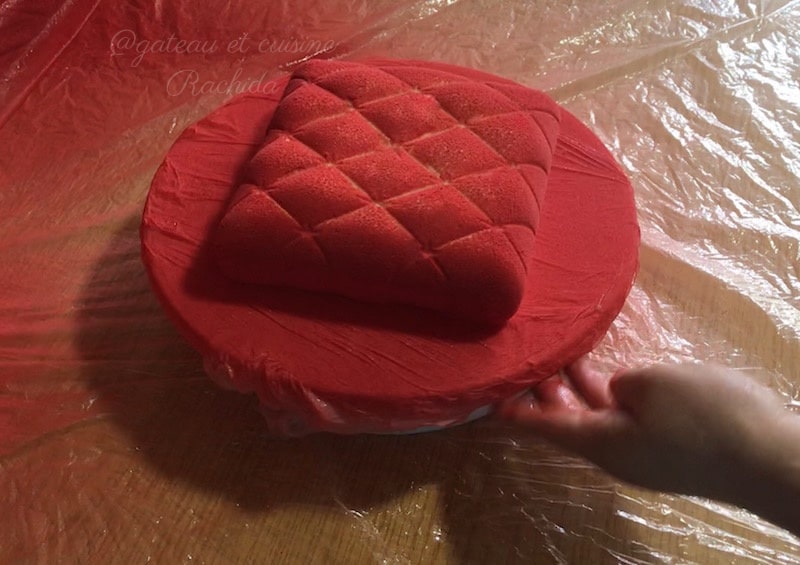
Remove the mousse cake from the freezer and unmold it onto a cake turntable, if possible. Gently run your hand over the surface to remove any frost.
Test your spray gun on the side before spraying the mousse cake. This helps avoid the initial sputter that can create unattractive clumps on the surface.
Hold the spray gun about 30 cm (12 in) from the mousse cake and spray in continuous, sweeping motions from left to right, then right to left, while turning the cake turntable with your other hand.
Once the mousse cake is evenly coated, stop spraying. Avoid applying too thick a layer, as it may cause the velvet texture to crack. (Refer to the tips at the beginning of the article.)
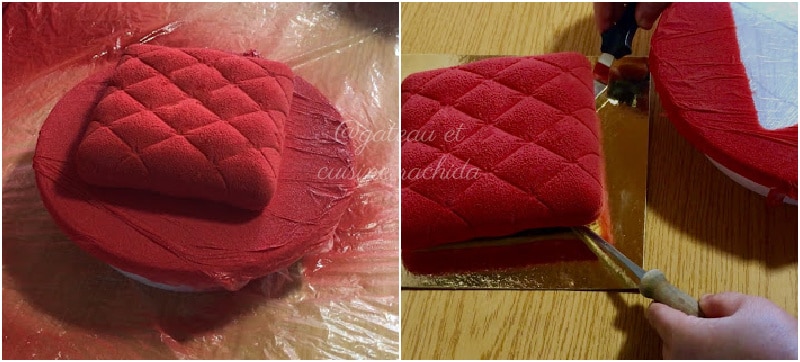
Transfer the mousse cake to a serving dish and decorate as desired. Let it thaw for 6 hours in the refrigerator or 2 hours at room temperature, slow defrosting gives the best texture.
You can safely refreeze a mousse cake with a velvet texture.
Once your mousse cake is in the refrigerator, clean the spray gun immediately, following the tips mentioned above.
If you have any leftover glaze, store it in an airtight container in a dry place until the next use. You can reheat it in a water bath or microwave before using it again.
I hope this article helps you select the right spray gun and master the art of perfectly spraying your mousse cakes for a stunning presentation.

Chocolate Velvet Texture Recipe (for glazing cake )
INGREDIENTS
- For a 20/22 cm (8-9 inches) Entremets
White or Colored Velvet texture
- 140 g white chocolate
- 60 g cocoa butter
- oil-based food coloring
Dark Chocolate Velvet texture
- 140 g dark chocolate
- 60 g cocoa butter
Milk Chocolate, Caramel, or Dulcey Velvet texture
- 120 g milk chocolate or Dulcey
- 80 g cocoa butter
PREPARATION
- Before You Start- Prepare all the ingredients- Have a thermometer on hand (though you can manage without one)- Get your spray gun ready- Use an immersion blender, such as a Bamix- Protect the surface where you'll be spraying.
- You can do this in the bathroom or even inside the dishwasher for easy cleanup with hot water once you’re done. Alternatively, use a large cardboard box and place your mousse cake on a rotating tray inside. Choose the setup that works best for you, but keep in mind, it’s a very messy process!
- The quantity shown in the photos was enough for two entremets.
- Melt the white chocolate and cocoa butter in a double boiler. You can melt them together in the same container.
- Stir to combine, then add the fat-soluble coloring.
- Blend with the immersion blender. Add more coloring if you want a deeper shade.
- Pour the mixture through a fine sieve into the spray gun reservoir and use immediately at 42°C (107.6°F).
- For smaller quantities, pour the mixture into a small jar or container before placing it into the reservoir.
- Remove the mousse cake from the freezer and unmold it onto a cake turntable, if possible. Gently run your hand over the surface to remove any frost.
- Test your spray gun on the side before spraying the mousse cake. This helps avoid the initial sputter that can create unattractive clumps on the surface.
- Hold the spray gun about 30 cm (12 in) from the mousse cake and spray in continuous, sweeping motions from left to right, then right to left, while turning the cake turntable with your other hand.
- Once the mousse cake is evenly coated, stop spraying. Avoid applying too thick a layer, as it may cause the velvet texture to crack. (Refer to the tips at the beginning of the article.)
- Transfer the mousse cake to a serving dish and decorate as desired. Let it thaw for 6 hours in the refrigerator or 2 hours at room temperature, slow defrosting gives the best texture.
- You can safely refreeze a mousse cake with a velvet texture.
- Once your mousse cake is in the refrigerator, clean the spray gun immediately, following the tips mentioned above.
- If you have any leftover glaze, store it in an airtight container in a dry place until the next use. You can reheat it in a water bath or microwave before using it again.
- I hope this article helps you select the right spray gun and master the art of perfectly spraying your mousse cakes for a stunning presentation.
Thank you for visiting my blog and your comments.