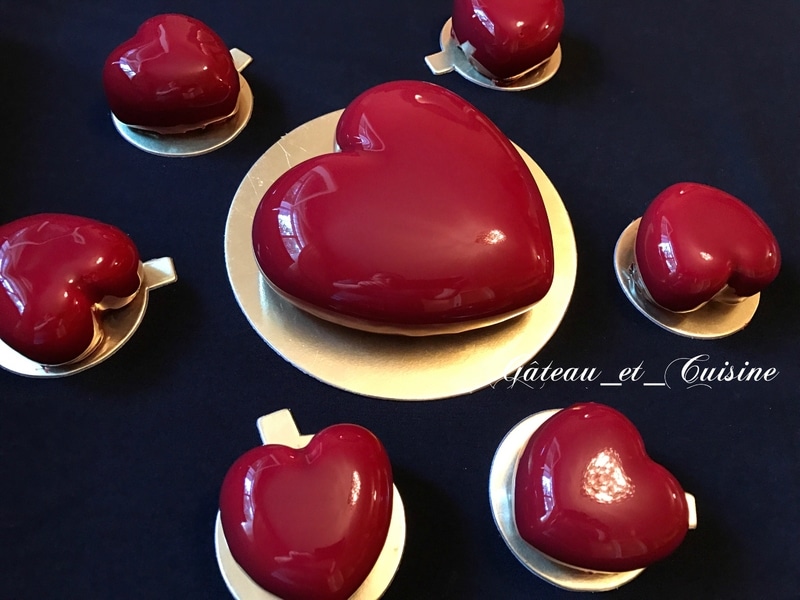
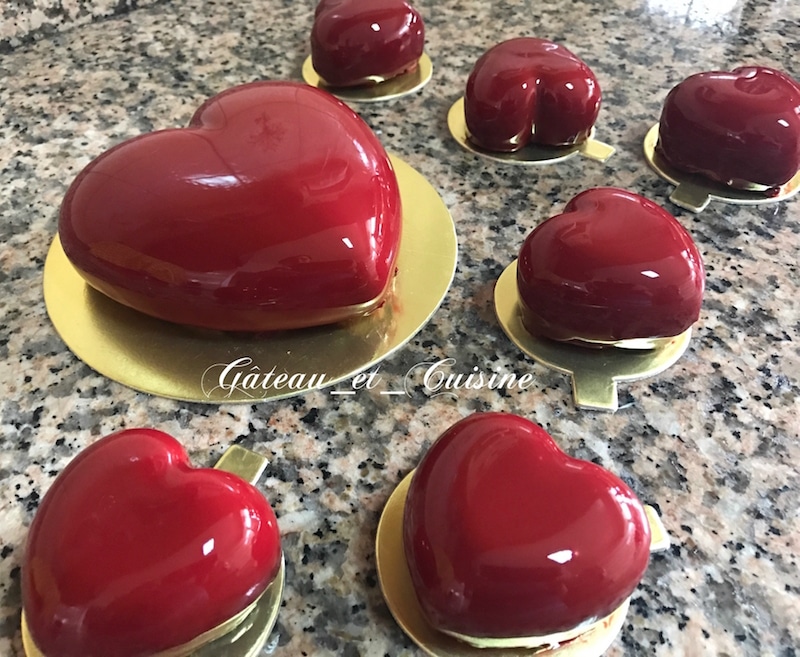
To celebrate the love you share with the one who has captured your heart, there’s nothing better than making a special dessert for Valentine’s Day. This heart-shaped chocolate and passion fruit mousse cake is the perfect indulgent treat to celebrate love with elegance and romance.
When it comes to choosing the shape and color of a cake for February 14, Valentine’s Day, using a heart-shaped mold and a red finish is the ultimate symbol of love, a nod to the heart struck by Cupid’s arrow.
Of course, this mousse cake can also be made for other occasions, such as birthdays, weddings, or engagement celebrations. It can just as easily be prepared in a round mold for a dessert to enjoy with family or friends.
The combination of dark chocolate and passion fruit is especially well suited for a romantic evening. The deep, intense notes of dark chocolate pair beautifully with the bright, exotic tang of passion fruit, creating an irresistible dessert that delights the palate and awakens the senses.
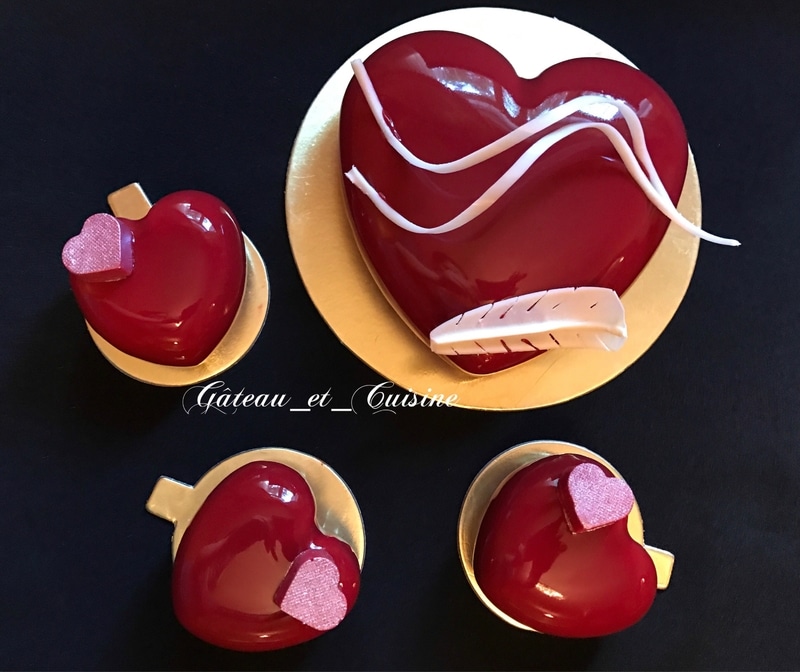
Table of Contents
What You’ll Love About This Chocolate and Passion Fruit Mousse Cake
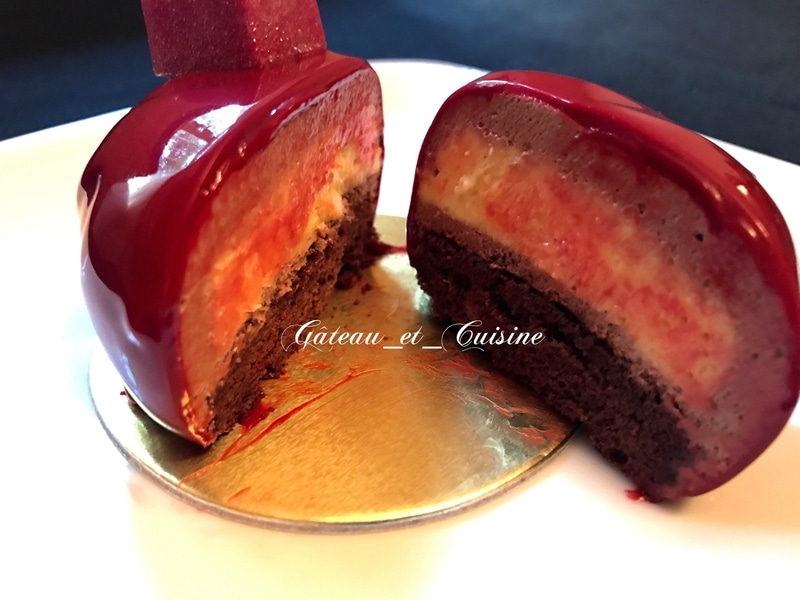
Flavors: This dessert offers a perfectly balanced combination of flavors. The dark chocolate mousse is rich and melt-in-your-mouth, while the passion fruit crémeux adds a bright, lightly tangy freshness that balances the intensity of the chocolate and brings a lively note to every bite. Everything rests on a soft chocolate sponge cake, adding an extra layer of texture to the dessert.
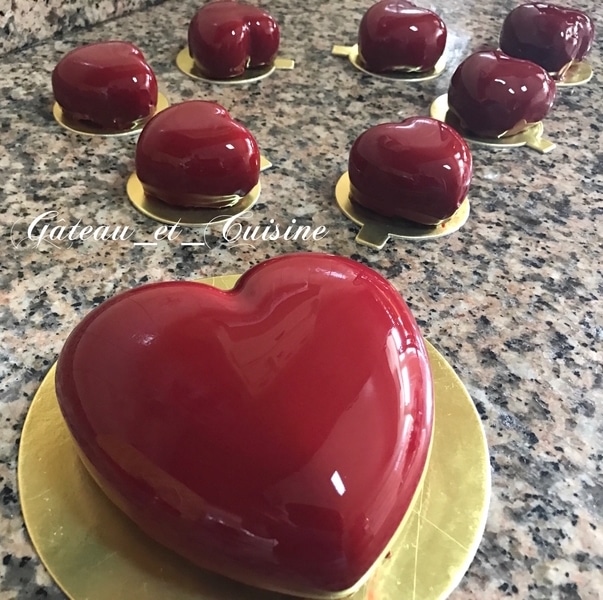
Shape: The heart-shaped design makes this mousse cake especially appealing, as it’s the perfect symbol of love.
Make-Ahead Friendly: This dessert can easily be prepared in advance, making it ideal for stress-free planning. The mousse cake can be made up to one month ahead and kept frozen, with the glaze added only on the day of serving for the best finish.
Difficulty Level: The only part that may seem challenging, especially if this is your first time making a mousse cake, is the mirror glaze. But don’t worry, it’s much easier than it looks. Many beginners have successfully made it on their very first try. By following the recipe step by step and watching the video to see the techniques in action, you’ll be able to make it without any trouble.
These small red heart-shaped mousse cakes are coated with a dark chocolate mirror glaze tinted with a touch of red food coloring. This rich, deep red shade cannot be achieved using a colored white chocolate glaze. This technique is known as red chocolate mirror glaze, and it pairs perfectly with a Valentine’s Day theme, symbolizing love and romance.
Recipe Video
Ingredients:
For the Amore silicone heart mold and the 8 small Amorini silicone heart molds from Silikomart.
You can also use a 20 cm (8-inch) cake ring, but make 1½ times the chocolate mousse to ensure you have enough.
Note: Find the recipe card at the end of the article, which you can print.
Chocolate Ladyfinger Sponge
- 3 eggs
- 75 g granulated sugar (2.6 oz)
- 25 g unsweetened cocoa powder (0.9 oz)
- 50 g all-purpose flour (1.8 oz)
- Powdered sugar, for dusting
Passion Fruit Cremeux
- 172 g passion fruit puree (6.1 oz)
- 52 g egg yolks (1.8 oz)
- 67 g whole eggs (2.4 oz) (lightly beaten, then weighed)
- 52 g granulated sugar (1.8 oz)
- 67 g butter, at room temperature (2.4 oz)
- 2.5 g gelatin (0.1 oz) (about 1¼ gelatin sheets)
Dark Chocolate Mousse
- 70 g whole milk (2.5 oz)
- 85 g heavy cream (35% fat) (3 oz)
- 85 g glucose syrup (3 oz)
- 170 g dark chocolate, 66% (6 oz)
- 3.5 g gelatin (about 0.12 oz) (about 1¾ gelatin sheets)
- 215 g heavy cream (35% fat), softly whipped (7.6 oz)
Red-Tinted Dark Chocolate Mirror Glaze
- 75 g water (2.6 oz)
- 150 g glucose syrup (5.3 oz)
- 150 g granulated sugar (5.3 oz)
- 100 g sweetened condensed milk (3.5 oz)
- 150 g dark chocolate (5.3 oz)
- 10 g gelatin powder (200 bloom), bloomed in 60 g water (0.4 oz gelatin + 2 oz water) or 5 gelatin sheets
- 1 teaspoon red food coloring (add gradually until you reach a deep red color)
Preparation Steps:
Chocolate Ladyfinger Sponge Cake
1. Preheat the oven to 180°C (350°F).
2. Butter a baking sheet and line it with parchment paper.
3. Sift the flour and cocoa powder together.
4. Separate the egg yolks from the whites. Beat the egg whites until foamy. Once they become airy, add one third of the sugar while continuing to beat. When the whites start to hold soft peaks, add the remaining sugar in two additions. Beat well until you get a smooth, glossy meringue.
5. Gently fold in the egg yolks in two or three additions, using an upward motion. Then carefully incorporate the flour and cocoa mixture, being careful not to deflate the batter.
6. Transfer the batter to a piping bag fitted with an 8 mm (3/8 inch) plain tip. Pipe a square about 20 cm (8 inches) wide. Smooth the surface, dust with powdered sugar, and bake for about 10 minutes. A toothpick inserted into the center should come out clean.
7. Turn the sponge out onto a wire rack and let it cool completely. Then cut out heart shapes that are at least 0.5 cm (1/4 inch) smaller than the heart molds used for assembly.
Passion Fruit Cremeux
1. Combine the passion fruit puree with the sugar, egg yolks, and whole eggs. Cook over low heat, whisking constantly, until the mixture thickens like a pastry cream. If you have a thermometer, cook until it reaches 84°C (183°F). The cremeux should coat the back of a spatula.
2. Remove from the heat, add the softened gelatin, mix well, and let cool to 40°C (104°F).
3. Add the butter, mix, then blend with an immersion blender until smooth.
4. Fill the inserts. Here, use eight small 3 cm (1¼-inch) rounds and one small heart insert, about 1 cm (1/2 inch) smaller on each side than the Amore heart mold. You can also pour the cremeux into a frame and cut it to the desired sizes afterward. The insert thickness should not exceed 1 cm (3/8 inch) for the small hearts and 1.5 cm (1/2 inch) for the Amore heart.
5. Freeze overnight.
Dark Chocolate Mousse
Measure all ingredients before starting.
1. Bloom the gelatin in a large bowl of cold water for 10 minutes.
2. Whip 215 g (7.5 oz) heavy cream to soft peaks. Return to the refrigerator.
3. Melt the chocolate in the microwave or over a double boiler. Set aside.
4. In a saucepan, combine the milk, cream, and glucose syrup. Heat gently, stirring well, and remove from the heat as soon as the mixture starts to simmer.
5. Add the bloomed gelatin, squeezed dry and mix well. Pour the hot mixture over the melted chocolate in three additions, straining through a fine sieve. Stir between each addition to create a smooth emulsion. Let cool to 38°C (100°F).
6. Stir a small amount of the whipped cream into the chocolate mixture to loosen it, then fold it into the remaining whipped cream in three additions, using a spatula and gentle upward motions while rotating the bowl.
7. Transfer the mousse to a piping bag fitted with a 1 cm (⅜-inch) plain tip.
Assembling the Mousse Cake
1. Pipe a layer of mousse into the molds, filling them slightly below halfway.
2. Insert the passion fruit cremeux, pressing gently so the mousse rises up along the sides.
3. Cover with a little more mousse, leaving enough space for the chocolate sponge.
4. Gently tap the tray holding the molds on the countertop to level everything evenly.
5. Place the sponge on top, pressing it in slightly. Freeze overnight or until ready to glaze and serve.
Red-Tinted Dark Chocolate Mirror Glaze
I recommend reading my detailed article on Ultra-Glossy Mirror Glaze before getting started.
1. Bloom the powdered gelatin in 60 g (2 oz) of water and let it hydrate for 20 minutes in the refrigerator.
Alternatively, bloom gelatin sheets in a large bowl of cold water for 10 minutes.
2. Place the glucose syrup, sugar, and water in a saucepan. Bring to a boil and cook until the mixture reaches 103°C (217°F). Stir occasionally, being careful not to splash the sides of the pan. If splashes occur, clean the sides with a damp pastry brush.
3. Strain the hot syrup through a fine sieve over the sweetened condensed milk. If using gelatin sheets, add the bloomed gelatin, squeezed dry. Mix with a spatula, then pour the mixture over the chocolate in a tall, narrow container (such as a measuring jug or a container suitable for an immersion blender). Wait 1 minute, then gently stir with the spatula.
4. Blend for 3 to 4 minutes using an immersion blender. This step must be done carefully to avoid incorporating air bubbles. Keep the container slightly tilted and hold the blender at an angle, fully submerged at all times. Only lift it out at the very end.
You’ll notice that blending makes the glaze smoother, more fluid, and much shinier.
5. Strain the glaze through a fine sieve into an airtight container and cover it directly on the surface with plastic wrap. Refrigerate until the next day (you can also leave it in the saucepan if you plan to use it the following day).
The Next Day
6. Transfer the glaze to a saucepan and gently reheat it to 38°C (100°F) using a double boiler or the microwave. If using a double boiler, remove the pan from the heat from time to time, stir, then return it to the heat. This helps melt the glaze evenly without exceeding the target temperature.
7. Remove from the heat and keep the glaze in the saucepan, stirring occasionally so it cools down more quickly and evenly.
8. At 36°C (97°F), pour the glaze into a tall, narrow measuring jug and blend briefly to eliminate any air bubbles. The glaze should become perfectly shiny, with a mirror-like finish.
Wait until it reaches 33–34°C (91–93°F) before glazing the mousse cakes. Also rely on the glaze’s texture: depending on conditions, you may glaze at a slightly different temperature. In general, the ideal glazing range is between 30°C and 35°C (86–95°F).
9. Remove the mousse cakes from the freezer and unmold them onto a wire rack. Gently run your hand over the surface to remove any frost, then glaze immediately.
10. Let the excess glaze drip off for about 1 minute. Once it stops running, slide a spatula under each mousse cake to lift it. Lightly rub the base against the rack to clean up any glaze drips.
Transfer to a serving platter or a gold cake board. I recommend watching the video to clearly see each step in action.
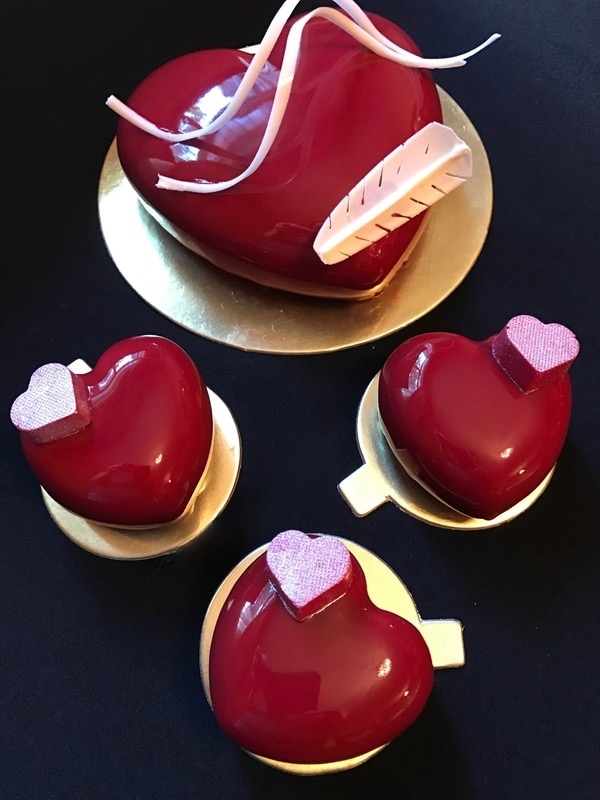
11. Decorate as desired.

I hope you’ll love this heart-shaped chocolate and passion fruit mousse cake and feel inspired to make it for Valentine’s Day or as a special birthday cake.

Dark Chocolate and passion fruit Mousse Cake Recipe
INGREDIENTS
For the Amore silicone heart mold and the 8 small Amorini silicone heart molds from Silikomart.
- You can also use a 20 cm (8-inch) cake ring, but make 1½ times the chocolate mousse to ensure you have enough.
Chocolate Ladyfinger Sponge
- 3 eggs
- 75 g granulated sugar
- 25 g unsweetened cocoa powder
- 50 g all-purpose flour
- Powdered sugar for dusting
Passion Fruit Cremeux
- 172 g passion fruit puree
- 52 g egg yolks
- 67 g whole eggs (lightly beaten, then weighed)
- 52 g granulated sugar
- 67 g butter at room temperature
- 2.5 g gelatin (about 1¼ gelatin sheets)
Dark Chocolate Mousse
- 70 g whole milk
- 85 g heavy cream 35% fat
- 85 g glucose syrup
- 170 g dark chocolate 66%
- 3.5 g gelatin (about 1¾ gelatin sheets)
- 215 g heavy cream 35% fat, softly whipped
Red-Tinted Dark Chocolate Mirror Glaze
- 75 g water
- 150 g glucose syrup
- 150 g granulated sugar
- 100 g sweetened condensed milk
- 150 g dark chocolate
- 10 g gelatin powder 200 bloom, bloomed in 60 g water (0.4 oz gelatin + 2 oz water) or 5 gelatin sheets
- 1 teaspoon red food coloring add gradually until you reach a deep red color
PREPARATION
Chocolate Ladyfinger Sponge Cake
- Preheat the oven to 180°C (350°F).
- Butter a baking sheet and line it with parchment paper.
- Sift the flour and cocoa powder together.
- Separate the egg yolks from the whites. Beat the egg whites until foamy. Once they become airy, add one third of the sugar while continuing to beat. When the whites start to hold soft peaks, add the remaining sugar in two additions. Beat well until you get a smooth, glossy meringue.
- Gently fold in the egg yolks in two or three additions, using an upward motion. Then carefully incorporate the flour and cocoa mixture, being careful not to deflate the batter.
- Transfer the batter to a piping bag fitted with an 8 mm (3/8 inch) plain tip. Pipe a square about 20 cm (8 inches) wide. Smooth the surface, dust with powdered sugar, and bake for about 10 minutes. A toothpick inserted into the center should come out clean.
- Turn the sponge out onto a wire rack and let it cool completely. Then cut out heart shapes that are at least 0.5 cm (1/4 inch) smaller than the heart molds used for assembly.
Passion Fruit Cremeux
- Combine the passion fruit puree with the sugar, egg yolks, and whole eggs. Cook over low heat, whisking constantly, until the mixture thickens like a pastry cream. If you have a thermometer, cook until it reaches 84°C (183°F). The cremeux should coat the back of a spatula.
- Remove from the heat, add the softened gelatin, mix well, and let cool to 40°C (104°F).
- Add the butter, mix, then blend with an immersion blender until smooth.
- Fill the inserts. Here, use eight small 3 cm (1¼-inch) rounds and one small heart insert, about 1 cm (1/2 inch) smaller on each side than the Amore heart mold. You can also pour the cremeux into a frame and cut it to the desired sizes afterward. The insert thickness should not exceed 1 cm (3/8 inch) for the small hearts and 1.5 cm (1/2 inch) for the Amore heart.
- Freeze overnight.
Dark Chocolate Mousse
- Measure all ingredients before starting.
- Bloom the gelatin in a large bowl of cold water for 10 minutes.
- Whip 215 g (7.5 oz) heavy cream to soft peaks. Return to the refrigerator.
- Melt the chocolate in the microwave or over a double boiler. Set aside.
- In a saucepan, combine the milk, cream, and glucose syrup. Heat gently, stirring well, and remove from the heat as soon as the mixture starts to simmer.
- Add the bloomed gelatin, squeezed dry and mix well. Pour the hot mixture over the melted chocolate in three additions, straining through a fine sieve. Stir between each addition to create a smooth emulsion. Let cool to 38°C (100°F).
- Stir a small amount of the whipped cream into the chocolate mixture to loosen it, then fold it into the remaining whipped cream in three additions, using a spatula and gentle upward motions while rotating the bowl.
- Transfer the mousse to a piping bag fitted with a 1 cm (⅜-inch) plain tip.
Assembling the Mousse Cake
- Pipe a layer of mousse into the molds, filling them slightly below halfway.
- Insert the passion fruit cremeux, pressing gently so the mousse rises up along the sides.
- Cover with a little more mousse, leaving enough space for the chocolate sponge.
- Gently tap the tray holding the molds on the countertop to level everything evenly.
- Place the sponge on top, pressing it in slightly. Freeze overnight or until ready to glaze and serve.
Red-Tinted Dark Chocolate Mirror Glaze
- I recommend reading my detailed article on Ultra-Glossy Mirror Glaze before getting started.
- Bloom the powdered gelatin in 60 g (2 oz) of water and let it hydrate for 20 minutes in the refrigerator.
- Alternatively, bloom gelatin sheets in a large bowl of cold water for 10 minutes.
- Place the glucose syrup, sugar, and water in a saucepan. Bring to a boil and cook until the mixture reaches 103°C (217°F). Stir occasionally, being careful not to splash the sides of the pan. If splashes occur, clean the sides with a damp pastry brush.
- Strain the hot syrup through a fine sieve over the sweetened condensed milk. If using gelatin sheets, add the bloomed gelatin, squeezed dry. Mix with a spatula, then pour the mixture over the chocolate in a tall, narrow container (such as a measuring jug or a container suitable for an immersion blender). Wait 1 minute, then gently stir with the spatula.
- Blend for 3 to 4 minutes using an immersion blender. This step must be done carefully to avoid incorporating air bubbles. Keep the container slightly tilted and hold the blender at an angle, fully submerged at all times. Only lift it out at the very end.
- You’ll notice that blending makes the glaze smoother, more fluid, and much shinier.
- Strain the glaze through a fine sieve into an airtight container and cover it directly on the surface with plastic wrap. Refrigerate until the next day (you can also leave it in the saucepan if you plan to use it the following day).
The Next Day
- Transfer the glaze to a saucepan and gently reheat it to 38°C (100°F) using a double boiler or the microwave. If using a double boiler, remove the pan from the heat from time to time, stir, then return it to the heat. This helps melt the glaze evenly without exceeding the target temperature.
- Remove from the heat and keep the glaze in the saucepan, stirring occasionally so it cools down more quickly and evenly.
- At 36°C (97°F), pour the glaze into a tall, narrow measuring jug and blend briefly to eliminate any air bubbles. The glaze should become perfectly shiny, with a mirror-like finish.
- Wait until it reaches 33–34°C (91–93°F) before glazing the mousse cakes. Also rely on the glaze’s texture: depending on conditions, you may glaze at a slightly different temperature. In general, the ideal glazing range is between 30°C and 35°C (86–95°F).
- Remove the mousse cakes from the freezer and unmold them onto a wire rack. Gently run your hand over the surface to remove any frost, then glaze immediately.
- Let the excess glaze drip off for about 1 minute. Once it stops running, slide a spatula under each mousse cake to lift it. Lightly rub the base against the rack to clean up any glaze drips.
- Transfer to a serving platter or a gold cake board. I recommend watching the video to clearly see each step in action.
- Decorate as desired.
- I hope you’ll love this heart-shaped chocolate and passion fruit mousse cake and feel inspired to make it for Valentine’s Day or as a special birthday cake.
Thank you for your visit and your comments!