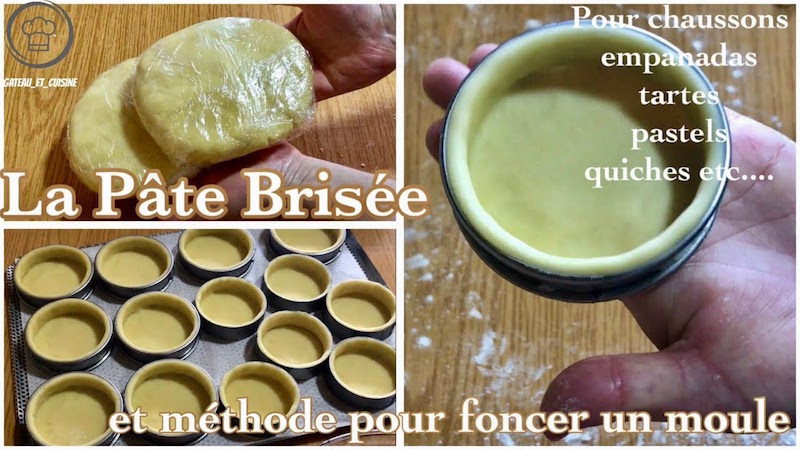
The shortcrust pastry is an essential basic recipe in pastry and cooking. It’s the one everyone should know how to prepare, especially when starting out. Very easy to make, this pastry dough can be prepared in less than 10 minutes.
It’s the simplest pie crust to know and adopt. It’s used for both fruit tarts and turnovers like empanadas, custard tarts, etc. It’s also the ideal quiche crust.
It’s so easy to make that it’s really not worth using store-bought shortcrust pastry. Unlike sweet pastry, which is still my favorite for tarts, this one is very easy to work with.
It’s a non-crumbly, flexible dough that doesn’t stick or tear. If you want to practice lining tart rings without any trouble, even in warm weather, this is the perfect dough.
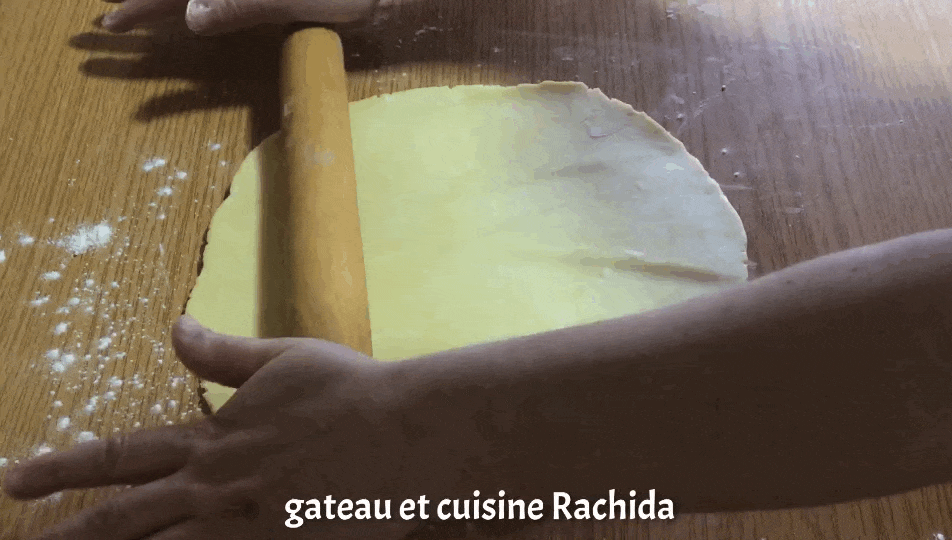
Table of Contents
Video recipe
Ingredients:
I invite you to read my tips below before starting the recipe.
NB: Find the printable recipe card at the end of the article.
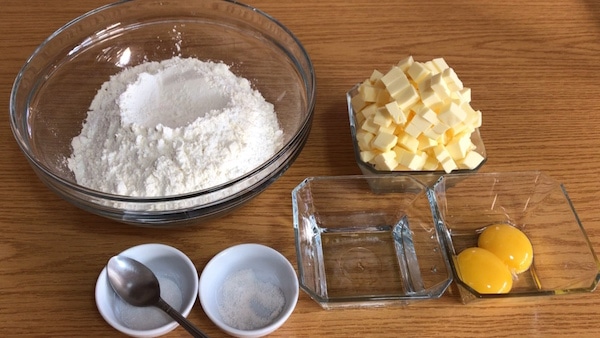
- 500 g all-purpose flour (17.6 oz)
- 250 g butter, (8.8 oz) taken out of the fridge 15 minutes before starting. It should be fairly firm, but neither too hard nor too soft.
- 2 egg yolks (if you want to skip them, add a little more water.)
- 1 teaspoon salt
- 1 teaspoon powdered sugar
- 100 ml cold water ( 3.5 oz) more or less depending on flour absorption
Preparation steps
Preparation by Hand
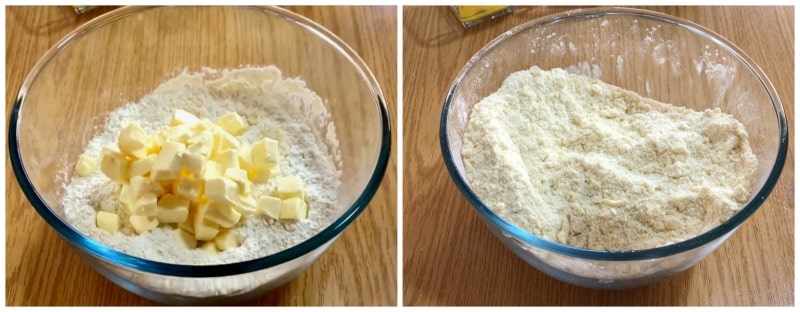
Put the flour in a large mixing bowl, add the salt and sugar on top, and mix. Add the butter cut into small cubes and, using your fingertips, rub it into the flour until the mixture resembles coarse crumb.
Dilute the egg yolk with the water and pour it over the crumbly dough. Mix to bring the dough together but without kneading.
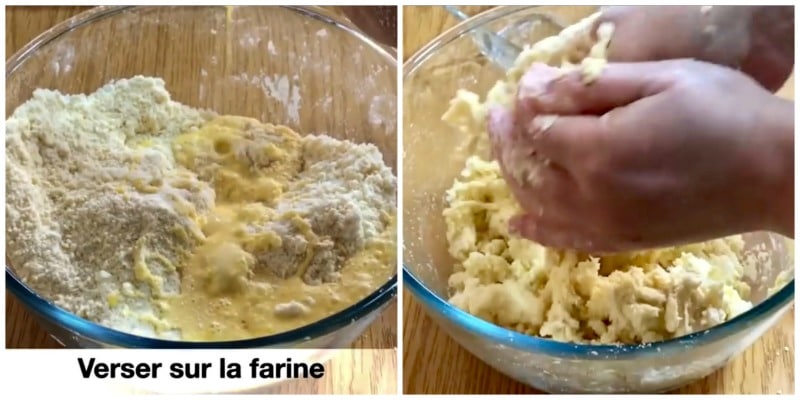
Pour onto the work surface and use the palm of your hand to smear the dough against the surface.
This technique helps to homogenize and smooth the dough without making it elastic.
Push the dough away from you by pressing it with the palm of your hand, then gather it back together.
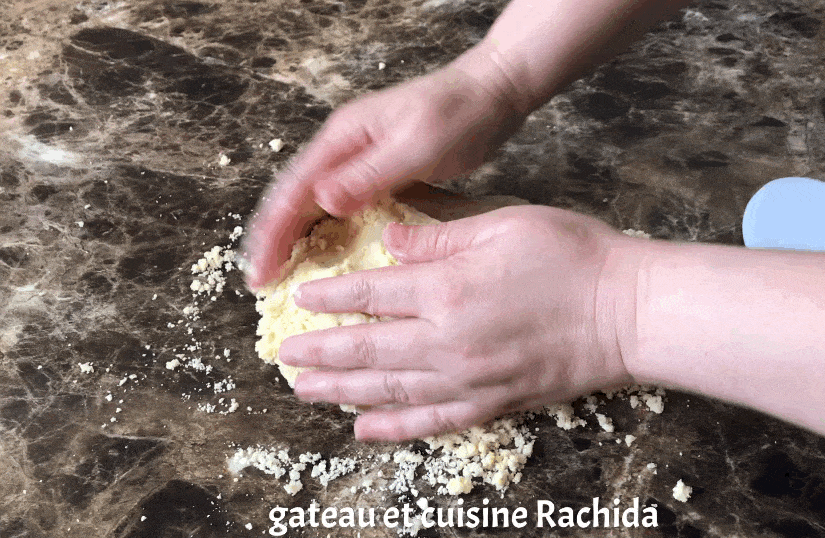
Do this 2 or 3 times, then gather the dough into a ball. Flatten it slightly, wrap it in plastic wrap, and refrigerate for at least 2 hours before use.
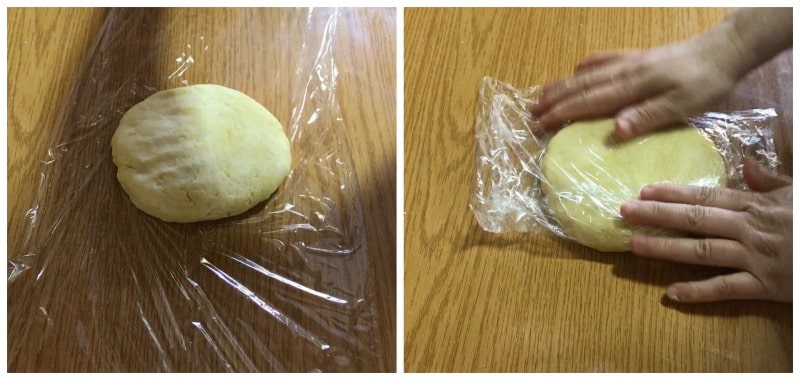
It will be quite firm when it comes out of the refrigerator. Make sure the dough is firm but still pliable and not brittle from the cold. If it’s too hard, let it sit at room temperature for a few minutes until easier to work with.
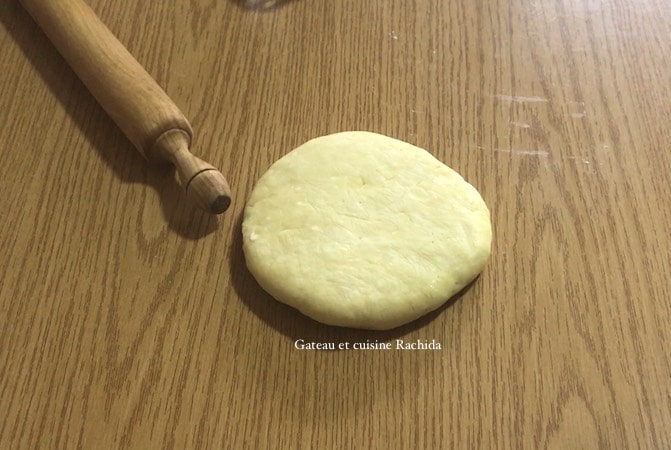
Roll it out between two sheets of parchment paper or on a floured work surface. Dust with flour from time to time to prevent sticking.
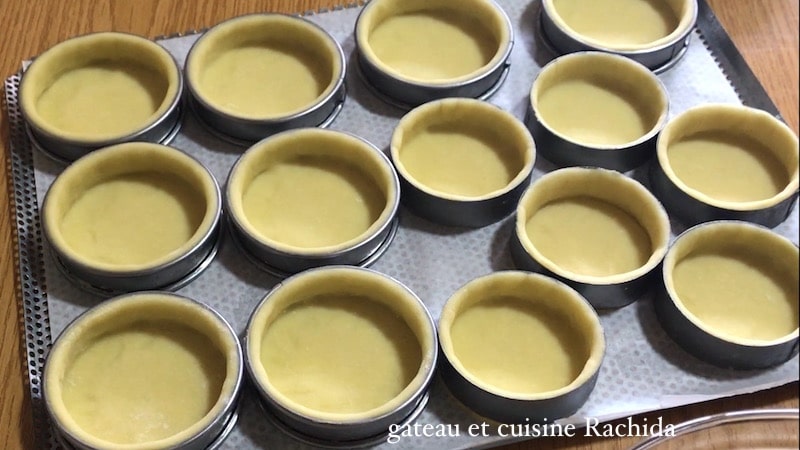
Roll out to about 3 mm (1/8 inch) thick for quiches, and thinner for tarts. Line your tart pan or tart ring with the dough.
Below, tart rings lined with dough for making mini quiches.
Preparation with Stand Mixer Using the Paddle Attachment (K)
Place the flour, sugar, salt, and butter in the bowl of a stand mixer fitted with the paddle attachment. Mix until the texture is crumbly.
Add the egg yolk diluted in water and mix for a few seconds, just until the dough begins to come together into a ball.
Transfer the dough to the work surface and “fraisage” (also called “frasing”) using the palm of your hand. This technique helps to homogenize and smooth the dough without making it elastic.
Push the dough forward with the palm of your hand, bring it back, and repeat the motion.
Do this 2 to 3 times, then gather the dough into a ball.
Preparation with Food Processor or Chopper
Place the flour and butter in the bowl of a food processor or chopper. My large food processor was out of order, so I used a small chopper instead, it did the job perfectly.
Pulse the mixture until it reaches a crumbly, sandy texture. As soon as the butter and flour are combined into coarse crumbs, stop mixing.
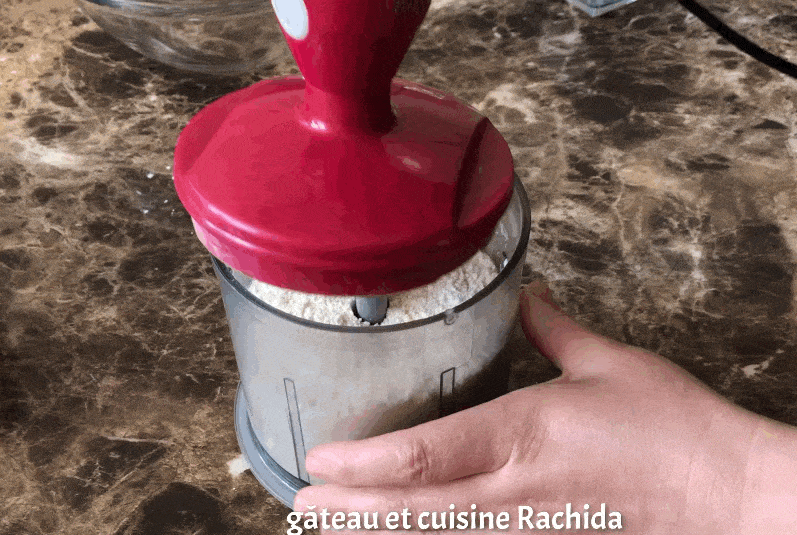
he mixture. Pulse briefly in the processor just until the dough starts to come together.
Turn the dough out onto the work surface and use the palm of your hand to “fraisage” (also called “frasing”), this involves pressing and pushing the dough to incorporate the butter evenly and smooth out the texture without developing any gluten or elasticity. Finish as shown in the hand method step.
I hope this guide to pâte brisée will be truly helpful to you.
Tips and tricks for success
What to Remember for a Perfect Pâte Brisée
Don’t overwork the dough. If you knead the dough too much, you activate the gluten, which gives elasticity to the dough. This makes it harder to roll out and can cause the edges to shrink during baking.
Prepare the dough at least 2 hours before using it. Ideally, make it the day before for better results.
Once the dough is lined in the tart ring, chill it in the freezer for 30 minutes. This will help the dough stay in place while baking.
Start baking in a fan-assisted oven at 200°C (392°F) and finish at 180°C (356°F) for most recipes.
The amount of water to add depends on the absorption rate of your flour. Only add enough to bring the dough together roughly.
Which Flour to Use for a Perfect Crust?
T55 flour (all-purpose flour) works well because it contains less gluten, making it less elastic when rolled out. It’s a common white flour used in baking.
You can also use T45 flour, which contains more gluten. In that case, be careful to work the dough as little as possible to avoid activating the gluten network and making the dough elastic.

Easy and Quick Shortcrust Pastry Recipe
EQUIPEMENTS
INGREDIENTS
- 500 g all-purpose flour (17.6 oz )
- 250 g butter (8.8 oz) taken out of the fridge 15 minutes before starting. It should be fairly firm, but neither too hard nor too soft.
- 2 egg yolks if you want to skip them, add a little more water.
- 1 teaspoon salt
- 1 teaspoon powdered sugar
- 100 ml cold water (3.5 oz) more or less depending on flour absorption
PREPARATION
Preparation by Hand
- Put the flour in a large mixing bowl, add the salt and sugar on top, and mix. Add the butter cut into small cubes and, using your fingertips, rub it into the flour until the mixture resembles coarse crumb.
- Dilute the egg yolk with the water and pour it over the crumbly dough. Mix to bring the dough together but without kneading.
- Pour onto the work surface and use the palm of your hand to smear the dough against the surface.
- This technique helps to homogenize and smooth the dough without making it elastic.
- Push the dough away from you by pressing it with the palm of your hand, then gather it back together.
- Do this 2 or 3 times, then gather the dough into a ball. Flatten it slightly, wrap it in plastic wrap, and refrigerate for at least 2 hours before use.
- It will be quite firm when it comes out of the refrigerator. Make sure the dough is firm but still pliable and not brittle from the cold. If it’s too hard, let it sit at room temperature for a few minutes until easier to work with.
- Roll it out between two sheets of parchment paper or on a floured work surface. Dust with flour from time to time to prevent sticking.
- Roll out to about 3 mm (1/8 inch) thick for quiches, and thinner for tarts. Line your tart pan or tart ring with the dough.
Preparation with Stand Mixer Using the Paddle Attachment (K)
- Place the flour, sugar, salt, and butter in the bowl of a stand mixer fitted with the paddle attachment. Mix until the texture is crumbly.
- Add the egg yolk diluted in water and mix for a few seconds, just until the dough begins to come together into a ball.
- Transfer the dough to the work surface and "fraisage" (also called "frasing") using the palm of your hand. This technique helps to homogenize and smooth the dough without making it elastic.
- Push the dough forward with the palm of your hand, bring it back, and repeat the motion.
- Do this 2 to 3 times, then gather the dough into a ball.
Preparation with Food Processor or Chopper
- Place the flour and butter in the bowl of a food processor or chopper. My large food processor was out of order, so I used a small chopper instead, it did the job perfectly.
- Pulse the mixture until it reaches a crumbly, sandy texture. As soon as the butter and flour are combined into coarse crumbs, stop mixing.
- he mixture. Pulse briefly in the processor just until the dough starts to come together.
- Turn the dough out onto the work surface and use the palm of your hand to "fraisage" (also called "frasing"), this involves pressing and pushing the dough to incorporate the butter evenly and smooth out the texture without developing any gluten or elasticity. Finish as shown in the hand method step.
Thank you for visiting the blog and for your comments.