cocoa mirror glaze
I love making mousse cake (french entremets), and the essential element to elevate them is the mirror glaze. It immediately adds that refined touch to entremets. The one I’m proposing here is different from those already on the blog: it’s the cocoa mirror glaze. Unlike the others, this is a glaze without chocolate, prepared only with cocoa. It offers a very dark and intense finish, while being more economical.
You can choose from all those I’ve already shared, depending on your needs, like the one I use most often: the ultra-shiny chocolate mirror glaze, to be made with the chocolate of your choice. The latter can be colored, unlike the cocoa glaze.
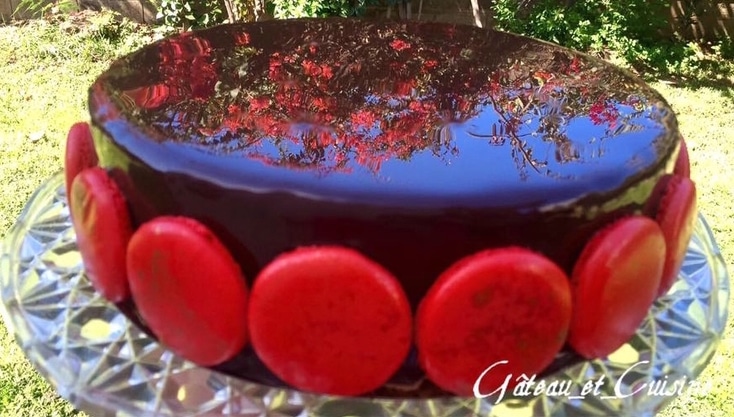
This ultra-shiny cocoa glaze provides a perfect finish to my mousse cake, as you can see on the chocolate royal mousse cake, where it enhances the beauty of the dessert.
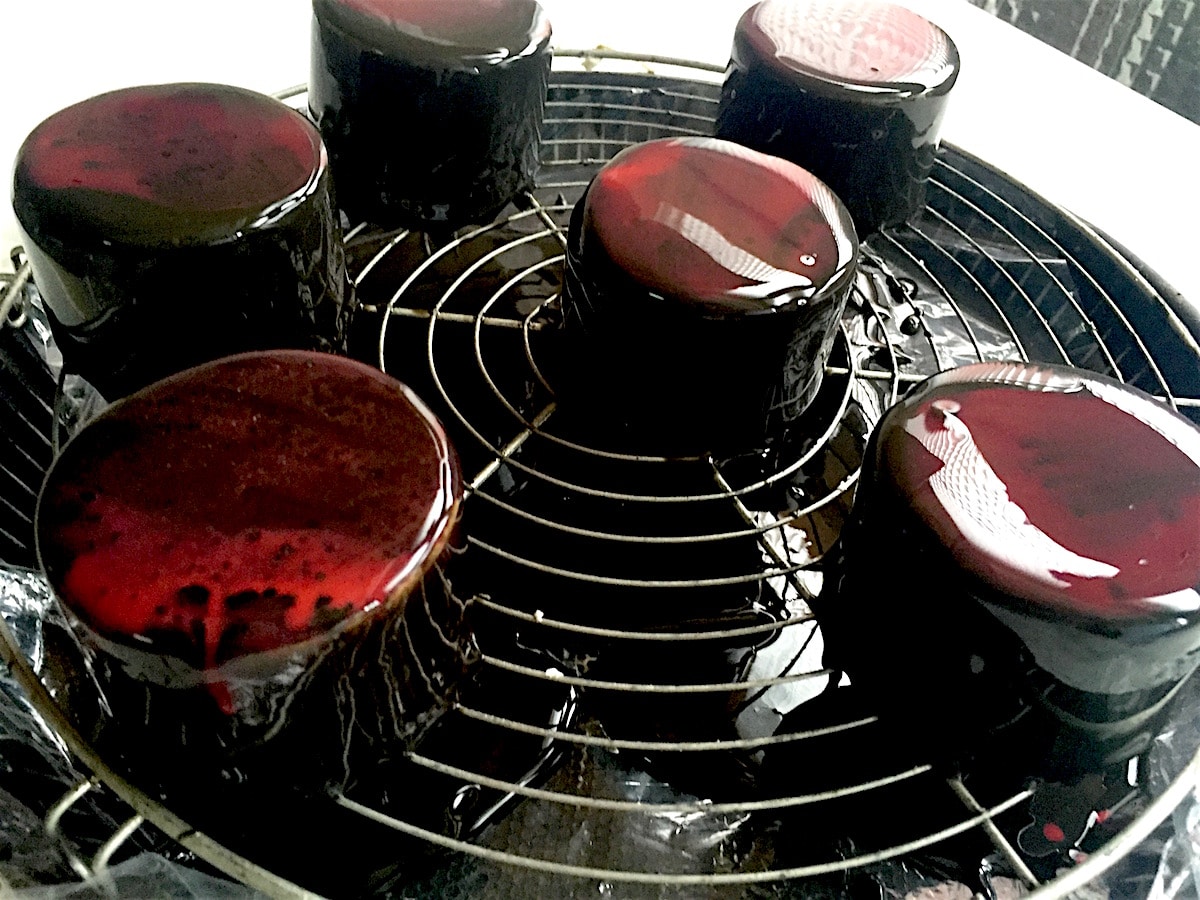
Table of Contents
Ingredients:
NB: Find the printable recipe card at the end of the content.
For a 22 cm / 8.7-inch round mousse cake
- 75 g water
- 210 g granulated sugar
- 70 g unsweetened bitter cocoa
- 145 g heavy cream
- 8 g powdered gelatin or 4 sheets of gelatin at 200 blooms (one sheet weighs 2 g. You can use sheets from 3.4 to 150 blooms. The result is the same.)
- 48 g water if using powdered gelatin.
Neutral Glaze for Spider Effect
- 10 g water
- 40 g neutral glaze
- Food coloring (as needed)
Preparation Steps:
Soak the gelatin in a bowl of cold water for 10 minutes before starting.
If using powdered gelatin, rehydrate it with the indicated amount of water. Stir and place in the refrigerator for about 20 minutes to let it bloom.
Pour the water and sugar into a saucepan and bring to a boil until it reaches 103°C (217°F). Remove from the heat as soon as it reaches the temperature.
Pour the syrup over the previously sifted cocoa powder. Mix well with a whisk, being careful not to whisk vigorously to avoid creating air bubbles.
Bring the cream to a boil, then remove from the heat and add the squeezed gelatin. Stir well until fully dissolved, then pour it over the syrup and cocoa mixture.
Blend with an immersion blender in a tall, narrow container. Strain through a fine sieve. Cover with plastic wrap directly touching the surface and let rest until the next day.
You can also use it the same day without issue, but letting it rest helps eliminate stubborn air bubbles.
The next day, gently reheat the glaze in a bain-marie without exceeding 40°C (104°F). Blend again and strain.
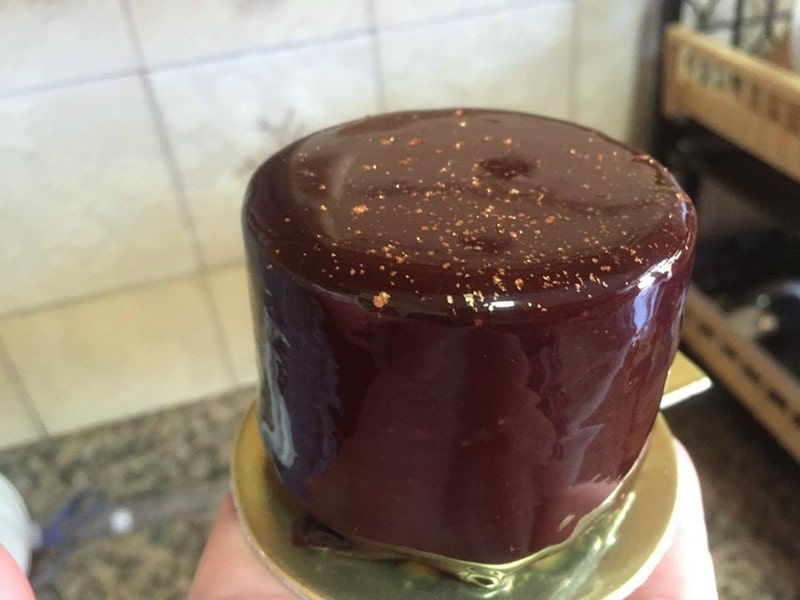
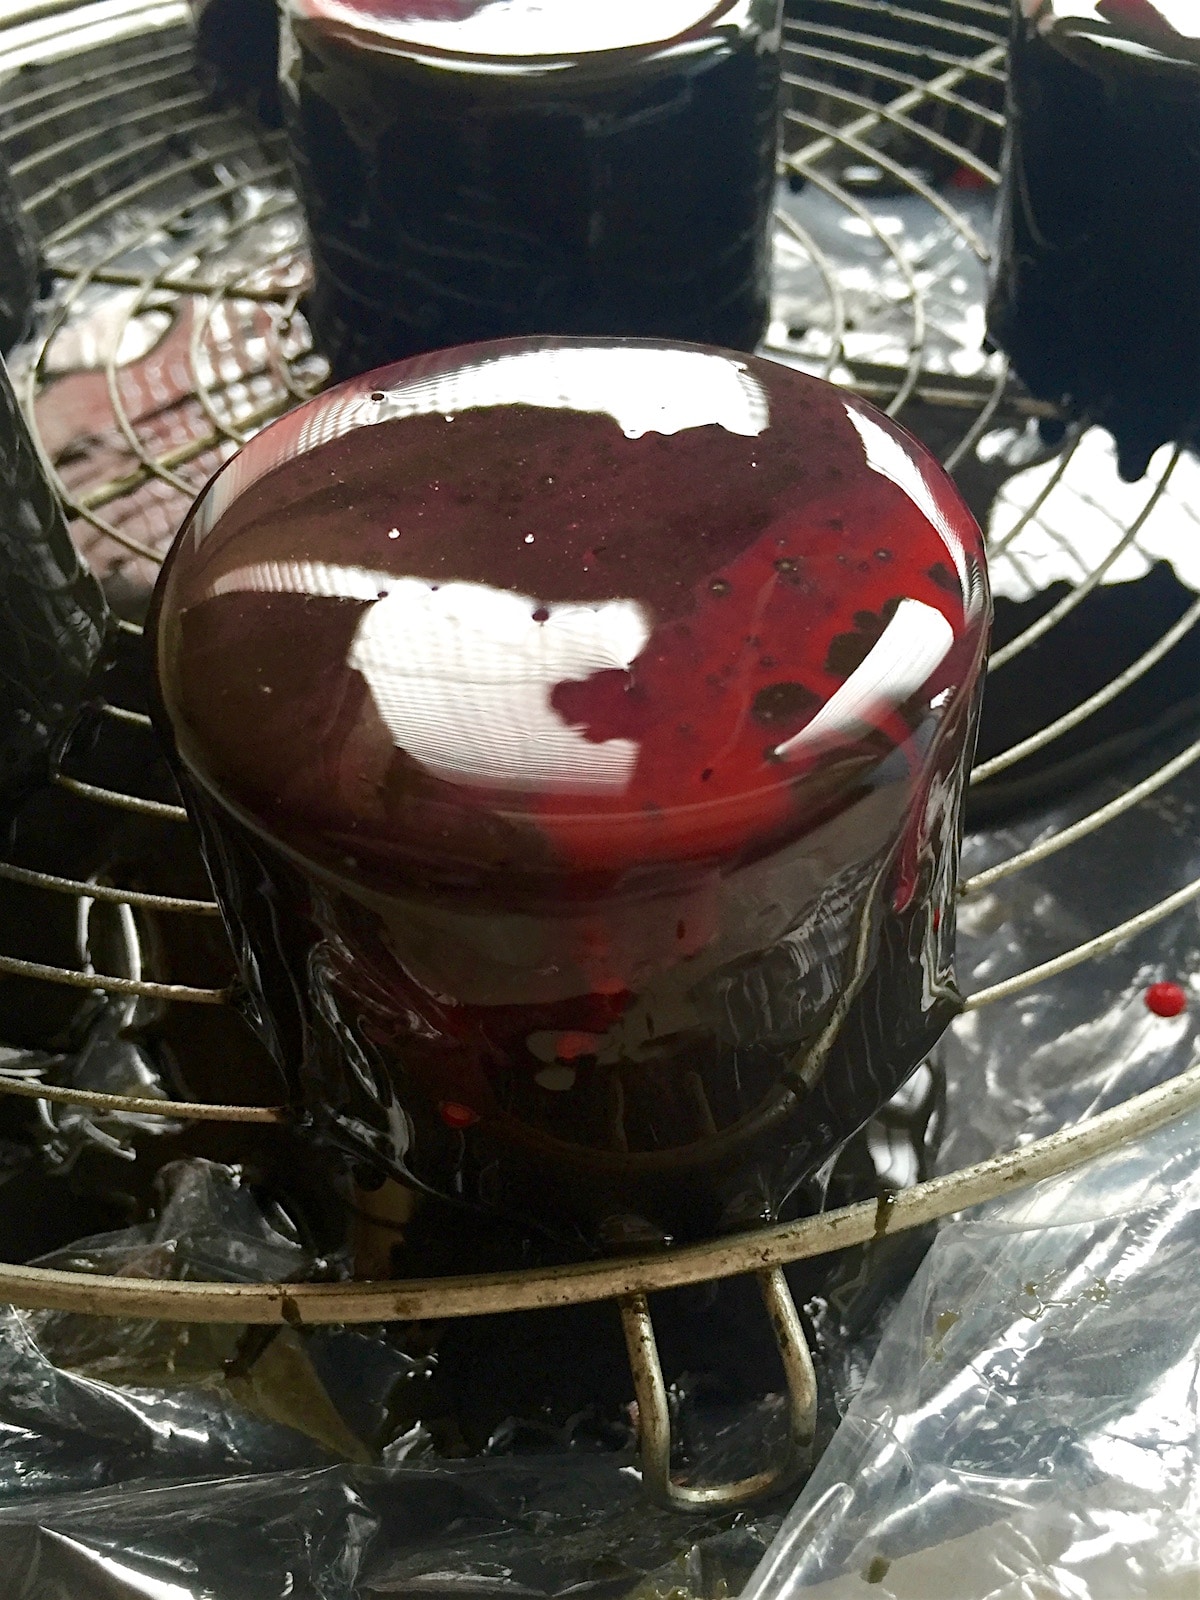
Let the glaze cool down to around 30°C (86°F), more or less depending on its viscosity, then glaze your frozen entremets straight out of the freezer.
Note: Always check the glaze’s fluidity before pouring it over the mousse cake.
If it’s too cold, it will be thick, won’t flow properly, and will result in a thick layer. If it’s too hot, it will run off without properly covering the cake.
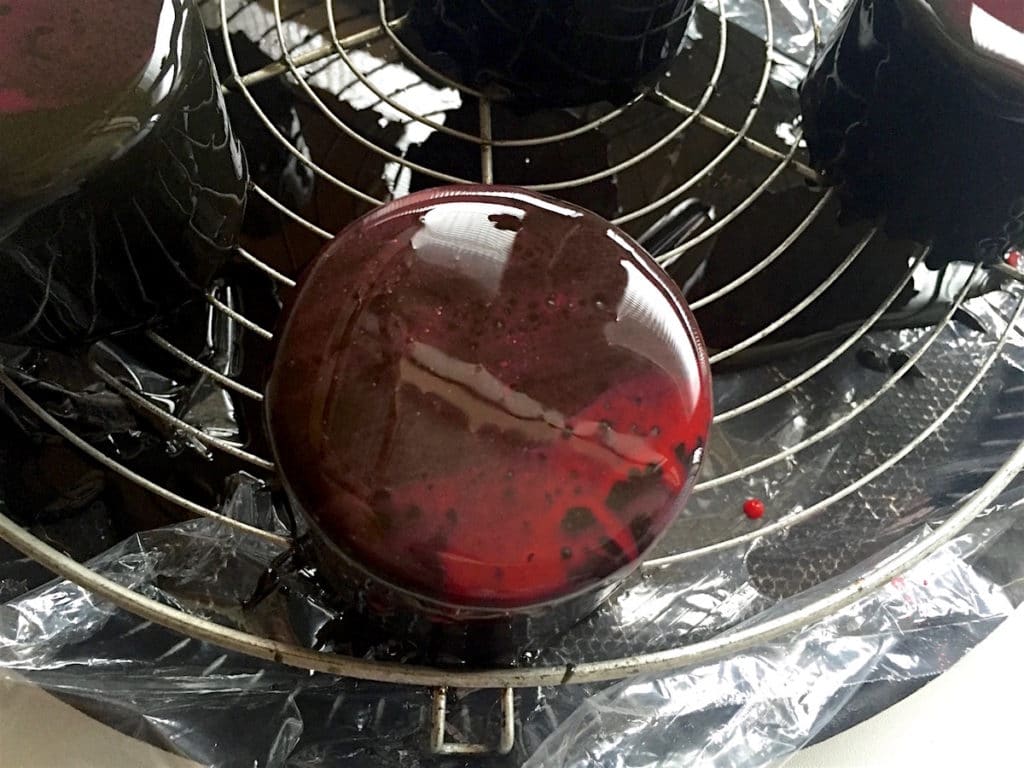
I recommend doing a test on the back of a frozen ladle. The glaze should spread evenly and form a thin, smooth layer over the surface.
How to create the spider effect?
Mix 10 g of water with 40 g of neutral glaze and food coloring of your choice (here, red).
Heat the mixture to 65-70°C just before using. Pass through a fine-mesh strainer, then use immediately.
Place a little glaze on a spatula and pass it over the mousse cake in one direction, right after glazing it.
To get a more intense red, I added a touch of black food coloring to the mixture.
Other mirror glazes you might like
Chocolate and cocoa mirror glaze

Cocoa mirror glaze
INGREDIENTS
For a 22 cm / 8.7-inch round mousse cake
- 75 g water
- 210 g granulated sugar
- 70 g unsweetened bitter cocoa
- 145 g heavy cream
- 8 g powdered gelatin or 4 sheets of gelatin at 200 blooms one sheet weighs 2 g. You can use sheets from 3.4 to 150 blooms. The result is the same.
- 48 g water if using powdered gelatin.
Neutral Glaze for Spider Effect
- 10 g water
- 40 g neutral glaze
- Food coloring as needed
PREPARATION
- Soak the gelatin in a bowl of cold water for 10 minutes before starting.
- If using powdered gelatin, rehydrate it with the indicated amount of water. Stir and place in the refrigerator for about 20 minutes to let it bloom.
- Pour the water and sugar into a saucepan and bring to a boil until it reaches 103°C (217°F). Remove from the heat as soon as it reaches the temperature.
- Pour the syrup over the previously sifted cocoa powder. Mix well with a whisk, being careful not to whisk vigorously to avoid creating air bubbles.
- Bring the cream to a boil, then remove from the heat and add the squeezed gelatin. Stir well until fully dissolved, then pour it over the syrup and cocoa mixture.
- Blend with an immersion blender in a tall, narrow container. Strain through a fine sieve. Cover with plastic wrap directly touching the surface and let rest until the next day.
- You can also use it the same day without issue, but letting it rest helps eliminate stubborn air bubbles.
- The next day, gently reheat the glaze in a bain-marie without exceeding 40°C (104°F). Blend again and strain.
- Let the glaze cool down to around 30°C (86°F), more or less depending on its viscosity, then glaze your frozen entremets straight out of the freezer.
- Note: Always check the glaze’s fluidity before pouring it over the mousse cake.
- If it's too cold, it will be thick, won't flow properly, and will result in a thick layer. If it's too hot, it will run off without properly covering the cake.
- I recommend doing a test on the back of a frozen ladle. The glaze should spread evenly and form a thin, smooth layer over the surface.
How to create the spider effect?
- Mix 10 g of water with 40 g of neutral glaze and food coloring of your choice (here, red).
- Heat the mixture to 65-70°C just before using. Pass through a fine-mesh strainer, then use immediately.
- Place a little glaze on a spatula and pass it over the mousse cake in one direction, right after glazing it.
- To get a more intense red, I added a touch of black food coloring to the mixture.
Thank you for your visit and your comments!