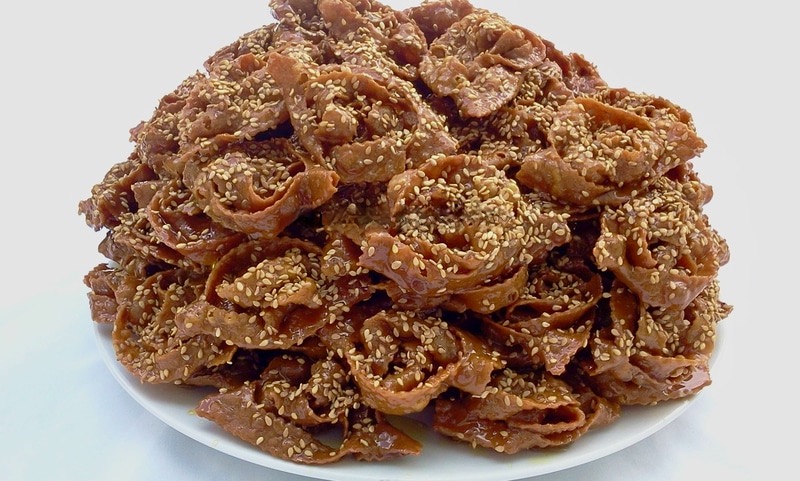
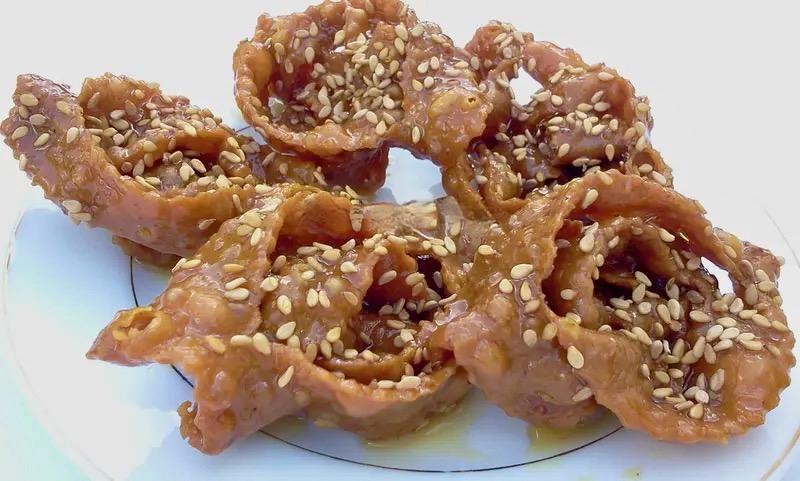
Chebakia, also known as mkherka, is a traditional Moroccan pastry shaped like a flower. It is deep fried in oil, then generously coated in honey and finished with a sprinkle of sesame seeds. Both crispy and tender, and delicately flavored with cinnamon and anise, it is mainly enjoyed during the month of Ramadan.
Prepared for generations in Moroccan households, chebakia is one of those recipes made with care and patience, especially during the month of Ramadan. Also known as mkherka, and sometimes referred to as zlabia depending on the region, it holds an important place in Moroccan kitchens and is considered one of the country’s most iconic sweets, alongside cornes de gazelle and briouates. A small clarification though, zlabia is a completely different pastry and should not be confused with chebakia.
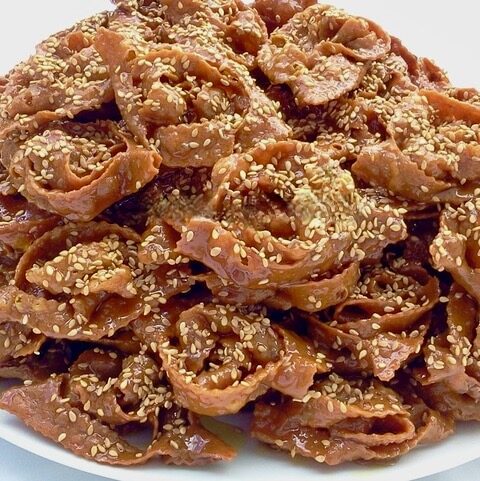
Made from simple ingredients such as flour, finely ground sesame seeds, cinnamon, anise, and orange blossom water, chebakia is shaped into a flower before being deep fried in oil. It is then soaked in honey and finished with a sprinkle of sesame seeds. This pastry is most commonly enjoyed during Ramadan, where it traditionally accompanies harira soup on the iftar table.
In many families, making chebakia is much more than just a recipe. It is a true moment of sharing, when large batches are prepared to offer to family, friends, and neighbors. A beautiful, warm tradition that I love to keep alive and share with you.
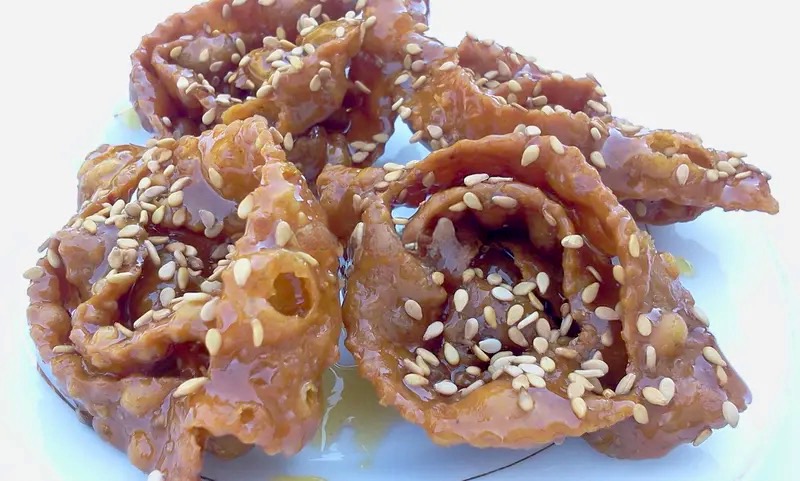
Table of Contents
Tips for a Successful Moroccan Chebakia
good kneading: The recipe itself is not difficult, but good kneading is essential to obtain a smooth and easy to work dough. Do not add water unless the dough is truly too hard. It should be firm at first, as kneading is what gradually softens it.
Turning the dough: When rolling out the dough, remember to turn it over 2 to 3 times. This simple step helps create small air bubbles in the dough, which will puff up during frying and later absorb the honey.
Fry over medium heat: The oil should be hot but not smoking. Fry over medium heat to achieve an even golden color and a consistent texture.
Honey should be liquid but cold: Gently warm the honey just enough to liquefy it, then use it without reheating. The chebakia can remain immersed in the honey during the first batches, as long as the container allows.
Ingredients:
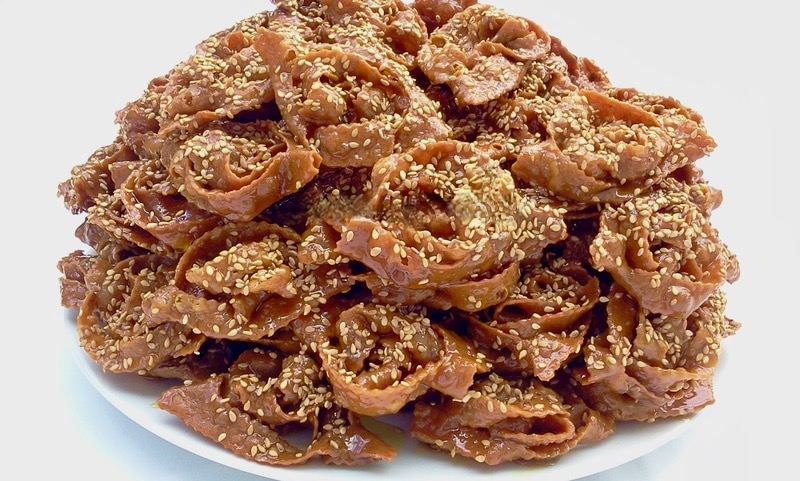
This recipe yields the quantity shown in the photo above. You can divide the quantities by two or more to obtain the amount that suits your needs.
Note: You will find the printable recipe card at the end of the article.
- 1 kg all-purpose flour (2.2 lb)
- 250 g toasted sesame seeds, ground into a fine powder (9 oz) (you may use a mix of sesame seeds and raw almond powder)
- 3 egg yolks (if you prefer not to use egg yolks, add a little more water to bring the dough together)
- 80 ml melted butter ( 2.7 fl oz)
- 80 ml vegetable oil (2.7 fl oz)
- 80 ml olive oil (2.7 fl oz)
- 1 tablespoon ground anise
- 1 tablespoon ground cinnamon
- 1/2 tablespoon aged butter (smen), optional
- A pinch of ground gum arabic (meska hourra)
- 1 packet artificial saffron food coloring (1/2 teaspoon) or 1 teaspoon turmeric
- 1 teaspoon saffron threads (gently warmed in a spoon, then rubbed between your hands)
- 90 ml white vinegar ( 3 fl oz)
- 180 ml orange blossom water ( 6 fl oz)
- 1 level tablespoon fresh baker’s yeast, dissolved in 60 ml warm water ( 2 fl oz)
For frying and coating
- 2 liters oil (67 fl oz), as needed
- 2 kg honey (4.4 lb), as needed
- 150 g toasted sesame seeds for sprinkling (5 oz)
How to Make Chebakia
1. Start by toasting the sesame seeds in a preheated oven at 320°F (160°C) for about 10 minutes. The seeds should be crunchy, with no bitter taste. Grind them into a fine powder, then measure out 250 g (9 oz).
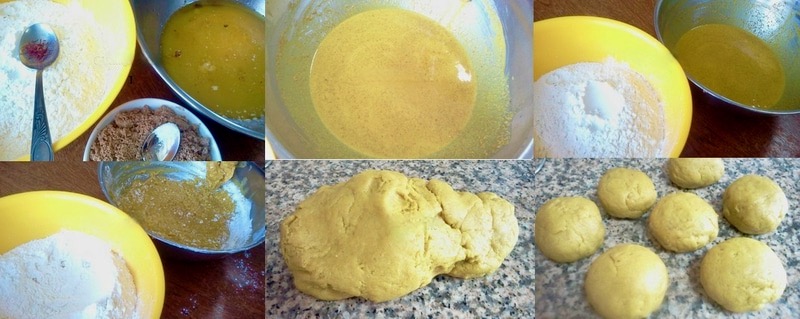
2. Combine all the ingredients in a large bowl, then gradually add the sifted flour, mixing well after each addition. Using a stand mixer can make this step easier.
3. Knead the dough as you add the flour. It is important to incorporate all of the flour, even if the dough feels firm at first. If it becomes too stiff, add a small amount of water.
4. Knead for about 20 minutes, until the dough becomes smooth and supple. Divide into 7 balls and cover them with plastic wrap.
5. Take one dough ball, roll it into a log, then cut it into two pieces. Roll out one piece into a rectangle, turning it over several times. This helps the dough puff up properly during frying.
The dough should be rolled very thin, not thick, as it will form small hollow layers that absorb the honey. Roll it out as thinly as possible. You can use a pasta machine if you like. For very thin dough like mine, use setting number 4 on the machine.
This is the pasta machine I have been using for years and it works very well here.
6. Cut the dough using a special chebakia cutter or a pastry wheel, cutting it into squares in the size you prefer. In each square, make slits without cutting all the way to the edges. You should make four slits in each square of dough.
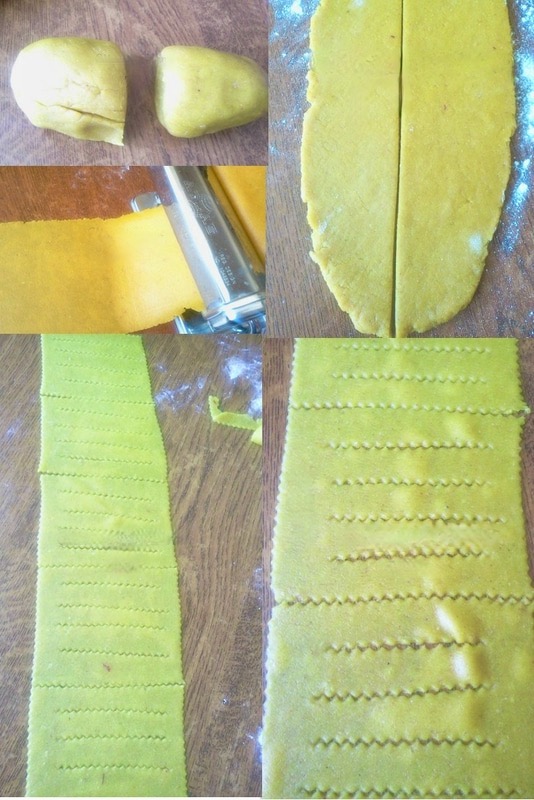
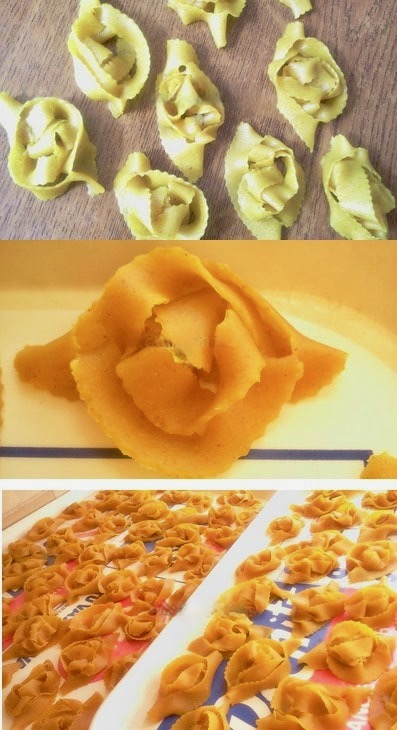
7. Take one square of dough in your hand. Using your finger, lift the first strip, leave the second one in place, then take the third and the last strip together. Turn everything inside out, like turning a sock. It may help to watch a shaping tutorial on YouTube, as there are several ways to shape chebakia.
8. Let the shaped chebakias rest for 3 hours, then start frying them in well heated oil over low heat. Fry until the chebakias are nicely golden before removing them from the oil with a slotted spoon.
9. Dip the chebakias into the honey, slightly warmed just enough to liquefy it. Leave them immersed during the following frying batches, as long as the container allows and they remain fully coated with honey.
10. Then remove the chebakias from the honey using a slotted spoon and place them in a large colander or a steamer basket
11. Sprinkle with toasted sesame seeds as you go. You can store the chebakias in an airtight container without the sesame seeds, then, when ready to serve, add a little cold liquid honey if needed and sprinkle with toasted sesame seeds.
12. Once all the chebakias are fried, let them cool completely before storing them in an airtight container.
How to Store Chebakia?
Chebakia keeps very well. I store it at room temperature in airtight containers throughout the month of Ramadan, and it stays excellent. It even improves in flavor over time.
Remember to gently turn the container from time to time so the honey that may have settled at the bottom redistributes evenly.
You can also freeze chebakia for several months, separating the layers with plastic wrap.
Moroccan Chebakia Sesame Cookies With Honey
INGREDIENTS
- 1 kg all-purpose flour
- 250 g toasted sesame seeds ground into a fine powder (you may use a mix of sesame seeds and raw almond powder)
- 3 egg yolks if you prefer not to use egg yolks, add a little more water to bring the dough together
- 80 ml melted butter
- 80 ml vegetable oil
- 80 ml olive oil
- 1 tablespoon ground anise
- 1 tablespoon ground cinnamon
- 1/2 tablespoon aged butter smen, optional
- A pinch of ground gum arabic meska hourra
- 1 packet artificial saffron food coloring 1/2 teaspoon or 1 teaspoon turmeric
- 1 teaspoon saffron threads gently warmed in a spoon, then rubbed between your hands
- 90 ml white vinegar
- 180 ml orange blossom water
- 1 level tablespoon fresh baker’s yeast dissolved in 60 ml warm water ( 2 fl oz)
For frying and coating
- 2 liters vegetable oil as needed
- 2 kg honey as needed
- 150 g toasted sesame seeds for sprinkling
PREPARATION
- This recipe yields the quantity shown in the photo above. You can divide the quantities by two or more to obtain the amount that suits your needs.
- Start by toasting the sesame seeds in a preheated oven at 320°F (160°C) for about 10 minutes. The seeds should be crunchy, with no bitter taste. Grind them into a fine powder, then measure out 250 g (9 oz).
- Combine all the ingredients in a large bowl, then gradually add the sifted flour, mixing well after each addition. Using a stand mixer can make this step easier.
- Knead the dough as you add the flour. It is important to incorporate all of the flour, even if the dough feels firm at first. If it becomes too stiff, add a small amount of water.
- Knead for about 20 minutes, until the dough becomes smooth and supple. Divide into 7 balls and cover them with plastic wrap.
- Take one dough ball, roll it into a log, then cut it into two pieces. Roll out one piece into a rectangle, turning it over several times. This helps the dough puff up properly during frying.
- The dough should be rolled very thin, not thick, as it will form small hollow layers that absorb the honey. Roll it out as thinly as possible. You can use a pasta machine if you like. For very thin dough like mine, use setting number 4 on the machine.
- This is the pasta machine I have been using for years and it works very well here.
- Cut the dough using a special chebakia cutter or a pastry wheel, cutting it into squares in the size you prefer. In each square, make slits without cutting all the way to the edges. You should make four slits in each square of dough.
- Take one square of dough in your hand. Using your finger, lift the first strip, leave the second one in place, then take the third and the last strip together. Turn everything inside out, like turning a sock. It may help to watch a shaping tutorial on YouTube, as there are several ways to shape chebakia.
- Let the shaped chebakias rest for 3 hours, then start frying them in well heated oil over low heat. Fry until the chebakias are nicely golden before removing them from the oil with a slotted spoon.
- Dip the chebakias into the honey, slightly warmed just enough to liquefy it. Leave them immersed during the following frying batches, as long as the container allows and they remain fully coated with honey.
- Then remove the chebakias from the honey using a slotted spoon and place them in a large colander or a steamer basket
- Sprinkle with toasted sesame seeds as you go. You can store the chebakias in an airtight container without the sesame seeds, then, when ready to serve, add a little cold liquid honey if needed and sprinkle with toasted sesame seeds.
- Once all the chebakias are fried, let them cool completely before storing them in an airtight container.
Thank you for visiting my blog and for your comments.