Today, I’m sharing with you a delicious recipe for a chocolate and cocoa glaze without glucose or condensed milk, a simple and effective alternative to enhance your mousse cake. Unlike the traditional cocoa glaze, this version holds up very well to freezing, making it perfect if you want to fully complete your entremets in advance and refreeze it after glazing.
After my recipe for ultra-shiny chocolate mirror glaze which was hugely successful, I wanted to share this one with you, which is intense in cocoa.
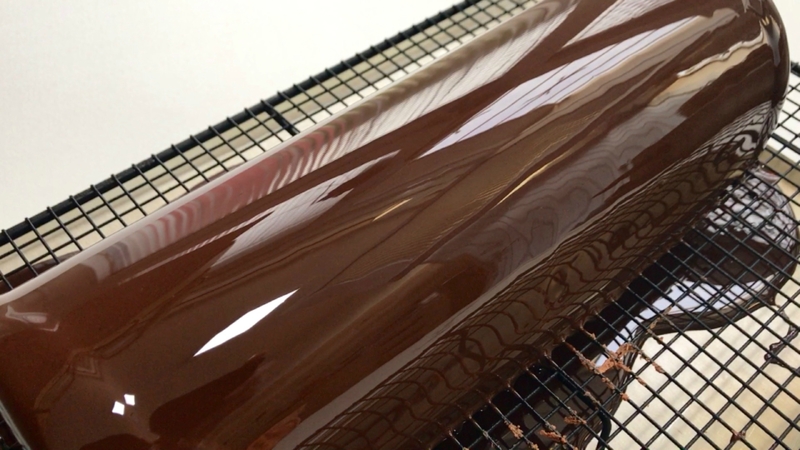
This glaze is very fine on the palate, I guarantee it. No more overly gelatinous glazes that you sometimes see removed from cakes, like Cyril Lignac does in “Le Meilleur Pâtissier”! This one coats desserts delicately, without weighing them down, and gives them a very shiny and elegant finish.
I used it for an absolutely delicious chocolate-vanilla yule log, perfect for your festive year-end meals, especially for Christmas Eve.
Table of Contents
Video recipe

Ingredients:
For a 12-inch Yule log or an 8.5-inch round mousse cake
NB: Find the printable recipe card at the end of the content.
- 225 g sugar
- 125 ml water
- 150 g dark couverture chocolate (66% or 72%)
- 30 g unsweetened cocoa
- 65 ml heavy cream (32% / 35% fat)
- 5 gelatin sheets (10 g if the sheets are 2 g at 200 blooms) or 150 bloom sheets Or 10 g powdered gelatin (200 blooms) (rehydrated in 60 ml water.)
- For a very black glaze (add a little black food coloring)
Preparation steps :
It’s better to have a little more glaze than not enough. If you have any leftover, collect the glaze that has dripped off and store it for later use: up to 3 days in the refrigerator or 1 month in the freezer.
Soak the gelatin in very cold water before you start.
Pour 125 ml of water into a saucepan. Add 225 g of sugar on top, then place over the heat.
Stir to dissolve the sugar. ⚠️ Warning: remove from the heat as soon as the syrup reaches 103 °C (217 °F).
Pour the hot syrup over 150 g of chocolate. Whisk well until the chocolate is completely melted.
Add 30 g of sifted unsweetened cocoa powder and mix thoroughly to fully dissolve it.
Next, add 65 ml of cold heavy cream. Stir and let the temperature drop to 60 °C (140 °F).
At 60 °C, add the drained gelatin and mix well. Strain the glaze through a fine mesh sieve.
If you plan to use it the same day, blend the glaze with an immersion blender and use it at 29 °C (84 °F).
Otherwise, cover the surface with plastic wrap (direct contact) and refrigerate until the next day.
The following day, gently reheat it, removing it from the heat several times to avoid exceeding 40 °C (104 °F). Take it off the heat once it reaches around 37 °C (99 °F), even if a few small pieces remain.
Let the temperature drop to 32°C (89.6°F) in the saucepan before pouring into a pouring jug to blend. Blend with an immersion blender (this step is very important for the smoothness and shine), keeping it well immersed to avoid creating air bubbles that would make your glaze less aesthetically pleasing.
For me, the ideal temperature is 29°C (84.2°F), but it can slightly vary depending on the thermometer used, a bit lower or higher for you.
Check the consistency of the glaze on the back of a spoon that’s been previously frozen: it should flow while covering with a thin, even layer.
When the glaze reaches 29°C (84.2°F), take your entremet out of the freezer and place it on a rack or a small support slightly smaller than the entremet, to elevate it. Run your hand or a paper towel over the entremet to remove any frost crystals. Pour the glaze over to fully cover it.
Once the glaze has stopped dripping, move the entremet to a serving platter. Let it defrost in the refrigerator for about 6 hours. Be sure to follow the instructions provided in the recipe.
Tips and tricks
Use good ingredients: I recommend using high-quality unsweetened cocoa powder and couverture chocolate. The brands I usually use are Valrhona and Cacao Barry. The latter is reasonably priced.
Blend your glaze properly: Use an immersion blender and keep it well immersed to avoid air bubbles that could spoil the appearance of the glaze. I use the Bamix.
Keep an eye on the glaze temperature: Wait until it reaches about 29°C (84.2°F) before using it. Since thermometers can vary slightly, always test the consistency on the back of a cold spoon.
Remove any frost crystals: Before glazing, gently pass a paper towel over the mousse cake to remove any traces of frost.
Work quickly: Once everything is ready, pour the glaze promptly to achieve a thin, smooth, and shiny layer.
Other glaze recipes you might like:
Glaze without glucose or condensed milk

Chocolate and Cocoa Mirror Glaze
INGREDIENTS
For a 12-inch Yule log or an 8.5-inch round mousse cake
- 225 g sugar
- 125 ml water
- 150 g dark couverture chocolate 66% or 72%
- 30 g unsweetened cocoa
- 65 ml heavy cream 32% / 35% fat
- 5 gelatin sheets 10 g if the sheets are 2 g at 200 blooms or 150 bloom sheets Or 10 g powdered gelatin (200 blooms) (rehydrated in 60 ml water.)
- For a very black glaze add a little black food coloring
PREPARATION
- It’s better to have a little more glaze than not enough. If you have any leftover, collect the glaze that has dripped off and store it for later use: up to 3 days in the refrigerator or 1 month in the freezer.
- Soak the gelatin in very cold water before you start.
- Pour 125 ml of water into a saucepan. Add 225 g of sugar on top, then place over the heat.
- Stir to dissolve the sugar. ⚠️ Warning: remove from the heat as soon as the syrup reaches 103 °C (217 °F).
- Pour the hot syrup over 150 g of chocolate. Whisk well until the chocolate is completely melted.
- Add 30 g of sifted unsweetened cocoa powder and mix thoroughly to fully dissolve it.
- Next, add 65 ml of cold heavy cream. Stir and let the temperature drop to 60 °C (140 °F).
- At 60 °C, add the drained gelatin and mix well. Strain the glaze through a fine mesh sieve.
- If you plan to use it the same day, blend the glaze with an immersion blender and use it at 29 °C (84 °F).
- Otherwise, cover the surface with plastic wrap (direct contact) and refrigerate until the next day.
- The following day, gently reheat it, removing it from the heat several times to avoid exceeding 40 °C (104 °F). Take it off the heat once it reaches around 37 °C (99 °F), even if a few small pieces remain.
- Let the temperature drop to 32°C (89.6°F) in the saucepan before pouring into a pouring jug to blend. Blend with an immersion blender (this step is very important for the smoothness and shine), keeping it well immersed to avoid creating air bubbles that would make your glaze less aesthetically pleasing.
- For me, the ideal temperature is 29°C (84.2°F), but it can slightly vary depending on the thermometer used, a bit lower or higher for you.
- Check the consistency of the glaze on the back of a spoon that’s been previously frozen: it should flow while covering with a thin, even layer.
- When the glaze reaches 29°C (84.2°F), take your entremet out of the freezer and place it on a rack or a small support slightly smaller than the entremet, to elevate it. Run your hand or a paper towel over the entremet to remove any frost crystals. Pour the glaze over to fully cover it.
- Once the glaze has stopped dripping, move the entremet to a serving platter. Let it defrost in the refrigerator for about 6 hours. Be sure to follow the instructions provided in the recipe.
Notes
Thank you for your visit and your comments!