Lining a tart or tartlet rings is the technique of covering a tart mold with a rolled-out sheet of sweet pastry, shortcrust pastry, or french pâte sablée. Lining a tart mould is the first step in making tart shells. It is also the most technical step for achieving a perfect tart base with right angles.

Tart shell with an egg wash
I’ve already shared a comprehensive article on sweet pastry dough, in which I demonstrate both the creaming and crumbling methods, as well as chef Gianluca Fusto’s technique for lining a large tart ring. He uses a modern method. It’s this technique that I mostly use for small rings. It yields excellent results.
It’s the method used by many chefs, notably Cédric Grolet with his stunning tarts. It simplifies the process of making small tart bases. This method involves lining a tart ring in two steps.
It might seem like a difficult method when you have several tartlets to line. I assure you that it’s very quick once you get the hang of it.
The new chef’s trick for tart bases with a beautiful golden shine is to brush them with an egg wash after pre-baking to make them glossy. I never skip this step because the result is superb.
Tartlet bases with sweet pastry
I’ve also written another article on the classic traditional method of tart lining, which you all know. This is the method used to make pies in pastry schools. A single sheet of sweet pastry dough is used to line a mold.
It’s more challenging to achieve a perfect right angle, but it’s quicker once you’ve grasped the method. With a little practice, no matter which tart lining technique you choose, you can achieve an excellent result, worthy of the great Parisian patisseries.

Table of Contents
The method on video
How to line mini tart rings?
| NB: Find the quantity of ingredients in the recipe card at the end of the article, which you can print. Below are the instructions, also available with visual images. |
Start by preparing the sweet pastry dough or shortcrust pastry. It’s best to prepare it at least the day before to make lining easier. If you’re in a hurry and didn’t plan to make a tart, you can leave it in the refrigerator for just 2 hours to firm up.
You can also roll it out immediately between 2 sheets of parchment paper and then let it firm up for 30 minutes before using it.
There are two slightly different methods for lining a tart or tartlet ring. Both methods yield excellent results. In both methods, you assemble a strip of sweet pastry dough around the side of the ring with a disc inside the tartlet ring.
1st method :
Roll out the chilled but not hard sweet pastry dough between 2 floured sheets of parchment paper.
Roll out to 3 mm for the circles and 2.5 mm for the strips (use rulers if possible).
Form a rectangle and cut strips slightly taller than the height of the tartlet ring and slightly longer than the circumference of the ring.
Also, cut out sweet pastry dough discs slightly smaller than the diameter of the tart ring.
You can calculate the circumference of the circles you are going to line or just estimate the length of the strip that will fit.
| To calculate the circumference of a circle, you multiply the diameter of the circle by 3.14 (PI) and add 2 cm for comfort. |
For an 8 cm tart ring (3.14 in ), you’ll need a strip 28 cm long and 2.5 cm wide (11 in x 0.98 in), and a disk for the bottom 7 cm in diameter (2.75 in ).
If the dough loses its firmness, refrigerate to firm up.
Lightly grease the circles and press the strips around the inside side, then trim off any excess. Press well to ensure the dough adheres well and to remove any air bubbles. It’s these air bubbles that create holes in baked pie shells. It’s quite unsightly.
Moisten the outline of the pastry disc and place it inside the circle. Extend it with your finger to stick it to the strip already stuck to the side of the circle.

Technique for lining tartlet rings
Slightly firm up the dough before trimming the excess strips that extend beyond the rings. Shave off from the inside out with a sharp knife.
Place the prepared rings on a Silpain mat and preferably a perforated baking tray. This allows better heat distribution and ensures even baking.
Before baking, firm up in the freezer for 1 hour. Sometimes, I leave the prepared rings in the refrigerator until the next day before baking.
Preheat oven to 150°C/160°C fan-assisted oven ( 302°F/320°F).
Bake for about 15 to 20 minutes (lightly golden brown) since they will be returned to the oven after applying the egg wash (8 to 10 minutes).
If everything is done correctly, the dough won’t shrink, and the tart shells will be perfect.

Finishing the tart shells and baking results
2nd Method
Cut out discs of dough using the tart ring. The dough disc should adhere to the ring. Place it on the Silpain mat.
Next, cut strips of dough as in the 1st method.
Lightly moisten the side of the strip that will adhere to the disc. Press it around the edge of the ring and onto the disc.
Complete the finishing of the tart shell as in the 1st method.

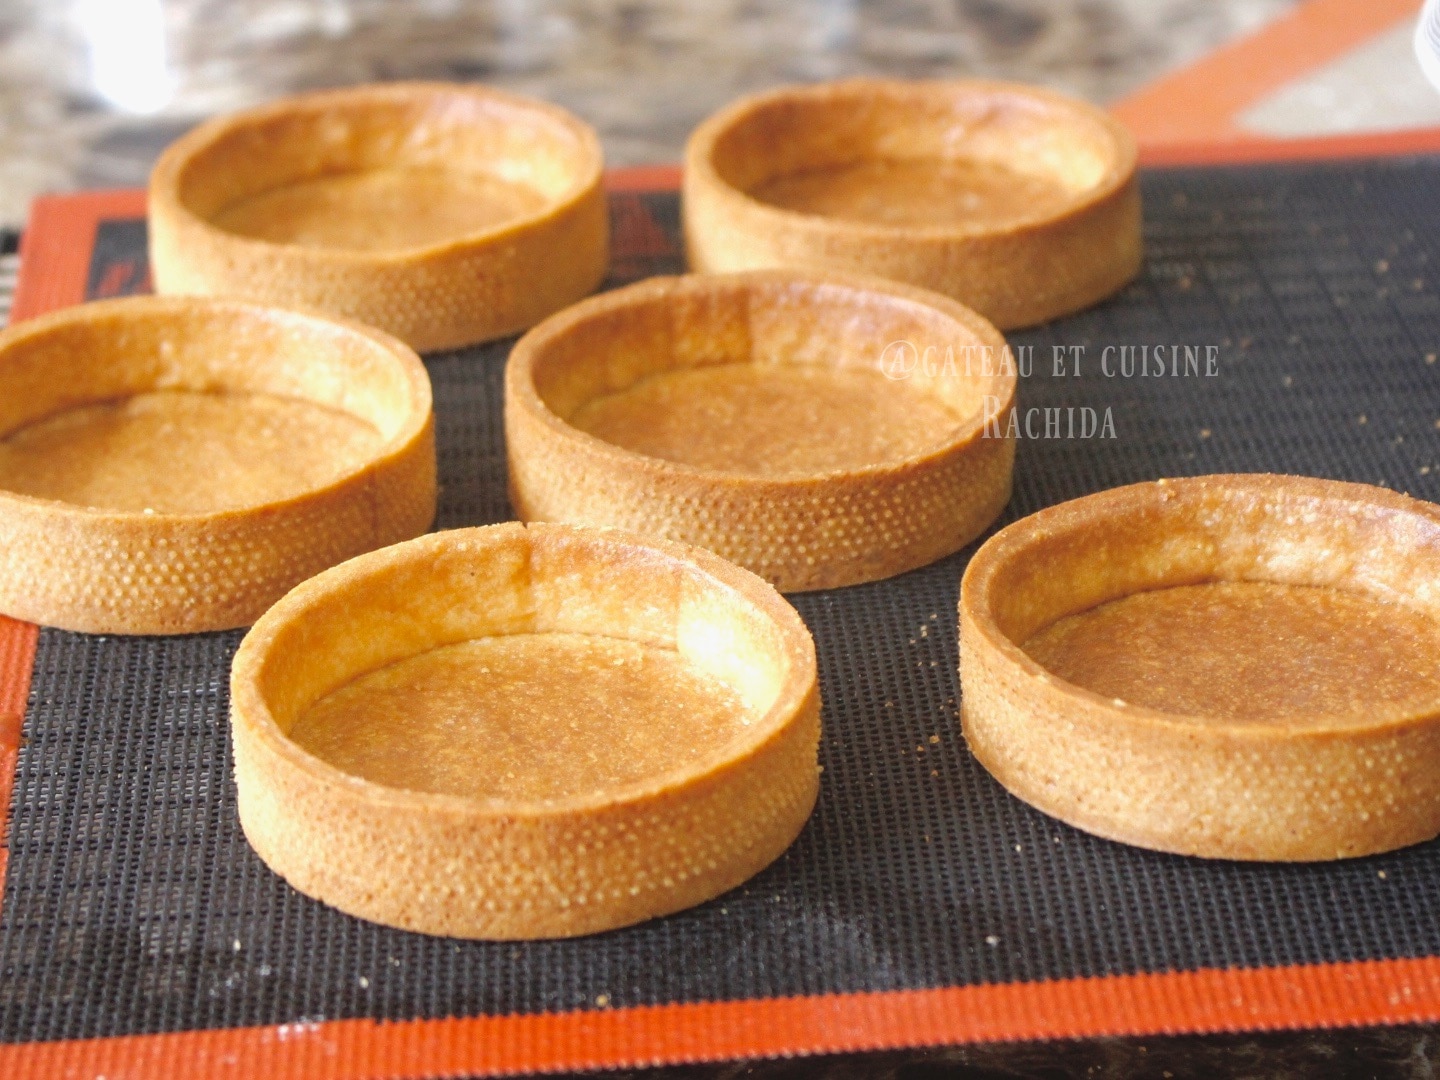
After baking (15 to 20 minutes), remove the tart shells from the rings.
Finishing the Tart Shells
Pass each tart shell over the back of a sieve to remove any irregularities.
Wipe with a paper towel to remove crumbs. Yes, a beautiful tart shell needs some care!
You have the option to either put them back in the oven to finish baking and give them a golden color or brush them with an egg wash.
Prepare the egg wash by mixing the egg yolk with the heavy cream using a fork. Using a pastry brush, coat the inside and outer edges of the tart shells. Brush several times to remove excess wash and avoid clumping.
Bake for 8 to 10 minutes until the tart shells are nicely golden brown.
Remove the tray from the oven and slide the Silpain mat onto a wire rack. Allow the tart shells to cool completely before using them.

How to Store Tart Shells
Once the tart shells are baked, we want to preserve their crispness for a few days. However, baked sweet pastry tends to soften quickly. Sometimes I prepare multiple shells in advance so I have them ready when I get a sudden urge to make a tart.
I place the cooled shells in zip-lock bags, label them with the date, and freeze them. You can store them for 2 to 3 months without any issues.
When you want to use, you can fill with almond cream and bake at 160°C (320°F). Alternatively, you can bake them empty for about fifteen minutes. The tart shell becomes as crispy as the first day.
Enjoy your perfectly baked, crisp, and golden tart shells !
Tart Recipes to Try

How to make perfect tart shells like pro
EQUIPEMENTS
INGREDIENTS
Sweet pastry ( pâte sucrée)
- 250 g flour t55 (8.8 oz) - I used all purpose flour
- 150 g very soft butter (5.3 oz)
- 95 g powdered sugar (3.4 oz)
- 35 g almond flour (1.2 oz)
- 50 g eggs (1.8 oz)
- 1 g salt 1/3 teaspoon
- 1 vanilla bean or vanilla powder
Egg wash
- 1 egg yolk 20 g (0.7 oz)
- 2 teaspoons of heavy cream 5 g (0.2 oz)
PREPARATION
- Start by preparing the sweet pastry dough or shortcrust pastry. It's best to prepare it at least the day before to make lining easier. If you're in a hurry and didn't plan to make a tart, you can leave it in the refrigerator for just 2 hours to firm up.
- You can also roll it out immediately between 2 sheets of parchment paper and then let it firm up for 30 minutes before using it.
- There are two slightly different methods for lining a tart or tartlet ring. Both methods yield excellent results. In both methods, you assemble a strip of sweet pastry dough around the side of the ring with a disc inside the tartlet ring.
1st method :
- Roll out the chilled but not hard sweet pastry dough between 2 floured sheets of parchment paper.
- Roll out to 3 mm for the circles and 2.5 mm for the strips (use rulers if possible).
- Form a rectangle and cut strips slightly taller than the height of the tartlet ring and slightly longer than the circumference of the ring.
- Also, cut out sweet pastry dough discs slightly smaller than the diameter of the tart ring.
- You can calculate the circumference of the circles you are going to line or just estimate the length of the strip that will fit.
- To calculate the circumference of a circle, you multiply the diameter of the circle by 3.14 (PI) and add 2 cm for comfort.
- For an 8 cm tart ring (3.14 in ), you'll need a strip 28 cm long and 2.5 cm wide (11 in x 0.98 in), and a disk for the bottom 7 cm in diameter (2.75 in ).
- If the dough loses its firmness, refrigerate to firm up.
- Lightly grease the circles and press the strips around the inside side, then trim off any excess. Press well to ensure the dough adheres well and to remove any air bubbles. It's these air bubbles that create holes in baked pie shells. It's quite unsightly.
- Moisten the outline of the pastry disc and place it inside the circle. Extend it with your finger to stick it to the strip already stuck to the side of the circle.
- Slightly firm up the dough before trimming the excess strips that extend beyond the rings. Shave off from the inside out with a sharp knife.
- Place the prepared rings on a Silpain mat and preferably a perforated baking tray. This allows better heat distribution and ensures even baking.
- Before baking, firm up in the freezer for 1 hour. Sometimes, I leave the prepared rings in the refrigerator until the next day before baking.
- Preheat oven to 150°C/160°C fan-assisted oven ( 302°F/320°F).
- Bake for about 15 to 20 minutes (lightly golden brown) since they will be returned to the oven after applying the egg wash (8 to 10 minutes).
- If everything is done correctly, the dough won’t shrink, and the tart shells will be perfect.
2nd Method
- Cut out discs of dough using the tart ring. The dough disc should adhere to the ring. Place it on the Silpain mat.
- Next, cut strips of dough as in the 1st method.
- Lightly moisten the side of the strip that will adhere to the disc. Press it around the edge of the ring and onto the disc.
- Complete the finishing of the tart shell as in the 1st method.
- After baking (15 to 20 minutes), remove the tart shells from the rings.
Finishing the Tart Shells
- Pass each tart shell over the back of a sieve to remove any irregularities.
- Wipe with a paper towel to remove crumbs. Yes, a beautiful tart shell needs some care!
- You have the option to either put them back in the oven to finish baking and give them a golden color or brush them with an egg wash.
- Prepare the egg wash by mixing the egg yolk with the heavy cream using a fork. Using a pastry brush, coat the inside and outer edges of the tart shells. Brush several times to remove excess wash and avoid clumping.
- Bake for 8 to 10 minutes until the tart shells are nicely golden brown.
- Remove the tray from the oven and slide the Silpain mat onto a wire rack. Allow the tart shells to cool completely before using them.
- Enjoy your perfectly baked, crisp, and golden tart shells !
Thank you for visiting my baking blog and your comments.
Tartelette, Tarte, Pastry, Easy Recipe, Snack,