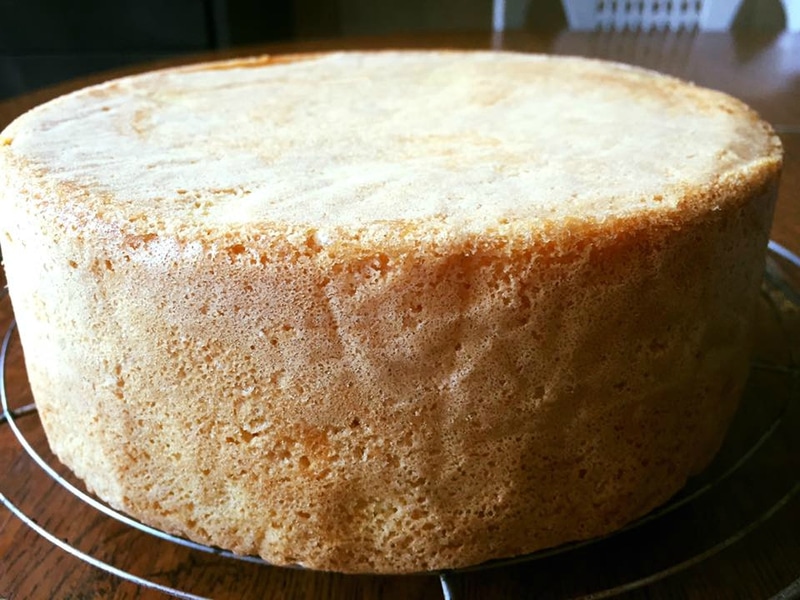
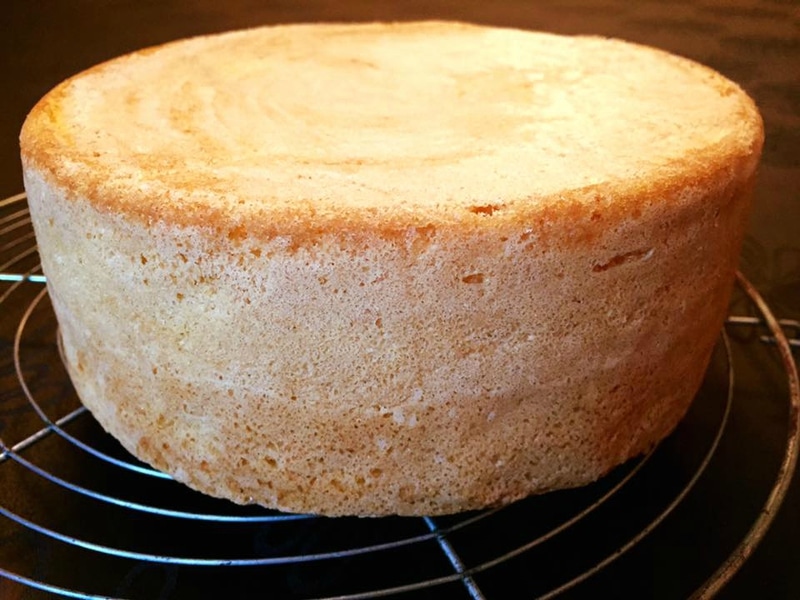
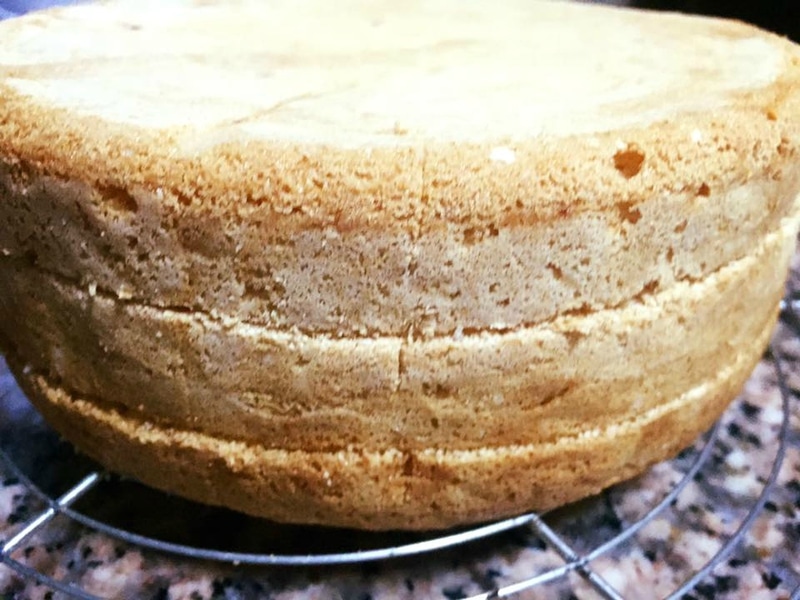
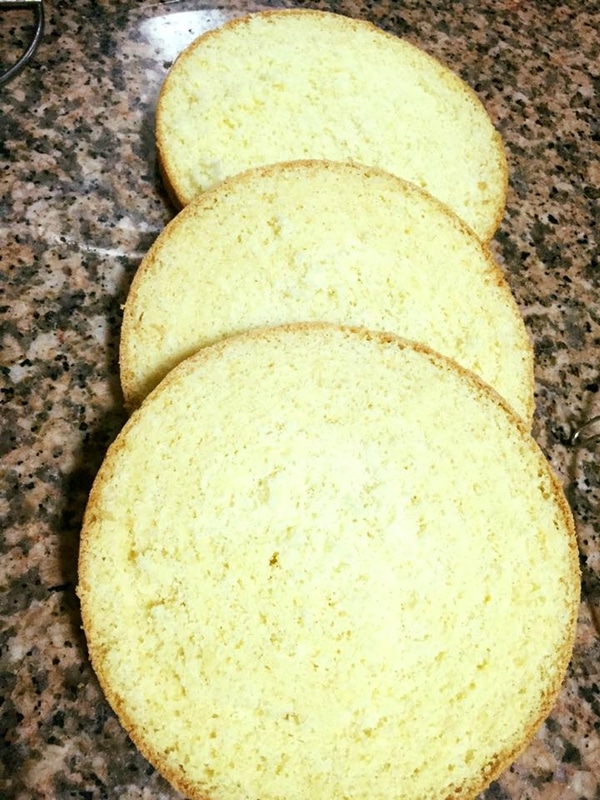
A simple but essential recipe: The fluffy and super easy sponge cake, as it’s the base for many cakes. I’ve made many types of sponge cakes, with various measurements, using a bain-marie, without yeast… but this one is the best in all aspects. It’s fluffy, airy, and nicely tall, perfect for 3 layers.
The recipe is very simple and quick to make.
EDIT 2020: Check out my new recipe for a very tall sponge cake, over 10 cm high. I told you that I never stop researching to improve a recipe and achieve an excellent result. I think I’ve found the gem. Those who follow me have seen and tested the recipe on YouTube. It’s the foolproof very tall sponge cake, and also the very tall chocolate sponge cake.
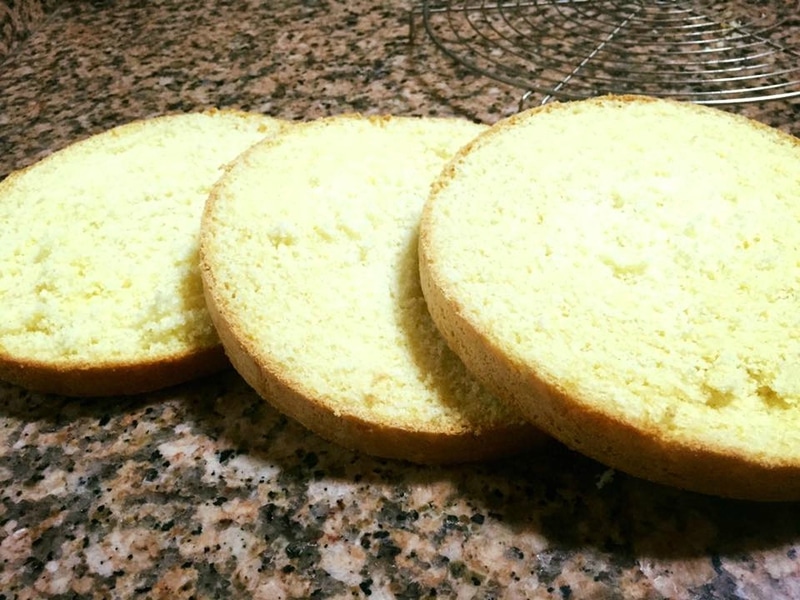
You can stick with the recipe I give you here, which is excellent as well. As you can see, it gives a very good result and you can slice it into 3 layers.
In the following video, all the work is done with a stand mixer, but you can easily use a simple hand mixer. The recipe is designed for a 24 cm diameter and 6 cm high sponge cake, but I also give you the quantities for an 18 cm by 8 cm pan as well as for a chocolate sponge cake.
Please be forgiving about the video quality, it was from my early days: I filmed it with my phone, using only one hand!
Table of Contents
Video recipe
You can use this sponge cake to make a fraisier cake, a layer cake, a tiered cake, a Black Forest cake, etc. It’s a very useful basic recipe.
If you’re looking for an even taller, denser cake better suited for tiered cakes like cake designs, I recommend the vanilla or chocolate molly cake. That said, with this sponge cake, you already get 3 beautiful layers, which is more than enough for many cakes.
Personally, I prefer to use sponge cake in many recipes like those mentioned above, because it’s light, spongy, and very pleasant to eat.
Ingredients:
NB: Find the printable recipe card at the end of the article.
Edit 2022: I reduced the amount of baking powder while obtaining the same result.
For a 9.5 x 2.4 inches round cake pan:
- 5 eggs
- 250 g sugar ( 8.8 oz )
- 1 vanilla sugar bag (0.35 oz)
- 250 g flour (8.8 oz)
- 1 sachet baking powder (7 g /0.25 oz)
For an 7 x 3 inches round cake pan:
- 4 eggs
- 200 g granulated sugar (7 oz)
- 1 vanilla sugar bag (0.35 oz)
- 200 g all-purpose flour (7 oz)
- 1 sachet baking powder (7 g /0.25)
For a chocolate sponge cake (9.5 x 2.4 inches round cake pan):
- 5 eggs
- 250 g sugar ( 8.8 oz )
- 1 vanilla sugar bag (0.35 oz)
- 225 g flour (8 oz)
- 25 g cocoa powder (0.9 oz)
- 1 sachet baking powder (7 g /0.25 oz)
Preparation steps :
Sift the flour, baking powder, and cocoa if you’re making a chocolate sponge cake.
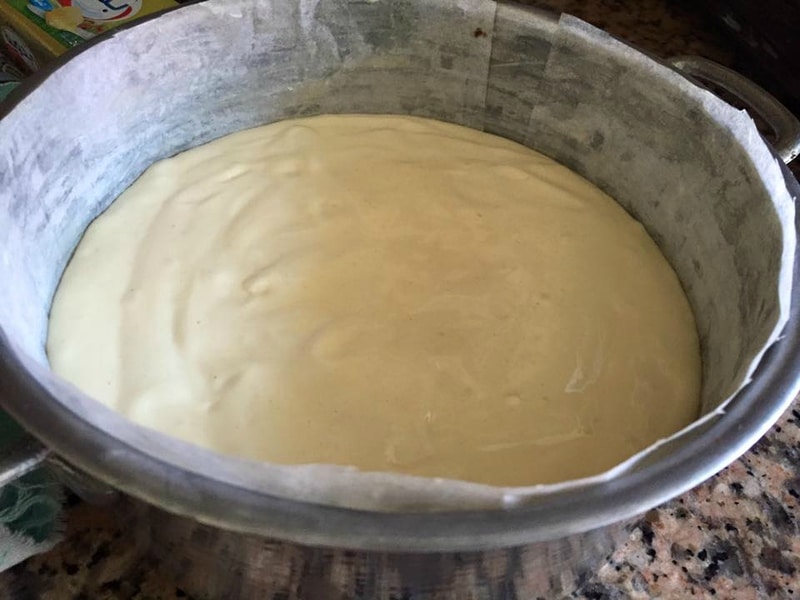
Butter the mold, flour it, and line the bottom with a round of parchment paper.
Preheat oven to 175°C / 350°F
In the bowl of the stand mixer, put the eggs, sugar, and vanilla sugar. Beat for 5 minutes at maximum speed (speed 10).
You can do this step with a hand mixer, but it will take a little longer.
The mixture should triple in volume, become white and creamy.
Add the sifted flour in three batches, gently incorporating it with a spatula, from bottom to top, to avoid deflating the mixture.
Pour immediately into the mold, then put in the oven. Bake between 30 and 45 minutes.
Do not open the oven before the end of baking, as the sponge cake may collapse.
For me, it’s perfectly cooked after 40 minutes. A skewer inserted in the center should come out dry.
Small tip: some ovens cook faster than others. For your first attempt, start monitoring the baking from 25 minutes, then adjust for the next times.
When out of the oven, run a knife around the sponge cake to loosen it from the sides of the mold.
Gently unmold onto a wire rack and let cool completely before wrapping in plastic wrap or cutting into 2 or 3 layers depending on its height.
For a chocolate sponge cake (9.5 x 2.4 inches round cake pan):

Tips and Tricks
I always leave the baking sheet at the top of the oven: this way, the sponge cake doesn’t brown too much on top.
It’s best to keep it in the refrigerator until the next day before cutting it. This makes cutting easier and prevents it from crumbling.
I sometimes cut it the same day without any problem.
The sponge cake freezes very well for up to a month, well wrapped in plastic wrap.

INGREDIENTS
For a 9.5 x 2.4 inches round cake pan:
- 5 eggs
- 250 g sugar
- 1 vanilla sugar bag
- 250 g flour
- 1 sachet baking powder
For an 7 x 3 inches round cake pan:
- 4 eggs
- 200 g granulated sugar
- 1 vanilla sugar bag
- 200 g all-purpose flour
- 1 sachet baking powder
For a chocolate sponge cake (9.5 x 2.4 inches round cake pan):
- 5 eggs
- 250 g sugar
- 1 vanilla sugar bag
- 225 g flour
- 25 g cocoa powder
- 1 sachet baking powder
PREPARATION
- Sift the flour, baking powder, and cocoa if you're making a chocolate sponge cake.
- Butter the mold, flour it, and line the bottom with a round of parchment paper.
- Preheat oven to 175°C / 350°F
- In the bowl of the stand mixer, put the eggs, sugar, and vanilla sugar. Beat for 5 minutes at maximum speed (speed 10).
- You can do this step with a hand mixer, but it will take a little longer.
- The mixture should triple in volume, become white and creamy.
- Add the sifted flour in three batches, gently incorporating it with a spatula, from bottom to top, to avoid deflating the mixture.
- Pour immediately into the mold, then put in the oven. Bake between 30 and 45 minutes.
- Do not open the oven before the end of baking, as the sponge cake may collapse.
- For me, it's perfectly cooked after 40 minutes. A skewer inserted in the center should come out dry.
- Small tip: some ovens cook faster than others. For your first attempt, start monitoring the baking from 25 minutes, then adjust for the next times.
- When out of the oven, run a knife around the sponge cake to loosen it from the sides of the mold.
- Gently unmold onto a wire rack and let cool completely before wrapping in plastic wrap or cutting into 2 or 3 layers depending on its height.
Notes
Thank you for visiting my blog and for your comments.