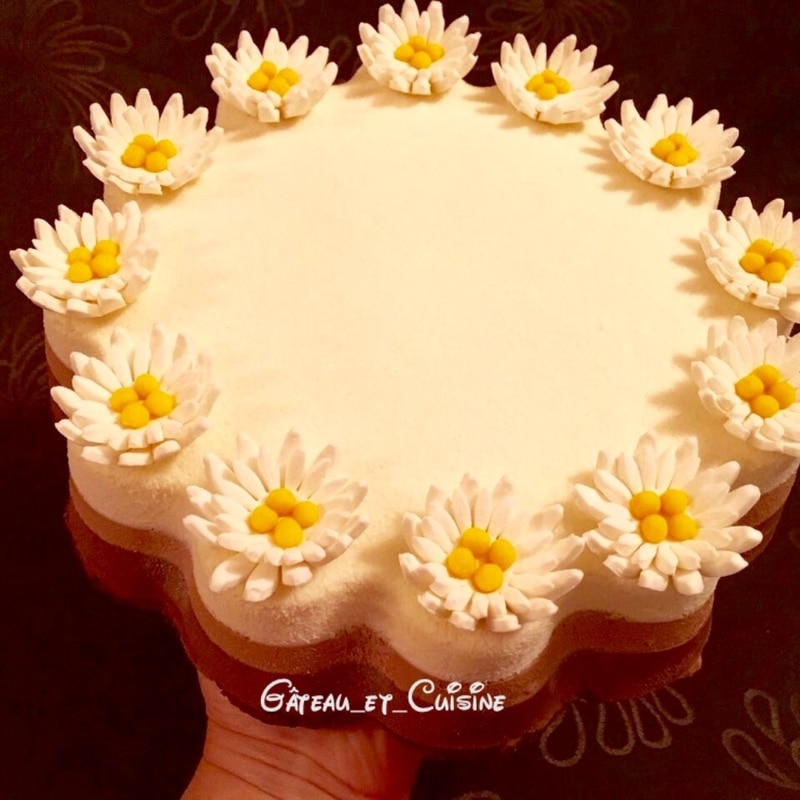
You can already find my best triple-chocolate mousse cake on the blog, which you liked very much. I had to share with you a second version with custard-based mousses that I had made a long time ago.
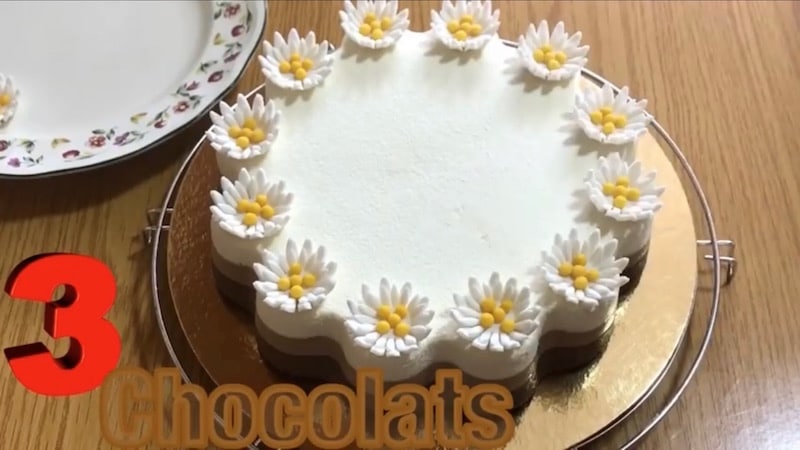
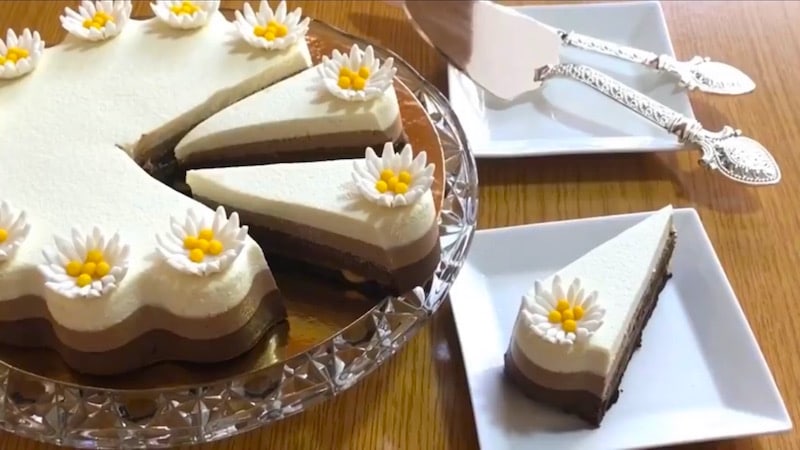
I often make it in the shape of entremets or Yule logs using silicone molds, and it’s very popular. I really enjoy using this flower-shaped mold. There’s no need for a mirror glaze to enhance it.
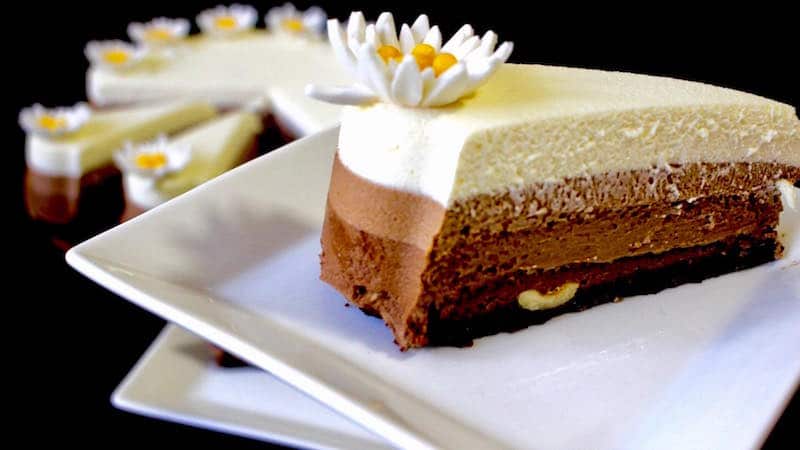
I find that the well-defined layers of chocolate mousse with this flower shape are enough to make a very beautiful chocolate cake. I just added a few sugar paste flowers on top.
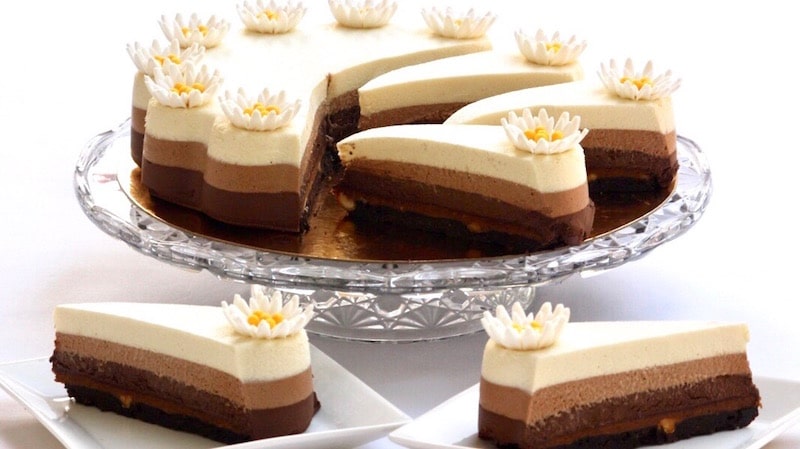
Table of Contents
What is the difference between my two three-chocolate mousse cake ?
Their difference lies mainly in the preparation of the chocolate mousses. The previous one consists of mousses made with whipped cream and chocolate, which makes it simpler to make.
This one consists of mousses made with crème anglaise, which makes it a bit more technical, or at least that’s what those who are put off by making crème anglaise might think. The crème anglaise adds more finesse to the mousses and a bit more flavor.
The difference is really imperceptible! So, like me, make one or the other depending on your mood. For a special occasion, a birthday party, engagement, or any other event, you can offer both desserts.
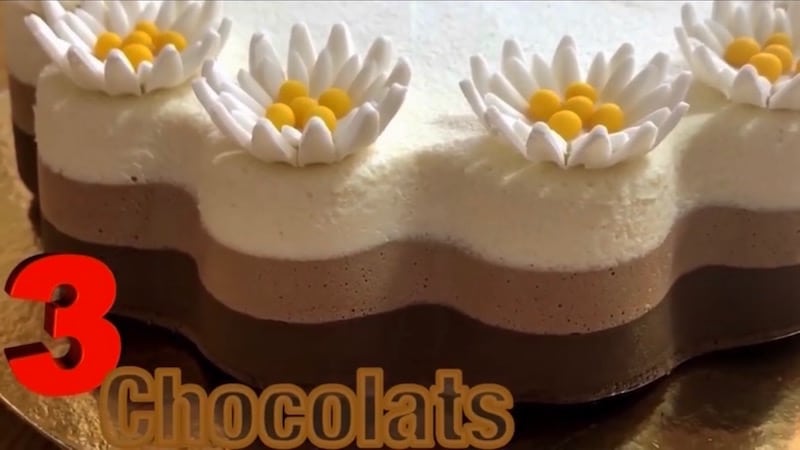
I’ve been asked a lot why the dark chocolate mousse doesn’t contain gelatin and why the milk chocolate mousse contains less than the white chocolate mousse. The difference comes from the fact that dark chocolate has a high cocoa butter content, which makes it set quickly and firmly. Milk chocolate contains slightly less, so we add a small amount of gelatin. For white chocolate, we add more because it has very little cocoa butter, so it lacks the strength to set on its own.
I was also asked if I cut the entremets while it was still chilled, as the cut is clean. No, it needs to come back to room temperature before cutting, otherwise the crunchy layer would be difficult to cut.
The chocolate mousses are more airy when at the right temperature, with a perfect texture.The three-chocolate mousse cake is eaten cold but not frozen. The slicing into portions is perfect; the mousses do not stick to the knife.

Assembly right side up or assembly upside down of the entremets?
For silicone molds, such as the one I use here or Silikomart molds, always assemble upside down.
In this recipe, I’ve done an upside-down assembly. The bottom of the mold will become the top of the mousse cake when it’s unmolded.
Upside-down assembly
Pour the white chocolate mousse first, then the milk chocolate mousse, and finally the dark chocolate mousse. Place the brownie with the crunch on top of the dark chocolate mousse, with the crunchy side against the mousse. Allow the mousse to set between each addition.
You can use a cake ring for the Two upside-down or right-side-up assemblies. Be sure to cover the bottom with plastic wrap. If you don’t want the biscuit to be visible on the sides, cut it smaller than the cake ring. If your cake ring is 20 cm (7.87 inches), make a biscuit that is 18 cm (7.09 inches). You will thus have a margin of 1 cm on each side.
If you make a biscuit that is 16 cm (6.30 in), you will have a margin of 2 cm (0.79 in) on each side.
Here is the texture of the mousses in the video below; it’s the upside-down assembly of the entremets.
Right-side up
If you want to assemble it right-side up in a ring, pour the dark chocolate mousse over the brownie with the crunch, then the milk chocolate mousse, and finally the white chocolate mousse.
If you want to glaze the entire entremets, make sure the biscuit is not visible on the sides.
Recipe on video
Preparation steps :
| NB: NB: Find the quantity of ingredients in the recipe card at the end of the article, which you can print. Below are the instructions, also available with visual images. |
The recipe is for a cake ring of 20 cm in diameter and 5 cm in height (7.87 X1.97 inches) or a mold of 18×7 cm (7×2.76 inches ), use rhodoïd.
Here, I used a silicone mold in the shape of a flower, 22 cm in diameter and 5 cm in height (8.66 x1.97 inches ). Its capacity is 1500 ml (50.72 fl oz) if you fill it with water. Each layer of mousse is approximately 1.5 cm (0.59 inches) in height.
![]()
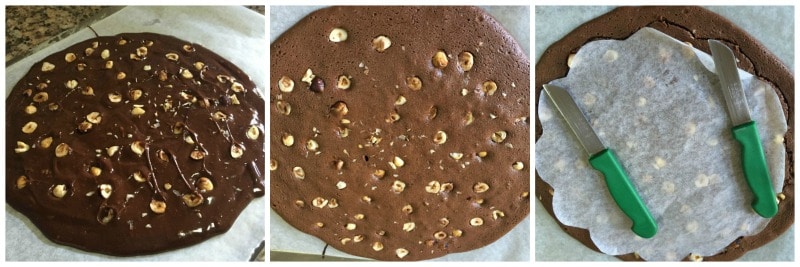
Chocolate Hazelnut brownie Base
Preheat the oven to 180°C (356°F).
1. Beat the sugar and eggs together.
2. Melt the chocolate and butter in a double boiler until it reaches 45°C (113°F).
3. Mix the two preparations together and add the flour. Mix well.
4. Grease a baking sheet and place a parchment paper on top of it on which you have drawn a circle. The side marked with a pencil should be against the baking sheet.
5. Put your mixture into a piping bag without a tip or a plastic freezer bag.
6. Fill the circle starting from the center in a spiral motion. Press the hazelnuts on top, pushing them in slightly.
7. Place in the oven and bake for about 15 minutes. Check with a toothpick, it should come out clean.
8. Let it cool and cut out a circle the size of your mold or according to the template, paper cut to match the shape of your mold.
I add a praline crunch, but you can skip it. I find that it adds more texture, as Cyril Lignac and Mercotte say. You can also make the brownie and crunch a little smaller than the diameter of the mold. This way, only the 3 layers of chocolate will be visible.
So, cut the brownie half a centimeter smaller than the mold.
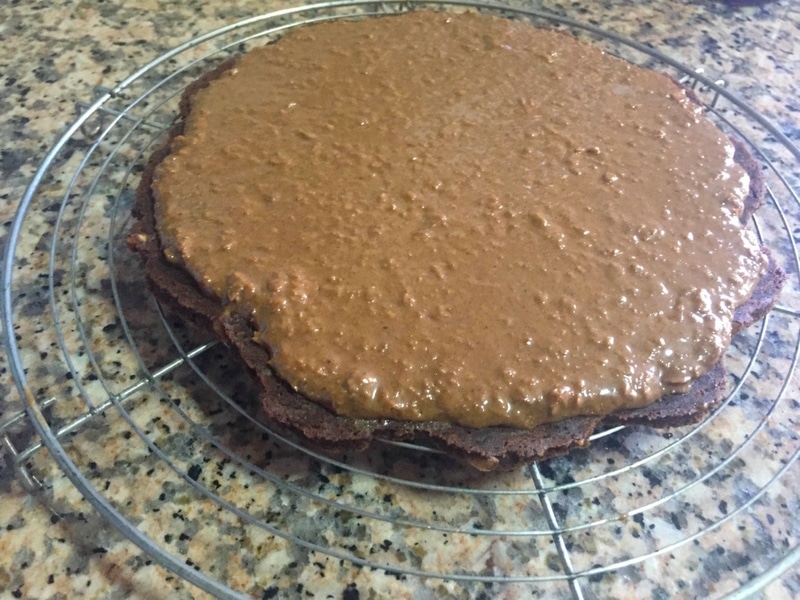
Praline Crunch layer
1. Melt the chocolate in a double boiler, add the praline, and mix until everything is well combined.
2. Remove from heat, add the feuilletine, mix well, and spread over the brownie without overflowing on the sides.
3. If you choose to assemble it upside down, set it aside in the fridge. Otherwise, place the brownie in the ring, spread the crunch on top, and let it set.
Basic crème anglaise
It will be used for the 3 chocolate mousses.
1. Mix the egg yolks with the sugar without trying to make them pale.
2. Bring the milk to a boil.
3. Pour half of it over the yolks while mixing, then add the rest of the milk.
4. Pour everything back into the saucepan and heat over low heat. Stir constantly with a spatula to prevent sticking to the bottom.
5. Thicken until it reaches 83°C (181°F) or nappe consistency. Your finger passed over the spatula with some cream on it should leave a trace. Do not allow the crème anglaise to boil.
6. Weigh the amount of crème anglaise needed for each mousse and cover with plastic wrap, making sure it touches the surface.
White chocolate mousse
1. Soak the gelatin in cold water for 10 minutes. It should be covered with water.
2. Melt the white chocolate in a double boiler.
3. Heat the crème anglaise (just warm enough to melt the gelatin) and dissolve the squeezed gelatin in it.
4. Add it to the chocolate through a fine sieve.
5. Whip the cold cream until soft peaks form.
6. Add a little cream to the white chocolate mixture when it reaches 35/40°C (95/104°F) and mix well. Then add the remaining whipped cream in two additions, gently folding from bottom to top with a spatula.
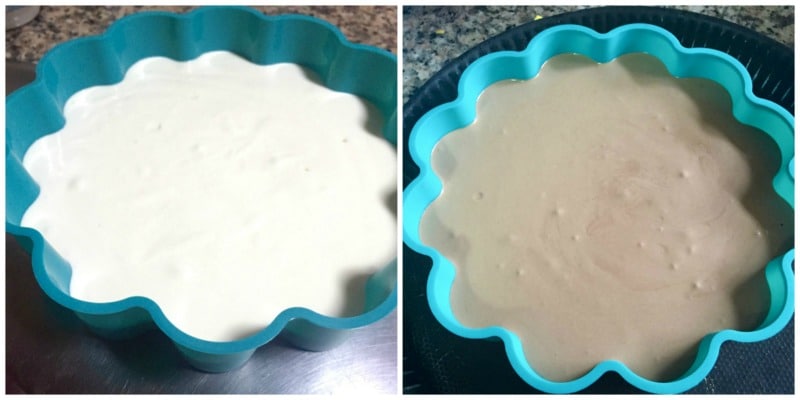
7. Pour into the mold. Tap the mold on the countertop and put it in the freezer to set slightly.
Milk chocolate mousse
1. Soak the gelatin in cold water for 10 minutes. Make sure it is covered with water.
2. Melt the milk chocolate in a double boiler.
3. Heat the crème anglaise (just warm enough to melt the gelatin) and dissolve the squeezed gelatin into it.
4. Add it to the chocolate through a fine sieve in two additions. Mix well with a spatula to create an emulsion.
5. Whip the cold cream until soft peaks form.
6. Add a little whipped cream to the chocolate mixture when it reaches 38°/42°C (100.4°F to 107.6°F) and mix well. Then add the remaining whipped cream in two additions, gently folding from bottom to top with a spatula.
7. Pour over the slightly set white chocolate mousse. Tap the mold on the work surface and return to the freezer.
Dark chocolate mousse
1. Melt the chocolate in a double boiler. Heat the crème anglaise (just warm to the touch) and add it to the chocolate in 2 additions through a fine sieve. Mix to create an emulsion.
2. Whip the cream until it is quite soft but doesn’t fall out of the bowl when inverted. It should have the consistency of shaving cream.
3. Add a bit of whipped cream to the chocolate mixture when it reaches 40/44°C (104/111.2°F). Mix well to loosen the chocolate. Gently fold in the remaining whipped cream in two additions, mixing from bottom to top with a spatula.
4. Pour over the set milk chocolate mousse. Tap the mold on the work surface to smooth out and burst any bubbles.
5. Place the brownie, with the crunchy side against the mousse. The mousse should be slightly set so the biscuit doesn’t sink. Press lightly on the brownie and crunch to adhere them to the mousse. If the biscuit doesn’t fit, gently pull the sides of the silicone mold.
6. Freeze on a flat surface for at least 8 hours, preferably overnight.
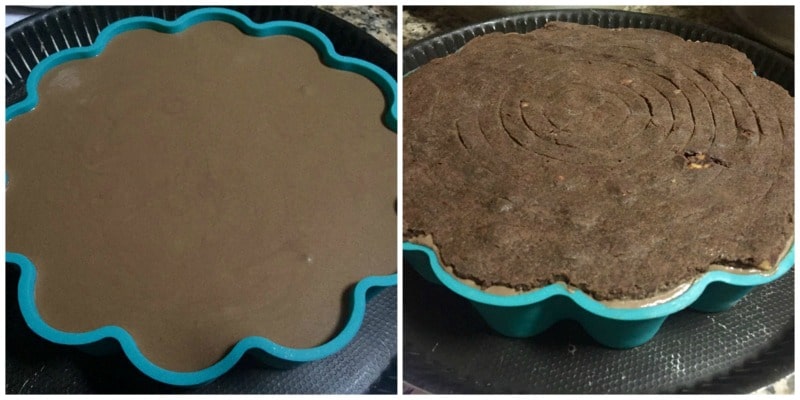
If you assembled the cake right-side up, once it is frozen, before unmolding, pour a thin layer of glaze on top or glaze it entirely if you prefer.
Let it set in the refrigerator, then unmold. Allow it to thaw for 6 to 8 hours in the refrigerator.
If you’re in a hurry, you can leave it at room temperature to thaw quickly. If it’s not too cold, 1 to 2 hours should suffice.
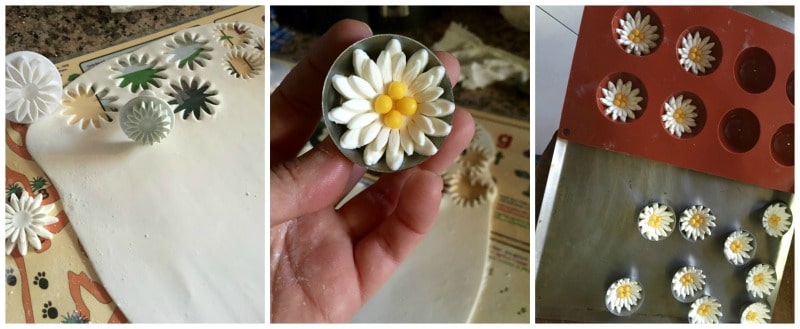
I opted for a simple decoration with small sugar paste daisies.

Three-chocolate mousse cake (custard-based mousses)
INGREDIENTS
- See the article for step-by-step picture and mold information
Chocolate Hazelnut Brownie Base
- 94 g eggs (3.3 oz)
- 51 g sugar (1.8 oz)
- 108 g 70% chocolate (3.8 oz)
- 94 g butter (3.3 oz)
- 19 g flour (0.7 oz)
- 25 g roasted hazelnuts halved (0.9 oz) (roast for about 10 minutes at 180°C and remove the skins)
Praline Crunch
- 34 g milk chocolate (1.2 oz)
- 100 g praline (3.5 oz)
- 47 g feuilletine or crumbled french crêpes Gavottes (1.7 oz) (french crêpes Gavottes can be found in the biscuit aisle of supermarkets)
Basic Crème Anglaise
- This will be used for the three chocolate mousses
- 207 ml milk (7 fl oz)
- 65 g egg yolks (2.3 oz)
- 40 g sugar (1.4 oz)
White Chocolate Mousse
- 58 g basic crème anglaise (2 oz)
- 90 g white chocolate (3.2 oz)
- 150 ml heavy cream over 32% fat (5.3 fl oz)
- 1 and a half sheets gelatin 3 g (0.1 oz)
Milk Chocolate Mousse
- 55 g crème anglaise (1.9 oz)
- 147 g milk chocolate (5.2 oz)
- 116 ml heavy cream over 32% fat (4.1 fl oz)
- 1/2 sheet of gelatin 1 g (0.04 oz)
Dark Chocolate Mousse
- 90 g basic crème anglaise (3.2 oz)
- 91 g 72% dark chocolate (3.2 oz) (a lower cocoa butter content will not produce a mousse darker than the milk chocolate mousse)
- 142 ml heavy cream over 32% fat (5 fl oz)
PREPARATION
Chocolate Hazelnut Brownie Base
- Preheat the oven to 180°C (356°F).
- Beat the sugar and eggs together.
- Melt the chocolate and butter in a double boiler until it reaches 45°C (113°F).
- Mix the two preparations together and add the flour. Mix well.
- Grease a baking sheet and place a parchment paper on top of it on which you have drawn a circle. The side marked with a pencil should be against the baking sheet.
- Put your mixture into a piping bag without a tip or a plastic freezer bag.
- Fill the circle starting from the center in a spiral motion. Press the hazelnuts on top, pushing them in slightly.
- Place in the oven and bake for about 15 minutes. Check with a toothpick, it should come out clean.
- Let it cool and cut out a circle the size of your mold or according to the template, paper cut to match the shape of your mold.
- Cut the brownie half a centimeter smaller than the mold.
Praline Crunch layer
- Melt the chocolate in a double boiler, add the praline, and mix until everything is well combined.
- Remove from heat, add the feuilletine, mix well, and spread over the brownie without overflowing on the sides.
- If you choose to assemble it upside down, set it aside in the fridge. Otherwise, place the brownie in the ring, spread the crunch on top, and let it set.
The basic crème anglaise
- Mix the egg yolks with the sugar without trying to make them pale.
- Bring the milk to a boil.
- Pour half of it over the yolks while mixing, then add the rest of the milk.
- Pour everything back into the saucepan and heat over low heat. Stir constantly with a spatula to prevent sticking to the bottom.
- Thicken until it reaches 83°C (181°F) or nappe consistency. Your finger passed over the spatula with some cream on it should leave a trace. Do not allow the crème anglaise to boil.
- Weigh the amount of crème anglaise needed for each mousse and cover with plastic wrap, making sure it touches the surface.
- ➡️ 58 g (2.05 oz) for the white chocolate mousse
- ➡️ 55 g (1.94 oz) for the milk chocolate mousse
- ➡️ 90 g (3.17 oz) for the dark chocolate mousse
White chocolate mousse
- Soak the gelatin in cold water for 10 minutes. It should be covered with water.
- Melt the white chocolate in a double boiler.
- Heat the crème anglaise (just warm enough to melt the gelatin) and dissolve the squeezed gelatin in it.
- Add it to the chocolate through a fine sieve.
- Whip the cold cream until soft peaks form.
- Add a little cream to the white chocolate mixture when it reaches 35/40°C (95/104°F) and mix well. Then add the remaining whipped cream in two additions, gently folding from bottom to top with a spatula.
- Pour into the mold. Tap the mold on the countertop and put it in the freezer to set slightly.
Milk chocolate mousse
- Soak the gelatin in cold water for 10 minutes. Make sure it is covered with water.
- Melt the milk chocolate in a double boiler.
- Heat the crème anglaise (just warm enough to melt the gelatin) and dissolve the squeezed gelatin into it.
- Add it to the chocolate through a fine sieve in two additions. Mix well with a spatula to create an emulsion.
- Whip the cold cream until soft peaks form.
- Add a little whipped cream to the chocolate mixture when it reaches 38°/42°C (100.4°F to 107.6°F) and mix well. Then add the remaining whipped cream in two additions, gently folding from bottom to top with a spatula.
- Pour over the slightly set white chocolate mousse. Tap the mold on the work surface and return to the freezer.
Dark chocolate mousse
- Melt the chocolate in a double boiler. Heat the crème anglaise (just warm to the touch) and add it to the chocolate in 2 additions through a fine sieve. Mix to create an emulsion.
- Whip the cream until it is quite soft but doesn't fall out of the bowl when inverted. It should have the consistency of shaving cream.
- Add a bit of whipped cream to the chocolate mixture when it reaches 40/44°C (104/111.2°F). Mix well to loosen the chocolate.
- Gently fold in the remaining whipped cream in two additions, mixing from bottom to top with a spatula.
- Pour over the set milk chocolate mousse. Tap the mold on the work surface to smooth out and burst any bubbles.
- Place the brownie, with the crunchy side against the mousse. The mousse should be slightly set so the biscuit doesn’t sink.
- Press lightly on the brownie and crunch to adhere them to the mousse. If the biscuit doesn't fit, gently pull the sides of the silicone mold.
- Freeze on a flat surface for at least 8 hours, preferably overnight.
- If you assembled the cake right-side up, once it is frozen, before unmolding, pour a thin layer of glaze on top or glaze it entirely if you prefer.Let it set in the refrigerator, then unmold. Allow it to thaw for 6 to 8 hours in the refrigerator.If you’re in a hurry, you can leave it at room temperature to thaw quickly. If it’s not too cold, 1 to 2 hours should suffice.I opted for a simple decoration with small sugar paste daisies.
Thank you for visiting my blog and your comments.

