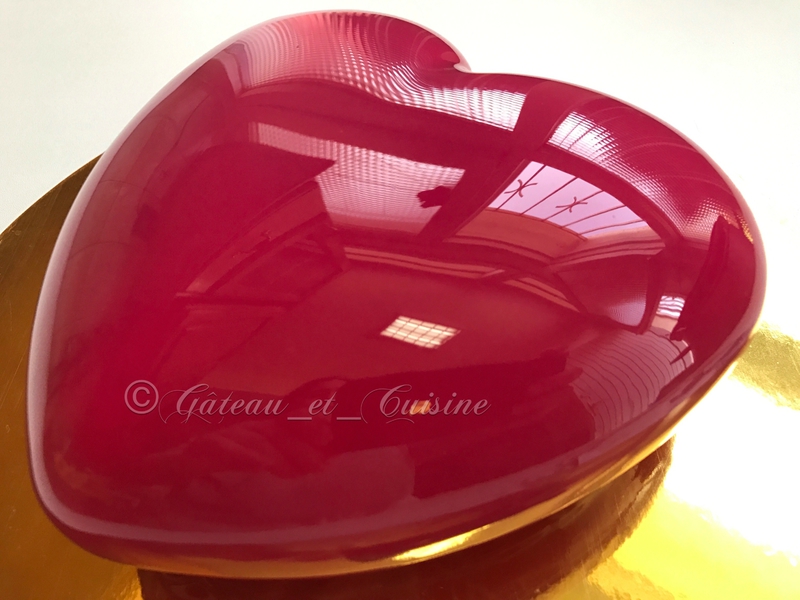
Mastering a mirror glaze cake is an essential technique for achieving a flawless, professional finish. This shiny mirror glaze transforms frozen mousse cakes by giving them a smooth, ultra glossy, perfectly reflective surface that enhances both appearance and texture.
Although it may seem complex, with a good mirror glaze recipe and the right method, temperature, and consistency, it is completely achievable, resulting in a thin, bubble-free layer that blends seamlessly with the dessert.
Knowing how to make a perfectly smooth and shiny chocolate mirror glaze cake is an essential skill for any baking enthusiast. This technique transforms frozen mousse cakes into refined desserts with a sleek, mirror-like finish that instantly catches the eye.
If you’ve ever been impressed by ultra-glossy cakes seen on TikTok and other social media platforms, this guide will help you master mirror glaze and achieve consistent, professional results.
Although mirror glaze may seem intimidating, it is very achievable with the right recipe, proper temperature control, and a little practice. Whether you choose to fully coat your cake or simply glaze the top, as I did for my triple chocolate cake, a thin layer is enough to enhance the dessert without overpowering its texture or flavor.
I’ve shared several mirror glaze cake recipes over time, but this one remains my favorite and is widely used by top pastry chefs. This is the renowned mirror glaze recipe created by MOF Jean-Michel Perruchon at the Bellouet Conseil school in Paris. Adaptable and versatile, it can be made with dark, milk, or white chocolate and easily colored to suit your design.
This recipe takes less than 15 minutes to prepare, and many readers have successfully made their first chocolate mirror glaze cake by following the step-by-step video instructions.
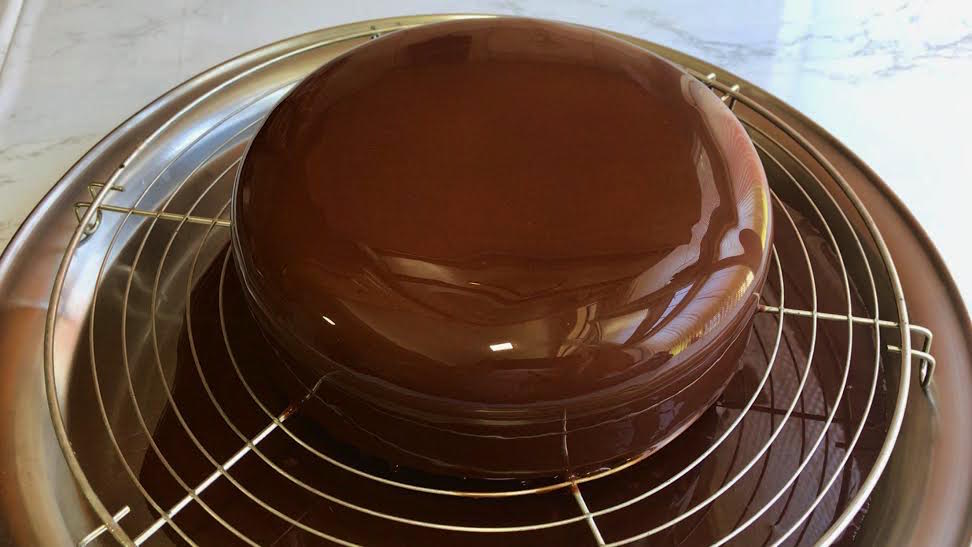
Table of Contents
Mirror Glaze Ingredients and Substitutions
The main ingredients in this recipe are chocolate, glucose, and condensed milk. Many of you often ask whether these ingredients can be replaced, so here are the answers.
- Glucose Syrup: Glucose gives the glaze its characteristic shine. If you don’t have any, it can be replaced with honey. Choose a light honey with a neutral flavor, such as acacia honey, to maintain a smooth texture and a beautiful glossy finish.
For a mirror glaze without glucose, I also share a dedicated recipe further below.
- Sweetened Condensed Milk: Sweetened condensed milk adds smoothness and balance to the glaze. After numerous tests, especially when developing my glaze without glucose or condensed milk, I found that it can be replaced with heavy cream containing at least 30% fat.In this case, the glaze will be less sweet while still keeping its shine.It is also possible to use unsweetened condensed milk, but this results in a more fluid glaze. When using it, the glaze should be poured at a lower temperature, around 30°C (86°F), to ensure proper coverage.This option also slightly reduces the sugar content.However, after comparing all versions, I recommend using either sweetened condensed milk or heavy cream while keeping the glucose, as this combination gives the most reliable and consistent results.
- Chocolate:This recipe works well with dark chocolate, milk chocolate, white chocolate, and even specialty chocolates such as Dulcey or Caramelia. Choose a high-quality couverture chocolate with good fluidity, preferably brands like Valrhona or Cacao Barry, which also tend to be less sweet.The cocoa percentage of dark chocolate directly affects the glaze’s texture and color.A higher cocoa content results in a darker and slightly less fluid glaze. I recommend using dark chocolate with a cocoa content between 55% and 64%.White chocolate can be colored using either oil-soluble or water-soluble food coloring, as this glaze contains both fat and water.
- Gelatin: You can use either sheet gelatin or powdered gelatin for this recipe. More detailed explanations about bloom strength and gelatin mass are provided at the end of the article. The recommended amount is 10 g (0.35 oz).For dark chocolate mirror glaze, reduce the gelatin to 9 g (0.32 oz) to achieve a perfectly balanced texture.The main ingredients of this recipe are chocolate, glucose, and condensed milk. Many of you wonder if it’s possible to replace them

Essential Equipment for Making an ultra Shiny Mirror Glaze:
- Thermometer: You’ll need a thermometer, whether it’s a classic kitchen thermometer, a probe thermometer, or an infrared (laser) thermometer. An affordable model is more than enough to get great results. I personally started with a small thermometer (visible in the video), and it has always been reliable.
If you’d like to invest a little more, Mastrad probe thermometers or infrared thermometers are excellent options, though slightly more expensive.
- Immersion Blender: To achieve a smooth, fine, and bubble-free mirror glaze, an immersion blender is essential. Air bubbles can ruin the final appearance of your mousse cake, so proper blending is key. While a standard stick blender can work, the most reliable results come from a Bamix immersion blender, which produces a perfectly smooth glaze with minimal air incorporation.
Video recipe:

Ingredients:
Note: You’ll find the printable recipe card at the end of the article, along with key tips to keep in mind..
This recipe yields enough mirror glaze to cover one 20 to 22 cm (8 to 9-inch) mousse cake, or about 10 small cakes measuring 7 cm (3 inches) in diameter
- 75 g water (2.6 oz)
- 150 g glucose syrup (5.3 oz)
- 150 g granulated sugar (5.3 oz)
- 100 g sweetened condensed milk or heavy cream with 30% fat
- 150 g white, milk, or dark chocolate of your choice (5.3 oz)
Use a high-quality couverture chocolate with 55% to 64% cocoa content. Brands such as Valrhona or Cacao Barry are recommended. - 10 g powdered gelatin (200 bloom) (0.35 oz), bloomed in 60 g cold water (2 oz),
or 5 gelatin sheets (2 g each, 200 bloom)
(Edit 2024: I now use 9 g powdered gelatin or 4.5 sheets, with equally good results.) - 5 g food coloring (0.18 oz), powdered or gel
Depending on the desired color intensity, 2 to 3 g (0.07 to 0.11 oz) may be sufficient.
Use with white chocolate to create a colored mirror glaze.
How to Make a Mirror Glaze Cake
This mirror glaze must be used on a frozen mousse cake.
If using sheet gelatin, soak it in very cold water for about 10 minutes to rehydrate it before starting the glaze. Squeeze it well before adding it to the hot mixture.
When working with powdered gelatin, bloom it in the indicated amount of cold water at least 15 to 20 minutes before starting, then keep it in the refrigerator. This will create what is known as a gelatin mass.
1. Prepare the syrup: Place the water, glucose syrup, and sugar in a saucepan. Heat until the mixture reaches 103°C (217°F), stirring occasionally without splashing the sides of the pan. If sugar splashes onto the sides, clean them with a damp pastry brush.
2. Pour the hot syrup through a strainer over the sweetened condensed milk and food coloring, then add the squeezed gelatin (if using sheet gelatin) or the gelatin mass (if using powdered gelatin).
The food coloring can also be added after blending, which makes it easier to divide the glaze into several portions and color them differently.
3. Gently mix with a spatula, then pour the mixture over the chocolate placed in a tall, narrow container, such as a measuring jug or the container that comes with your immersion blender.
4. Let it sit for about 1 minute, then gently stir with the spatula.
5. Blend for 3 to 4 minutes using an immersion blender. This step is crucial. To avoid creating air bubbles, slightly tilt the container and keep the blender fully immersed at all times, lifting it only at the very end.
You’ll notice that proper blending makes the mirror glaze shinier and more fluid.

6. Pour the glaze through a fine-mesh sieve into an airtight container, then cover it with plastic wrap pressed directly onto the surface. Refrigerate until the next day.
7. The next day, transfer the glaze to a saucepan and gently heat it to a maximum of 38 to 40°C (100 to 104°F), either using a double boiler or the microwave.
8. If using a double boiler or microwave, remove the glaze regularly, stir, then return it to the heat. This helps control the temperature and ensures the glaze melts evenly without overheating.
Note: If the glaze is almost completely melted at 35 to 36°C (95 to 97°F), it is perfect. The blending step will finish melting the remaining pieces, allowing you to reach the ideal pouring temperature more quickly.
9. Pour the glaze into a tall, narrow pouring jug and blend with an immersion blender to remove any remaining air bubbles. The glaze will become smooth and ultra shiny, with a perfectly reflective, mirror-like finish.
What Temperature to Use Mirror Glaze?
When the glaze reaches 33 to 34°C (91.4 to 93.2°F), remove the mousse cake from the freezer. The cake must be fully frozen to ensure the mirror glaze sets properly and holds a smooth, even finish.
Note: The glaze can also be used at a slightly lower or higher temperature depending on the desired result. At 33 to 34°C, the texture is ideal, fluid enough to flow smoothly while still providing perfect coverage.
How to Glaze a Mousse Cake with Mirror Glaze
1. Place the mousse cake on a wire rack or a small stand to elevate it. Set everything over a tray lined with plastic wrap to easily catch any excess glaze. Gently run your hand over the surface or use a paper towel to remove any traces of frost before glazing.
2. Pour the glaze evenly over the cake, making sure it is fully covered. If needed, lightly run a spatula over the top in one smooth, quick motion to level the surface.
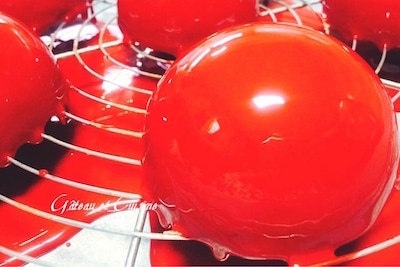
3. Let the glaze drip naturally. Once it stops dripping, slide two long spatulas under the mousse cake and gently rub them against the rack with a back-and-forth motion to cleanly cut off the excess glaze.
4. If the cake is elevated, trim any remaining drips using clean scissors or a sharp knife.

5. Gently transfer the mousse cake to a serving platter or a gold cake board. Let it thaw in the refrigerator for at least 6 hours.
If you’re short on time, the cake can also thaw at room temperature, but a slow defrost in the refrigerator will give you a more stable texture and cleaner finish.
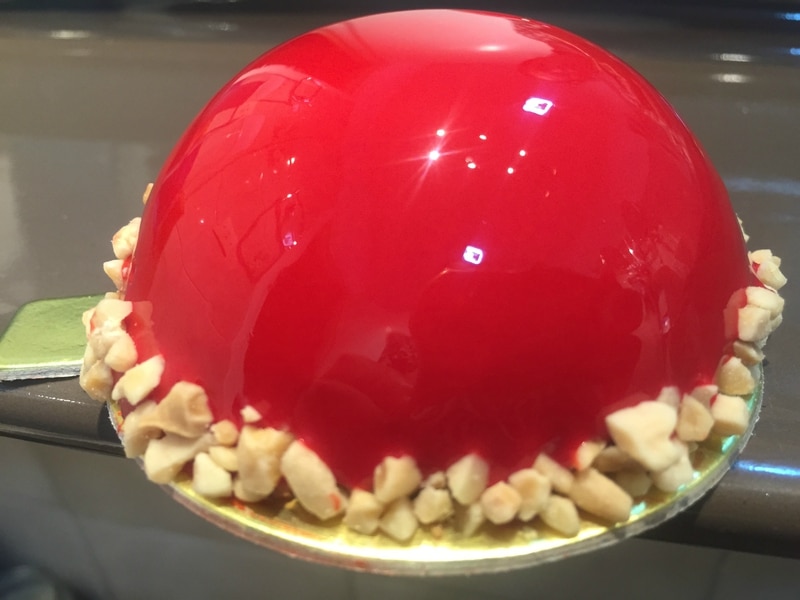
This ultra-shiny chocolate mirror glaze will elevate all your mousse cakes.

Tips for a Successful Mirror Glaze Cake
What to Do if Your Chocolate Mirror Glaze Is Too Thick
This can happen if the syrup is cooked above 103°C (217°F), if the chocolate used has a very high cocoa content and low fluidity, or if too much gelatin is added. A glaze that is too cold can also become less fluid.
Try using the glaze at a slightly higher temperature. If that is not enough, you can loosen it by adding a small amount of hot water and blending gently.
For future batches, make sure your thermometer is accurate and adjust the type of chocolate or the amount of gelatin as needed.
What to Do if Your Mirror Glaze Is Too Runny
A mirror glaze that is too runny can be caused by a temperature that is too high, an undercooked syrup, or an insufficient amount of gelatin.
Let the glaze cool for a few minutes and test it again. If the problem persists, add a few melted chocolate callets (chocolate chips), then blend to restore the proper consistency.
For future preparations, make sure the syrup is cooked to 103°C (217°F) and that the gelatin proportions are respected.
Which Gelatin to Use in a Mirror Glaze Recipe
You can use either gelatin sheets or powdered gelatin for a mirror glaze. The bloom number indicates the gelling strength: the higher the bloom, the stronger the gelatin. The most commonly used types are bronze gelatin (150 bloom), silver gelatin (180 bloom), and gold gelatin (200 bloom), with gold being the most widely used in pastry making.
For powdered gelatin, bloom it in six times its weight in cold water. For example, for 10 g (0.35 oz) of gelatin, add 60 g (2 oz) of water. This will give you 70 g (2.47 oz) of gelatin mass, ready to be incorporated into a hot preparation.
How to Avoid Air Bubbles in a Mirror Glaze Cake
Use an immersion blender without a bell guard (such as a Bamix) and work in a tall, narrow container. Blend slowly, keeping the blender upright and fully submerged at all times to avoid incorporating air.
If a few bubbles remain once the glaze is ready, strain it through a fine-mesh sieve to remove them. For best results, and if time allows, let the glaze rest overnight in the refrigerator. This helps eliminate any remaining air bubbles and improves the final finish.

How to Store Leftover Chocolate Mirror Glaze
Chocolate mirror glaze keeps very well. Leftovers can be stored in an airtight container in the refrigerator for 3 to 4 days. To reuse, gently reheat the glaze in a double boiler or in the microwave, making sure it does not exceed 38°C (100°F). Strain it through a fine-mesh sieve to remove any particles, then blend again to restore a smooth, shiny texture.
Mirror glaze can also be frozen for up to 3 months. Let it thaw overnight in the refrigerator, then reheat gently, strain, and blend before using.

Other Mirror Glaze Recipe
Chocolate and Cocoa Mirror Glaze

Chocolate Mirror Glaze Cake Recipe
INGREDIENTS
This recipe yields enough mirror glaze to cover one 20 to 22 cm (8 to 9-inch) mousse cake, or about 10 small cakes measuring 7 cm (3 inches) in diameter
- 75 g water
- 150 g glucose syrup
- 150 g granulated sugar
- 100 g sweetened condensed milk or heavy cream with 30% fat
- 150 g white, milk, or dark chocolate of your choice ; Use a high-quality couverture chocolate with 55% to 64% cocoa content. Brands such as Valrhona or Cacao Barry are recommended.
- 10 g powdered gelatin (200 bloom) bloomed in 60 g cold water (2 oz) or 5 gelatin sheets 2 g each (200 bloom). Edit 2024: I now use 9 g powdered gelatin or 4.5 sheets, with equally good results.
- 5 g food coloring powdered or gel. Depending on the desired color intensity 2 to 3 g (0.07 to 0.11 oz) may be sufficient.
PREPARATION
- The mirror glaze must be used on a frozen mousse cake.
- If using sheet gelatin, soak it in very cold water for about 10 minutes to rehydrate it before starting the glaze. Squeeze it well before adding it to the hot mixture.
- When working with powdered gelatin, bloom it in the indicated amount of cold water at least 15 to 20 minutes before starting, then keep it in the refrigerator. This will create what is known as a gelatin mass.
- Prepare the syrup: Place the water, glucose syrup, and sugar in a saucepan.
- Heat until the mixture reaches 103°C (217°F), stirring occasionally without splashing the sides of the pan. If sugar splashes onto the sides, clean them with a damp pastry brush.
- Pour the hot syrup through a strainer over the sweetened condensed milk and food coloring, then add the squeezed gelatin (if using sheet gelatin) or the gelatin mass (if using powdered gelatin).
- The food coloring can also be added after blending, which makes it easier to divide the glaze into several portions and color them differently.
- Gently mix with a spatula, then pour the mixture over the chocolate placed in a tall, narrow container, such as a measuring jug or the container that comes with your immersion blender.
- Let it sit for about 1 minute, then gently stir with the spatula.
- Blend for 3 to 4 minutes using an immersion blender. This step is crucial. To avoid creating air bubbles, slightly tilt the container and keep the blender fully immersed at all times, lifting it only at the very end.
- You’ll notice that proper blending makes the mirror glaze shinier and more fluid.
- Pour the glaze through a fine-mesh sieve into an airtight container, then cover it with plastic wrap pressed directly onto the surface. Refrigerate until the next day.
- The next day, transfer the glaze to a saucepan and gently heat it to a maximum of 38 to 40°C (100 to 104°F), either using a double boiler or the microwave.
- If using a double boiler or microwave, remove the glaze regularly, stir, then return it to the heat. This helps control the temperature and ensures the glaze melts evenly without overheating.
- Note: If the glaze is almost completely melted at 35 to 36°C (95 to 97°F), it is perfect. The blending step will finish melting the remaining pieces, allowing you to reach the ideal pouring temperature more quickly.
- Pour the glaze into a tall, narrow pouring jug and blend with an immersion blender to remove any remaining air bubbles. The glaze will become smooth and ultra shiny, with a perfectly reflective, mirror-like finish.
What’s the Ideal Temperature for Using Chocolate Mirror Glaze?
- When the glaze reaches 33 to 34°C (91.4 to 93.2°F), remove the mousse cake from the freezer. The cake must be fully frozen to ensure the mirror glaze sets properly and holds a smooth, even finish.
- Note: The glaze can also be used at a slightly lower or higher temperature depending on the desired result. At 33 to 34°C, the texture is ideal, fluid enough to flow smoothly while still providing perfect coverage.
How to Glaze a Mousse Cake with Mirror Glaze
- Place the mousse cake on a wire rack or a small stand to elevate it. Set everything over a tray lined with plastic wrap to easily catch any excess glaze. Gently run your hand over the surface or use a paper towel to remove any traces of frost before glazing.
- Pour the glaze evenly over the cake, making sure it is fully covered. If needed, lightly run a spatula over the top in one smooth, quick motion to level the surface.
- Let the glaze drip naturally. Once it stops dripping, slide two long spatulas under the mousse cake and gently rub them against the rack with a back-and-forth motion to cleanly cut off the excess glaze.
- If the cake is elevated, trim any remaining drips using clean scissors or a sharp knife.
- Gently transfer the mousse cake to a serving platter or a gold cake board. Let it thaw in the refrigerator for at least 6 hours.
- If you’re short on time, the cake can also thaw at room temperature, but a slow defrost in the refrigerator will give you a more stable texture and cleaner finish.
- This ultra-shiny chocolate mirror glaze will elevate all your mousse cakes.
Thank you for your visit and your comments!