
Here’s a festive treat that kids and adults alike can’t resist: chocolate cake pops! These moist, bite-sized cake balls are coated in colorful Candy Melts or melted chocolate, then finished with fun sprinkles. They’re just as enjoyable to make as they are to eat, making them perfect for a dessert table, birthday party, or afternoon treat.
If you’ve never made cake pops before, the idea is simple: crumbled cake is mixed with frosting to create a rich mixture that’s easy to shape The mixture is then rolled into balls, placed on sticks, dipped in chocolate, and decorated. Vous pouvez les personnaliser selon le thème choisi, avec des couleurs et des décorations pour Noël, Halloween, un anniversaire ou toute autre occasion.
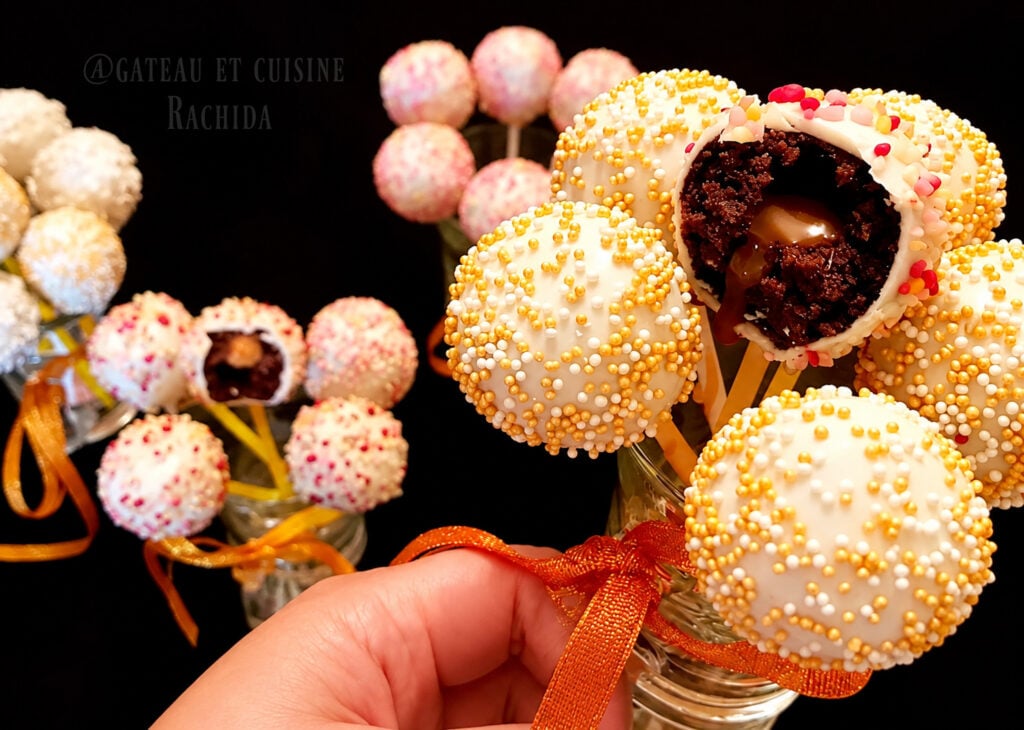
Table of Contents
What You’ll Love About These Chocolate Cake Pops
Choose your favorite cake base: You can use homemade vanilla cake, chocolate cake, pound cake, or even a simple box cake mix. Just bake, cool, and crumble!
Versatile binding options: To hold the crumbs together, mix in your favorite frosting, such as buttercream or cream cheese frosting, chocolate spread, ganache, or sweetened condensed milk.
Endless coatings and toppings: Dip your cake pops in melted Candy Melts or chocolate, then have fun decorating them with sprinkles, jimmies, sugar pearls, or crushed cookies.
A great way to use leftover cake: Have leftover cake or trimmed edges from a layer cake? Don’t throw them away. Turn them into these delicious, bite-sized treats instead!
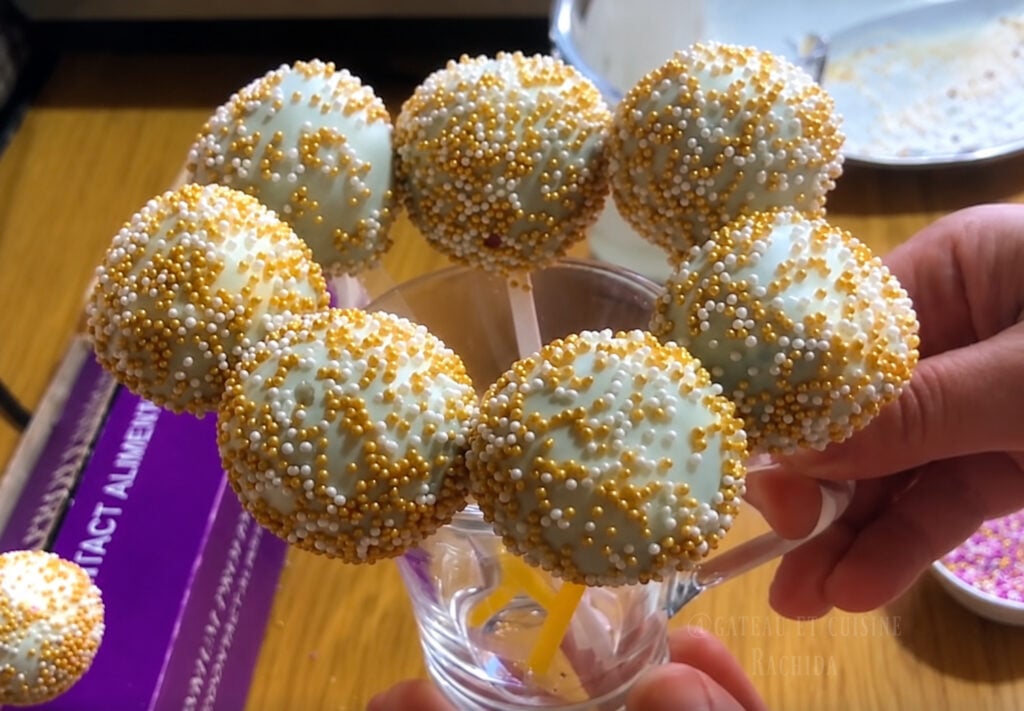
Chocolate Cake Pops Video Recipe
Ingrédients for 26 Cake pops
Note: You can find the printable recipe card at the end of this article.
Chocolate Cake Base
- 150 g (5.3 oz) dark chocolate
- 150 g (5.3 oz) unsalted butter, at room temperature
- 20 ml (0.7 fl oz) whole milk
- 15 g (2 Tbsp) unsweetened cocoa powder
- 3 large eggs
- 100 g (3.5 oz) granulated sugar
- 100 g (3.5 oz) all-purpose flour
- 6 g (1 ½ tsp) baking powder
Binder / Filling to form the cake balls
- 2 to 4 tbsp binder of choice: mascarpone cheese, praline paste, salted caramel, chocolate-hazelnut spread (Nutella), or fruit jam
Coating and Toppings
- 500 g (1.1 lb) Candy Melts, chocolate melting wafers, or chocolate (white, dark, or milk)
- 10 g (0.4 oz) cocoa butter or coconut oil (optional, to thin out real chocolate for smoother dipping)
- Sprinkles, sugar pearls, or colored jimmies/confetti
- A handful of roasted hazelnuts (optional, roasted for 10 minutes at 180°C / 350°F and coarsely chopped)
- Cake pop sticks
Chocolate Cake Pop Instructions
Chocolate Cake (Cake Pop Base)
Preheat your oven to 170°C (340°F).
Sift together the flour, cocoa powder, and baking powder (1 1/2 teaspoons), then mix to combine.
Melt the chocolate and milk together in a double boiler (bain-marie). As soon as it starts to melt, add the butter piece by piece, mixing well after each addition.
Remove from heat, add the sugar, and mix thoroughly. Add the eggs one at a time, whisking well after each addition.
Pour the chocolate mixture over the dry ingredients and whisk until smooth and homogeneous.
Pour the batter into a greased and floured baking pan, then bake for about 35 minutes. A skewer inserted into the center should come out clean.
Unmold and let the cake cool completely.
Crumble the chocolate cake as finely as possible.

Divide the crumbs between two bowls if you want to make two different flavors.
Add salted caramel to one bowl. In the other, stir in praline paste, gianduja, or a spread of your choice. You can also use classic frosting, such as buttercream or cream cheese frosting, chocolate-hazelnut spread like Nutella, ganache, or sweetened condensed milk. Mix well until you have a smooth mixture that is easy to shape into balls.
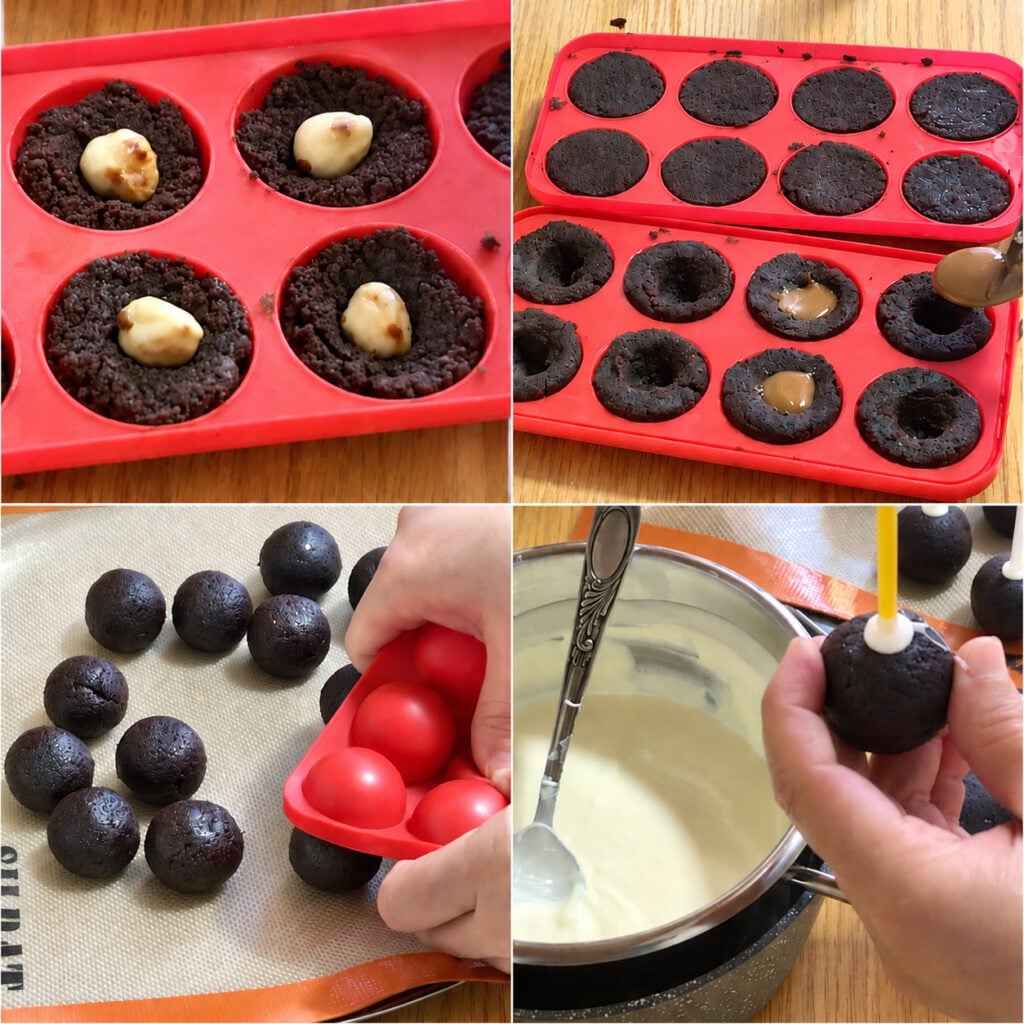
Fill each cavity of the cake pop mold. If you prefer not to use a mold, you can shape the balls by hand. In that case, weigh each portion so they are all the same size, about 25 g (0.9 oz) each.
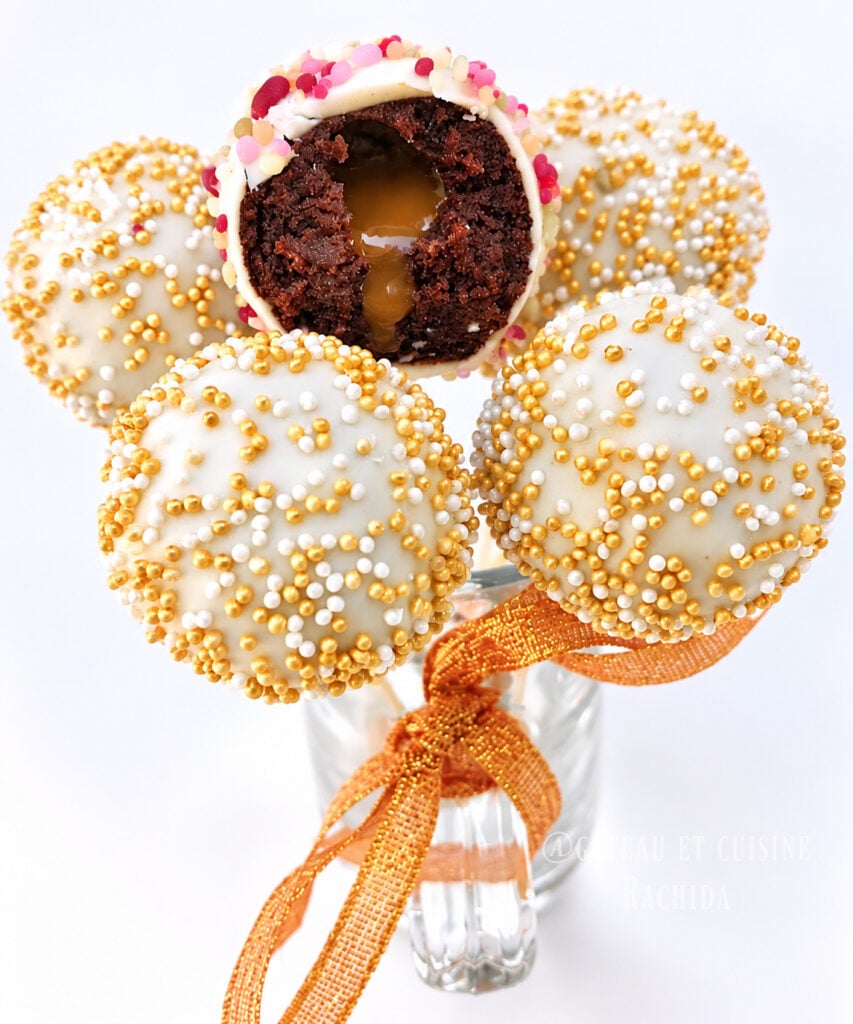
Place a hazelnut in the center of each half-sphere. Cover with a little more crumbled cake and smooth the surface. Fill both cavities to the top and smooth them evenly.
Close the mold and press down gently to seal the two halves together.
Unmold the cake pops and repeat with the remaining cake mixture. If desired, make a small opening in one side of each cake pop and fill it with a little salted caramel.
Coating and Decorating the Cake Pops
Melt the chocolate or Candy Melts in a double boiler, then stir in the cocoa butter.
Remove the bowl from the heat once or twice while stirring to prevent the chocolate from overheating.
Dip the tip of each cake pop stick into the melted chocolate, then insert it into the center of a cake pop. Let the chocolate set completely so the stick stays securely in place. You can place the cake pops in the refrigerator for about 20 minutes to speed up the process.
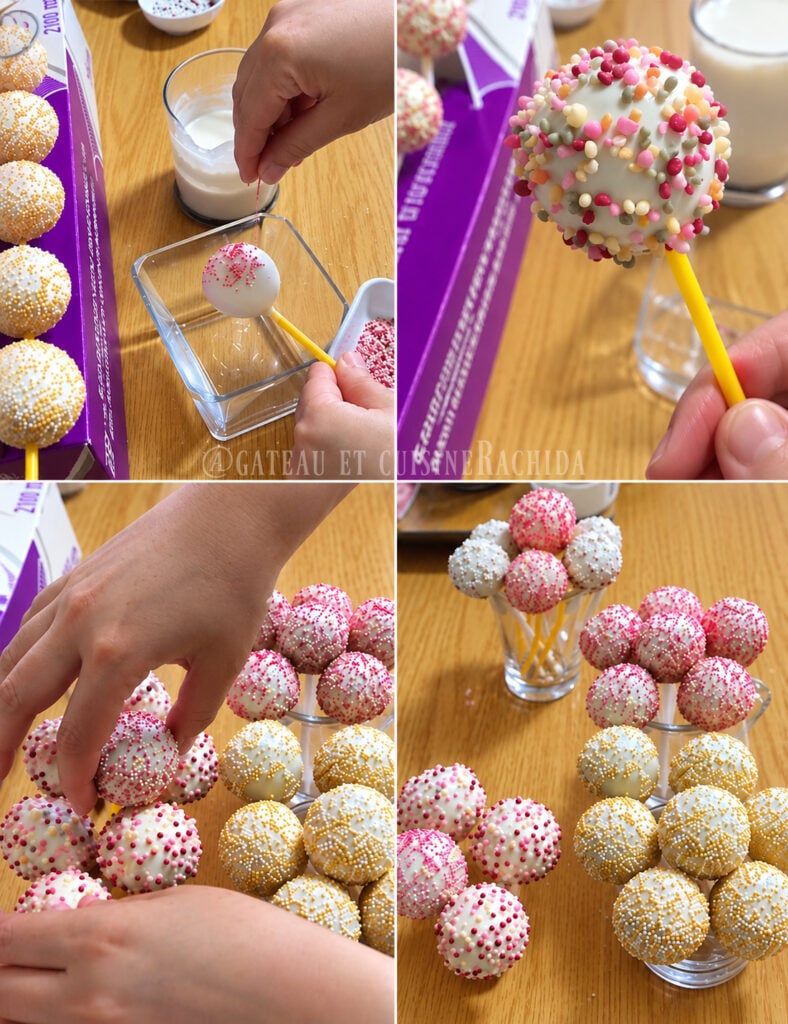
Pour the melted chocolate into a tall, narrow glass or container.
Dip the cake pops one by one into the chocolate, let the excess drip off, then immediately decorate with sprinkles or candy pearls.
Place them in a block of Styrofoam or, like I do, use the opening of an aluminum foil box to hold them upright.
Once the chocolate has completely set, store the cake pops in an airtight container, placing a sheet of parchment paper between each layer.
How to Store Homemade Cake Pops
The shelf life mostly depends on the binder used to hold the cake crumbs together.
- In the refrigerator: If you used a chocolate hazelnut spread, praline paste, or caramel, you can store the cake pops in an airtight container for up to one week. If you used mascarpone, heavy cream, or another perishable ingredient, it is best to enjoy them within 3 to 4 days.
- In the freezer: You can freeze the shaped cake balls before dipping them. Place them on a baking sheet and freeze until firm, then transfer them to an airtight container or a freezer bag. When you’re ready to use them, let them thaw in the fridge before dipping and decorating.
FAQ – Chocolate Cake Pops: Frequently Asked Questions
Click on the questions to reveal the answers
Can cake pops be made ahead of time?
Yes, you can make them in advance and store them in the refrigerator or freezer following the storage instructions.
What kind of cake works best for cake pops?
You can use sponge cake, pound cake, yogurt cake, chocolate cake, or any moist cake that crumbles easily.
Can I use store-bought cookies instead of cake?
Yes, store-bought cookies (like Oreos or Graham crackers) work great. Simply crush them into fine crumbs, then gradually mix in your binder until you reach a pliable dough that holds its shape.
How much binder should I add to the cake crumbs?
There is no fixed amount, as it depends on how moist your cake is to begin with. Add the binder a little at a time until the mixture holds together easily without feeling sticky.
Why is my chocolate coating cracking?
Cracking happens when chilled cake balls expand slightly as they come to room temperature while the warm chocolate sets around them. To prevent this, let chilled cake balls sit at room temperature for a few minutes before dipping, and make sure your chocolate isn’t too hot.
How do I keep cake pops from falling off the stick?
Dip the tip of the treat stick into melted chocolate before inserting it about halfway into the cake ball. Let it set for a few minutes in the fridge to anchor the stick before dipping the whole cake pop.
Can I make cake pops without sticks?
Yes! You can shape and dip them as cake balls or truffles, then place them in mini cupcake liners for an easy bite-sized dessert.
Can I use this same mixture to make cakesicles?
Yes, it is the exact same cake pop filling. Simply press the mixture firmly into silicone cakesicle (ice cream) molds, insert the sticks, chill, and coat with melted chocolate.
Other cake recipes you might like
Chocolate Cake Pops Recipe
Matériel
INGRÉDIENTS
Chocolate Cake Base
- 150 g dark chocolate
- 150 g unsalted butter, at room temperature
- 20 ml whole milk
- 15 g unsweetened cocoa powder
- 3 large eggs
- 100 g granulated sugar
- 100 g all-purpose flour
- 6 g baking powder
Binder / Filling to form the cake balls
- 2 to 4 tbsp binder of choice: mascarpone cheese praline paste, salted caramel, chocolate-hazelnut spread (Nutella), or fruit jam
Coating and Toppings
- 500 g Candy Melts, chocolate melting wafers, or chocolate (white, dark, or milk)
- 10 g cocoa butter or coconut oil (optional, to thin out real chocolate for smoother dipping)
- Sprinkles sugar pearls, or colored jimmies/confetti
- A handful of roasted hazelnuts optional, roasted for 10 minutes at 180°C / 350°F and coarsely chopped
- Cake pop sticks
PRÉPARATION
Chocolate Cake (Cake Pop Base)
- Preheat your oven to 170°C (340°F).
- Sift together the flour, cocoa powder, and baking powder (1 1/2 teaspoons), then mix to combine.
- Melt the chocolate and milk together in a double boiler (bain-marie). As soon as it starts to melt, add the butter piece by piece, mixing well after each addition.
- Remove from heat, add the sugar, and mix thoroughly. Add the eggs one at a time, whisking well after each addition.
- Pour the chocolate mixture over the dry ingredients and whisk until smooth and homogeneous.
- Pour the batter into a greased and floured baking pan, then bake for about 35 minutes. A skewer inserted into the center should come out clean.
- Unmold and let the cake cool completely.
- Crumble the moist chocolate cake as finely as possible.
- Divide the crumbs between two bowls if you want to make two different flavors.
- Add salted caramel to one bowl. In the other, stir in praline paste, gianduja, or a spread of your choice. You can also use classic frosting, such as buttercream or cream cheese frosting, chocolate-hazelnut spread like Nutella, ganache, or sweetened condensed milk. Mix well until you have a smooth mixture that is easy to shape into balls.
- Fill each cavity of the cake pop mold. If you prefer not to use a mold, you can shape the balls by hand. In that case, weigh each portion so they are all the same size, about 25 g (0.9 oz) each.
- Place a hazelnut in the center of each half-sphere. Cover with a little more crumbled cake and smooth the surface. Fill both cavities to the top and smooth them evenly.
- Close the mold and press down gently to seal the two halves together.
- Unmold the cake pops and repeat with the remaining cake mixture. If desired, make a small opening in one side of each cake pop and fill it with a little salted caramel.
Coating and Decorating the Cake Pops
- Melt the chocolate or Candy Melts in a double boiler, then stir in the cocoa butter.
- Remove the bowl from the heat once or twice while stirring to prevent the chocolate from overheating.
- Dip the tip of each cake pop stick into the melted chocolate, then insert it into the center of a cake pop. Let the chocolate set completely so the stick stays securely in place. You can place the cake pops in the refrigerator for about 20 minutes to speed up the process.
- Pour the melted chocolate into a tall, narrow glass or container.
- Dip the cake pops one by one into the chocolate, let the excess drip off, then immediately decorate with sprinkles or candy pearls.
- Place them in a block of Styrofoam or, like I do, use the opening of an aluminum foil box to hold them upright.
- Once the chocolate has completely set, store the cake pops in an airtight container, placing a sheet of parchment paper between each layer.
Thank you so much for visiting and for your comments. I truly appreciate it!