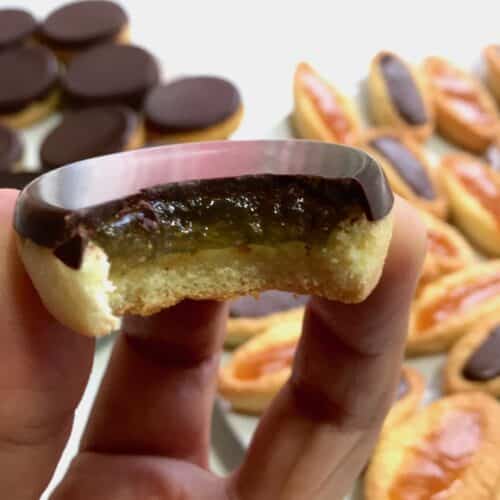
Homemade Jaffa Cakes are a delicious British treat made with a light sponge cake base, a layer of orange jelly, and topped with a thin, crackly layer of chocolate. Soft, fruity, and chocolatey, these little cakes are perfect for snack time and surprisingly easy to make at home.
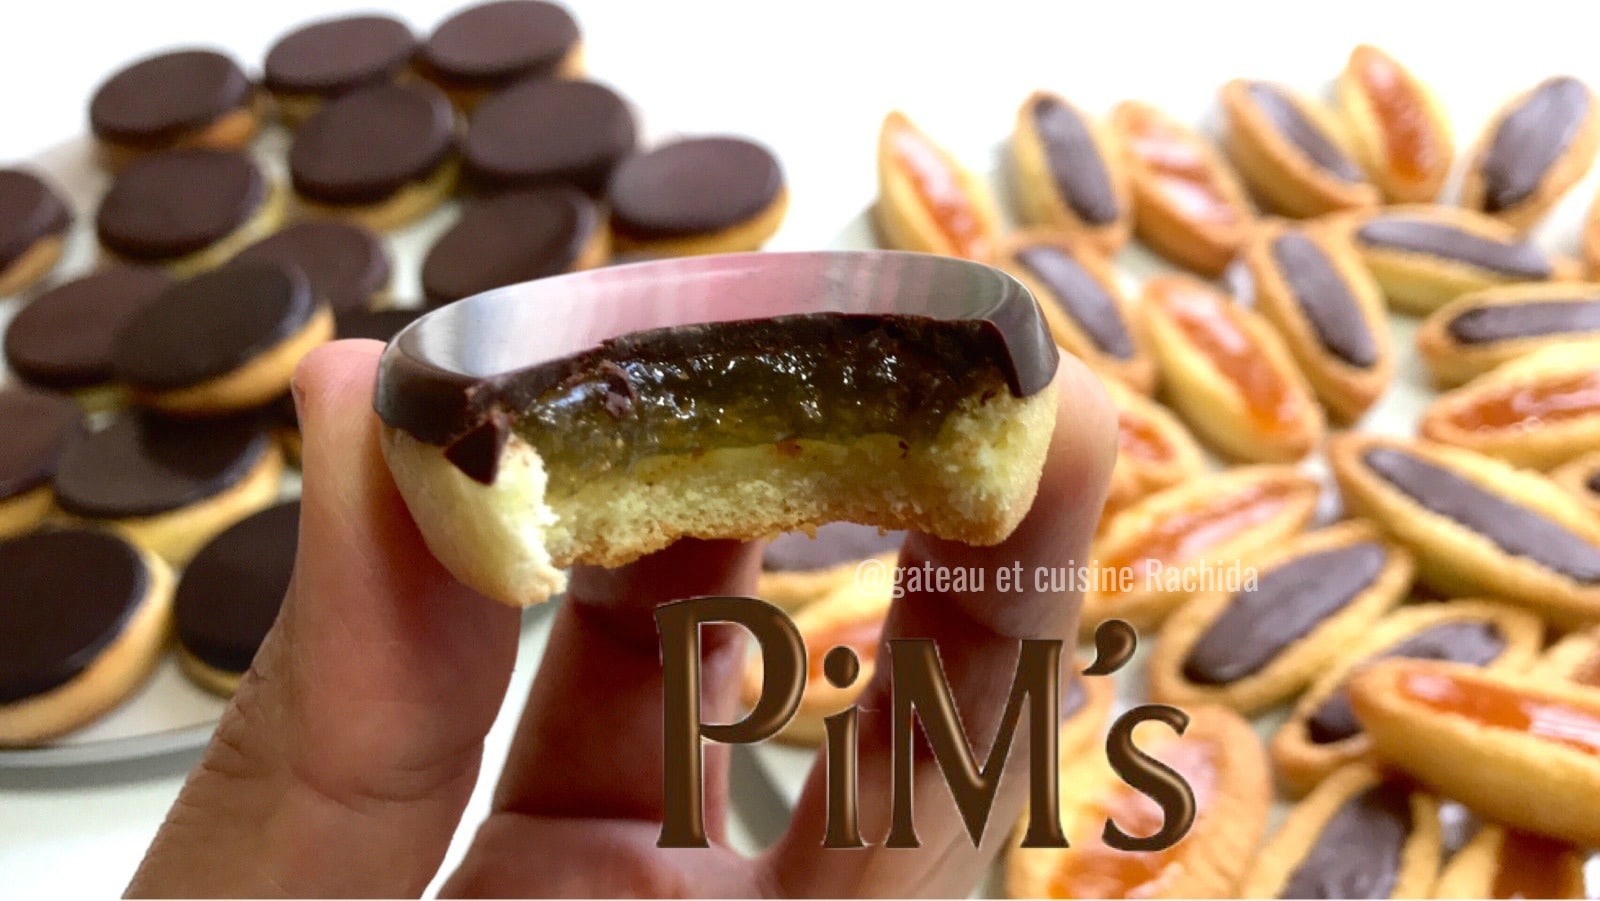
I’ve always wanted to recreate Jaffa Cakes at home and make them even better than the store bought version. After several tests, I finally found a simple and reliable recipe that delivers the texture and flavor I was looking for.
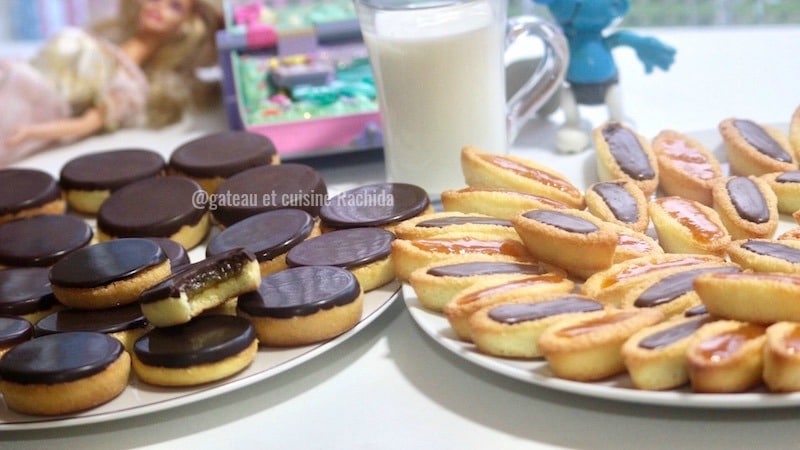
Jaffa Cakes are similar to French Pim’s, a popular snack that many children love. Whether for back to school lunch boxes, afternoon snacks, picnics, or family gatherings, these homemade Jaffa Cakes are always a hit with both kids and adults.
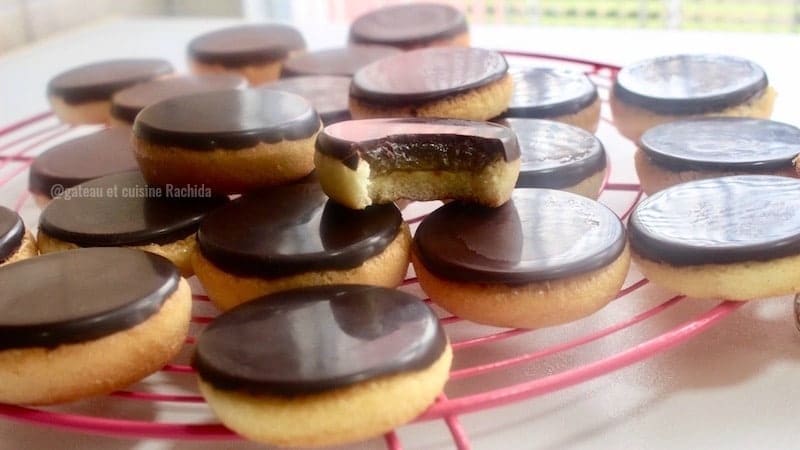
Table of Contents
Tips for Perfect Homemade Jaffa Cakes
I use a sponge cake as the base for these homemade Jaffa Cakes, but you can also make them with ladyfinger batter if you prefer.
Feel free to use your favorite jam flavor, such as raspberry, strawberry, orange, or apricot. Personally, I love orange Jaffa Cakes because the slight bitterness of the orange pairs beautifully with the chocolate.
For a shiny chocolate coating with a satisfying snap, the best option is to temper the chocolate using the proper temperature method. If you don’t have a thermometer, don’t worry. Simply follow the easy technique I share below. It works very well and still gives excellent results.
This recipe is also a great baking project to make with kids. They’ll enjoy helping in the kitchen and, even more, eating their homemade Jaffa Cakes afterward.
Recipe on video
Ingredients
Note: You’ll find the printable recipe card at the end of the article.
For the sponge cake
- 4 eggs
- 120 g (4.2 oz) flour
- 120 g (4.2 oz) sugar
- 1 packet of vanilla sugar
For the filling
- 480 g (17 oz) of very thick jam of your choice (I used orange jam)
- 1 sheet of gelatin
- 250 g (8.8 oz) dark couverture chocolate (I used Cacao Barry). You need to temper it as shown in the video to achieve a glossy finish and a nice snap.
How to make Perfect homemade Jaffa cakes ?
The silicone mould is a Silikomart reference D045 or this.
Preheat the oven to 180°C (350°F).
In a large mixing bowl, whisk the eggs and sugar over a double boiler (see note at the end of the post) until the mixture becomes pale, thick, and triples in volume, about 10 minutes.
Remove the bowl from the heat and gently fold in the flour using a spatula or whisk. Fold from the bottom up to keep as much air in the batter as possible (see the technique in the video or in my sponge cake recipe).
Transfer the batter to a piping bag (or a zip-top freezer bag) and fill the greased silicone molds. Adjust the amount of batter depending on how thick you want the sponge cakes to be.
Bake for about 15 minutes, or until the sponge cakes are lightly golden.
Meanwhile, soak the gelatin in a bowl of cold water for 10 minutes.
Heat the jam for about 5 minutes, then remove it from the heat and stir in the drained gelatin. Mix until fully dissolved and well combined.
As soon as the sponge cakes are lightly golden, remove them from the oven. Using the bottom of a small glass, gently press the center of each cake to create a shallow indentation.
Unmold the cakes. If they need a little more color, return them to the oven for 1 to 2 minutes, being careful not to dry them out. Let them cool completely.
Fill each indentation with the jam mixture.
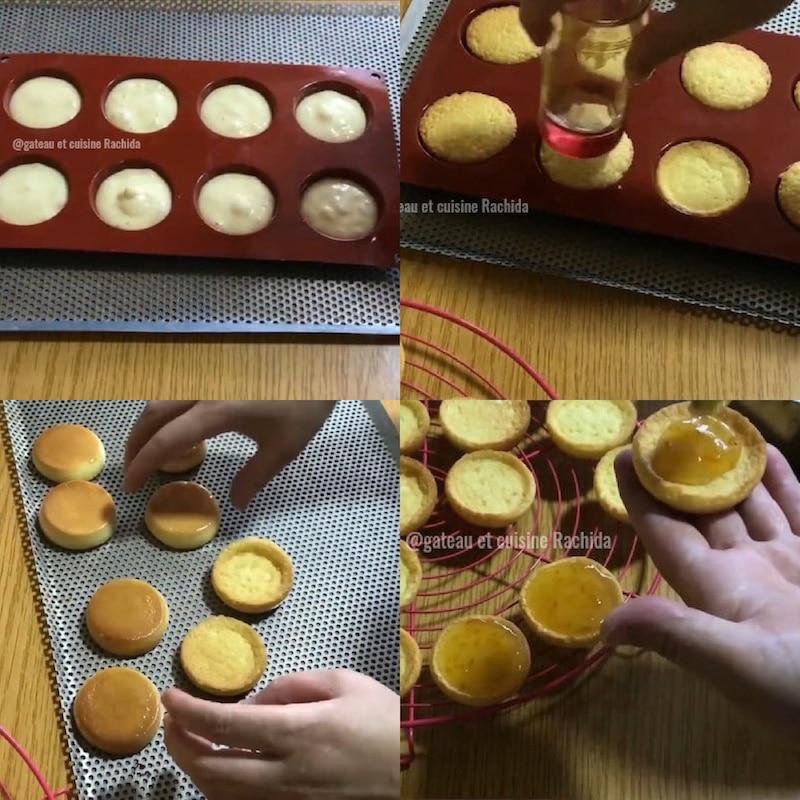
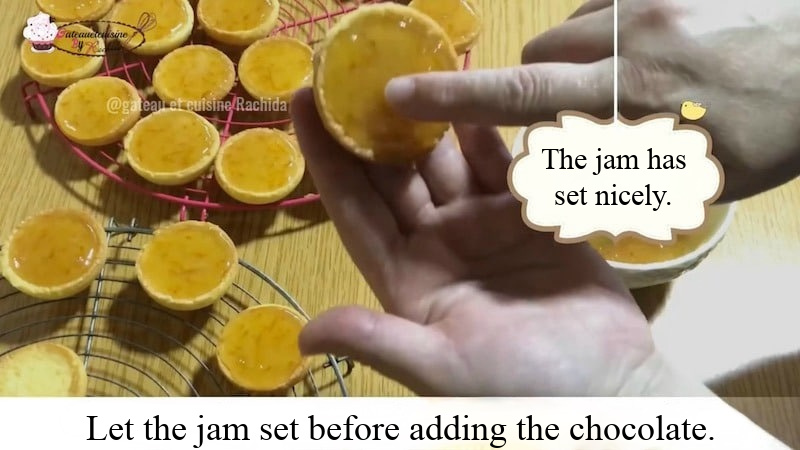
Let the jam set completely before adding the chocolate. It should be firm to the touch and no longer sticky or runny.
Chocolate shell
You can follow this temperature curve if you have a thermometer, or simply use the method below.
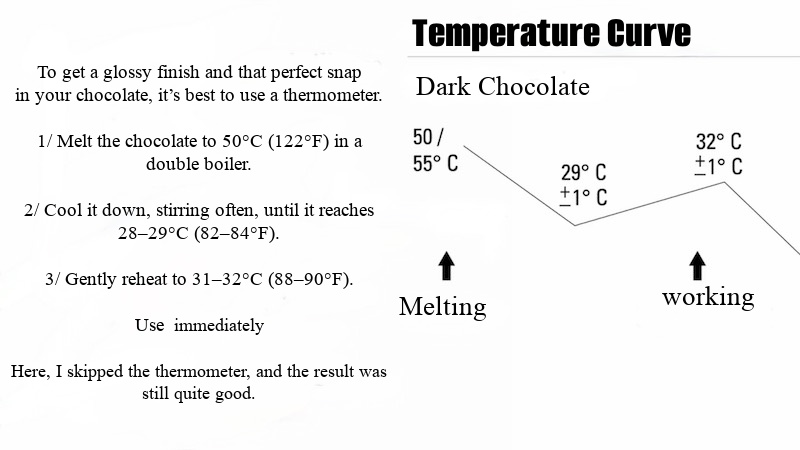
Melt the chocolate in a double boiler, removing it from the heat regularly and stirring well. It should not get too hot: the more you manage to melt it without overheating, the better the result will be.
Once melted, remove it from the double boiler and stir it frequently to let it cool. The chocolate should gradually thicken without hardening.
When it becomes thick and falls heavily back into the bowl, place it back over the double boiler for a few seconds.
Reheat it very slightly, just enough to achieve a fluid texture, without letting it get too hot.
Spoon some chocolate into each cavity, then tap the mold on the countertop to spread the chocolate evenly and smooth the surface.
Finally, place the sponge cakes on top, jam side down against the chocolate.
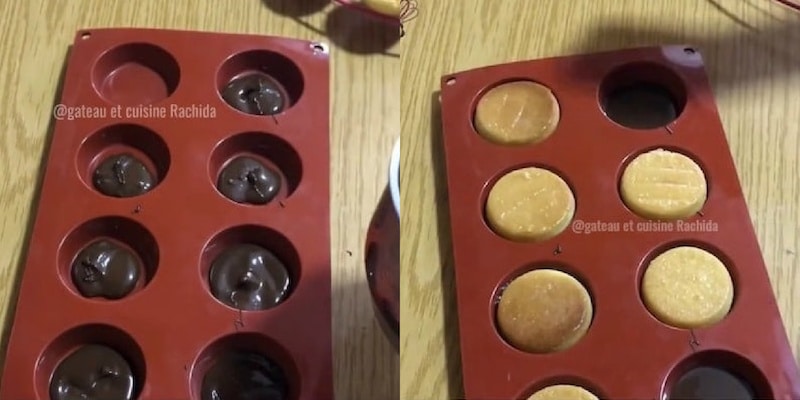
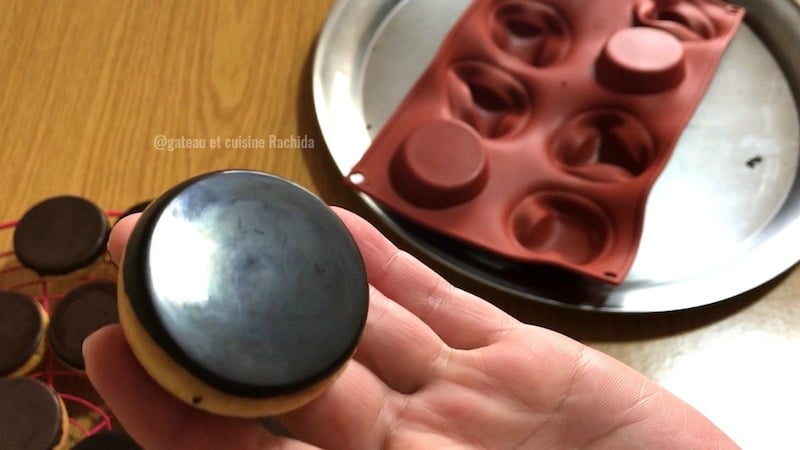
Let it set before unmolding and enjoying.
Note about the double boiler
A double boiler is when you place a bowl with your ingredients over a saucepan filled with hot water. The bottom of the bowl should not touch the water. Normally, the double boiler is placed over direct heat on the stove, but in this recipe, I use it off the heat.
Other recipes you might like
Perfect homemade Jaffa Cakes (Pim’s)
INGRÉDIENTS
For the sponge cake
- 4 eggs
- 120 g all-purpose flour
- 120 g granulated sugar
- 1 packet of vanilla sugar
For the filling
- 480 g very thick jam of your choice (I used orange jam)
- 1 sheet of gelatin
- 250 g dark couverture chocolate (I used Cacao Barry). You need to temper it as shown in the video to achieve a glossy finish and a nice snap.
PRÉPARATION
- The silicone mould is a Silikomart reference D045.
- Preheat the oven to 180°C (350°F).
- In a large mixing bowl, whisk the eggs and sugar over a double boiler (see note at the end of the post) until the mixture becomes pale, thick, and triples in volume, about 10 minutes.
- Remove the bowl from the heat and gently fold in the flour using a spatula or whisk. Fold from the bottom up to keep as much air in the batter as possible (see the technique in the video or in my sponge cake recipe).
- Transfer the batter to a piping bag (or a zip-top freezer bag) and fill the greased silicone molds. Adjust the amount of batter depending on how thick you want the sponge cakes to be.
- Bake for about 15 minutes, or until the sponge cakes are lightly golden.
- Meanwhile, soak the gelatin in a bowl of cold water for 10 minutes.
- Heat the jam for about 5 minutes, then remove it from the heat and stir in the drained gelatin. Mix until fully dissolved and well combined.
- As soon as the sponge cakes are lightly golden, remove them from the oven. Using the bottom of a small glass, gently press the center of each cake to create a shallow indentation.
- Unmold the cakes. If they need a little more color, return them to the oven for 1 to 2 minutes, being careful not to dry them out. Let them cool completely.
- Fill each indentation with the jam mixture.
- Let the jam set completely before adding the chocolate. It should be firm to the touch and no longer sticky or runny.
Chocolate shell
- You can follow this temperature curve if you have a thermometer, or simply use the method below.
- Melt the chocolate in a double boiler, removing it from the heat regularly and stirring well. It should not get too hot: the more you manage to melt it without overheating, the better the result will be.
- Once melted, remove it from the double boiler and stir it frequently to let it cool. The chocolate should gradually thicken without hardening.
- When it becomes thick and falls heavily back into the bowl, place it back over the double boiler for a few seconds.
- Reheat it very slightly, just enough to achieve a fluid texture, without letting it get too hot.
- Spoon some chocolate into each cavity, then tap the mold on the countertop to spread the chocolate evenly and smooth the surface.
- Finally, place the sponge cakes on top, jam side down against the chocolate.
- Let it set before unmolding and enjoying.
Notes
Thank you for visiting my blog and your comments.
2 Comments
Hi there I had a question. You say you prepare the mixture in the double boiler but off the heat. What may I ask is the purpose of the double boiler then? If there’s no flame underneath?
Great recipe, thanks!
Hi,
The bowl is placed over the double boiler off the heat to use only the residual warmth. This gentle heat is enough to warm the eggs and sugar so they whip better, without any risk of cooking the eggs. Using the double boiler off the heat gives better control and helps achieve a light, airy texture safely.
Thanks so much for your kind word about the recipe!